Maybelline SuperStay 24 Hour Concealer – HOT OR NOT?

  
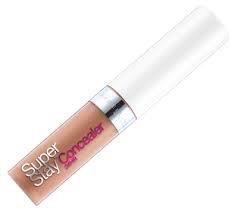
I have spent many years, and many hours perusing the beauty section of every drugstore and superstore I come across, on a quest for a concealer that covers everything, but feels lightweight and LASTS through anything. And the fruits of my labor have yielded none other than Maybelline SuperStay 24 Hour Concealer. For around $7 at Walmart and other drugstores, this is something that really gives you bang for your buck. Available in I believe 5 shades, it’s hard to NOT find one that will match you perfectly. 

When I initially purchased this, I hated it. It dried too quickly for me to properly blend it out. Let it be said that there is a learning curve to this product. I found the best way to apply it is over a primer, and then in small areas, working quickly to blend it out with a damp sponge, like the Real Techniques Miracle Complexion Sponge ($6, Ulta). I actually prefer this sponge for this product as this concealer tends to stain the sponge, so I’d rather not ruin an expensive BeautyBlender ($20, Sephora) with it. 

So on any given day, whether I need a little or a lot of coverage, I apply a primer, and for most days it’s just my Fruit of the Earth 100% Aloe Vera Gel, and then dab the concealer on, working in small sections of my face (ie my chin, one dark circle from hell at a time, you get the idea) until everything is covered. And a little goes a long way, so you’ll find that one little tube of this potent stuff lasts a long time. Afterwards, I spritz with a setting spray like NYX Cosmetics Dewy Finish Setting Spray ($8, Ulta) or anything you prefer, and then continue on with whatever makeup I’m applying that day. I prefer not to apply powder over this because then it can get a little cakey and uncomfortable. On its own, and applied in thin layers, it looks like natural skin. And as a bonus, it’s sweatproof. Believe me. I applied this one day, and then went out to do some yard work and mowing in the hot sun and humidity, and as I was sweating away and wiping at my face from time to time, I had forgotten that I’d put it on, and when I looked in the mirror hours later, I was delighted to find that it was still there! Which makes it ideal for summer, or really anytime you need to conceal something and you’re worried about it melting away. I can’t rave enough about this stuff!! Definitely one of my holy grail concealers!! And with a 9 month old son, I don’t have time to touch up throughout the day, much less check the mirror to make sure everything is where I put it that morning. 

Have you guys tried it? What are YOUR thoughts? Or do you have any other favorite concealers? I’d love to hear from you!! 

And if you’re not already, go follow me on Twitter and Instagram @dlynnesposito. 

   – Donna 

HOW TO LOOK WIDE AWAKE WHEN YOU’RE EXHAUSTED

We all have those mornings (some more often than others) where no matter how much sleep you got or how much night cream and eye gel we’ve slathered on, we just wake up looking….blah. The dull, lackluster skin, the red eyes, the dark circles. And to top it off, maybe you don’t have the time or energy for a full face of makeup, and you just need something quick, yet effective, that will get you out the door while allowing you to look like you’ve got it all together and then some. Well that’s what I’m here for! So here is your step by step guide to looking fresh and awake without breaking the bank or the clock (or the mirror). 

  
First, eye drops. Something that reduces redness, like Rohto Redness Relief eye drops (my personal fave) will be the biggest help when trying to make tired, red eyes look more vibrant and awake. 

  
A brightening primer is where it’s at here. I love L’oreal Magic Lumi primer or Maybelline Face Studio in Blur+Illuminate are some great options. If you’re on the oily side, I suggest Rimmel Stay Matte primer and then highlighting later on. One step at a time!

  
Next stop is foundation. Or concealer. If you’re not someone who wears foundation regularly or you just don’t really need it, not only are you a lucky duck, but then you can probably get away with a light layer of concealer, or even a BB or a CC cream. Some great ones that I always have handy are ANY of the L’oreal TruMatch (Lumi, regular, or even the mineral powder), Maybelline Fit Me foundation or concealer, Pond’s Luminous BB Cream, or Physician’s Formula all make great options. For more full coverage, I would recommend using a flat top kabuki style brush like the Elf powder brush, or even the Real Techniques Expert Face brush. If you’re looking for a more sheer, airbrushed coverage, a damp sponge like the Real Techniques Miracle Complexion Sponge is perfect. Or if you feel the opportunity to splurge, the BeautyBlender is great too. 

  
Next up is bronzer or blush. For long wear, I would recommend doing the following: once your cream based products are applied, use a light dusting of a translucent powder, and then apply your powder blush or bronzer on top. Creams and powders don’t mix well and will break down. But a translucent powder gives any other powder products something to grab on to, and helps with the staying power so it’s not pulling a disappearing act by lunch time. I love the Rimmel Natural Bronzer, and Nyx Blush in Pinched for a youthful glow that makes you look fresh, awake, and lit from within.  

  
A very important step is brows. And this is where you’ll find a multitasking product comes perfectly into play. For this, my fave is the Hard Candy Brows Now, which has a fiber brow gel on one end, and a highlighting stick on the other. Brow gels and mascaras are great for setting, filling in, and making sure they stay in place. Now, flip it over, and use the highlighter in the corner of the eye, and just under the brow bone. Even in the center of the eyelid to open up the eye. 

  
Next, curl your lashes, and use a lengthening mascara and apply one to two coats. The goal is that wide-eyed, long lash look. I love the L’oreal Double Extend mascara, and Covergirl Lash Blast Length or Clump Crusher mascaras. When presented with the choice between volume and length, I almost always choose length. Apply to top and bottom lashes. 

  
All that’s left to do is lips, and this is where my absolute favorite products come in to play, my MLBB’s if you will. Revlon Lip Butter in Pink Truffle is one I reach for on a daily basis, as it gives that perfect hint of color without looking like you’re trying too hard. I also love me some Revlon Balm Stain in Honey or Adore. Just a quick swipe of these buildable products leaves you with a perfectly natural yet slightly pumped up pout that’s PERFECT for running out the door! 

Enjoy these tips, comment below with some of YOUR favorite products, and don’t forget to follow me on Twitter and Instagram @dlynnesposito

Xoxo- Donna

EVENING SKIN CARE ROUTINE

In one of my previous posts, “HOW I SAVED MY SKIN – THE OILY TRUTH”, I talked about how coconut oil was the answer to my 28 year long dermatologic nightmare. While it plays a major role, it’s just one of several steps in my nightly skin care routine. To break it down:

  • makeup removal
  • cleanse
  • tone
  • eye cream
  • moisturize
  • lash serum
  • spot treat as necessary

The nighttime routine is a little more involved than the morning routine, but obviously it’s because we’re washing away a whole day’s worth of gunk. And it’s SO IMPORTANT to cleanse and moisturize properly at night, because your skin takes that time to regenerate and heal itself. It needs to breathe. And it can’t breathe if it’s being suffocated by makeup, sweat, dirt, and general nastiness that it accumulates during the day.

I really try to give myself more “no makeup days” whenever possible. And most days I’m just home with my son and have nowhere to go, so I don’t bother with much at all. If I know I’ll be running out, even briefly, I’ll do the bare minimum. But usually as soon as I’m home again, the makeup comes off. But before bed, here’s what I do:

  1. Remove all my makeup with Simple Micellar Cleansing Water (eye makeup too!)
  2. Wash my face with Neutrogena Liquid Face Wash with 2% salicylic acid
  3. Go back with the Simple Micellar cleansing water or a diluted Apple Cider Vinegar toner (if I’m broken out) to clean away any residue left behind.
  4. Apply my Garner Miracle Sleeping Eye Gel to the under eye area and the area just below my eyebrow.
  5. Apply a small amount (about the size of my fingernail) of Kelapo Extra Virgin Organic Coconut Oil
  6. Apply my Rimmel Lash Serum to my lashes and my brows, and comb through with a clean spoolie brush to ensure even distribution.
  7. Spot treat as needed with Desitin Maximum Strength diaper rash cream (yes, diaper cream – zinc oxide is acne’s kryptonite, believe me!)

It may seem like a lot of steps, but as I said, it’s so important to take care of your skin. What I love most about the coconut oil is not only does it keep the acne at bay, but it also acts as an anti aging treatment, aiding in cell turnover and renewal, without the addition of another product, and lets face it, some of those anti aging creams and serums can be pri-cy, even from the drugstore. And I know, I know, the whole diaper cream on the face thing seems a little weird right? At first it was – I wondered how a thick cream would help to clear my breakouts and not clog my pores even more. But it works. I applied it to an angry cystic blemish that I could feel working it’s way to the surface, and what probably would have taken a month or more to clear up was gone in 4 DAYS! SCORE!!

Ever since I’ve been following this routine, I’ve noticed a significant improvement in the overall clarity of my skin. Most days I even feel confident enough to leave the house without anything more than a touch of concealer here and there. And for me, that speaks volumes.

What do you guys use as part of your skin care routine? I’m always open to suggestions! Let me know in the comments!!

And don’t forget to follow me on Twitter and Instagram @dlynnesposito!

xoxo – Donna

MORNING SKIN CARE ROUTINE

So in following suit with the nighttime skin care routine, this article is about my MORNING skin care routine. While it is equally as important to wash your face in the morning and prep it for your makeup (or no makeup, the choice is yours), it generally requires less steps than what you would do at night.

In addition to cleansing, toning, and moisturizing, I like to use masks and scrubs in the morning a couple times a week. I prefer the morning because I feel like it creates a much smoother canvas for applying my makeup. So here goes:

  1. Typically 2-3 mornings per week, I’ll apply a mask in the morning before doing the daily skin care routine. I’ve been LOVING the Freeman Charcoal and Black Sugar Polishing Mask lately – it’s scrubby without being rudely abrasive, and when you rinse it off your skin feels SO AMAZING!
  2. I then cleanse with Biore Deep Pore Charcoal Cleansing Wash – it’s got a cool, tingly feeling that just FEELS clean, and doesn’t over dry, and feels amazing.
  3. Following cleansing, I tone with the Simple Micellar Cleansing Water (I tend to reserve the apple cider vinegar toner for nighttime as it can leave some pretty serious redness behind if I’m not careful with it)
  4. I apply my Garnier Anti-puff eye roller to the under eye area – baby + no sleep = puffy eyes for mama – this is the antidote.
  5. I then moisturize with Garnier Moisture Rescue Refreshing Gel-Cream for Dry Skin – I stumbled upon this at the GROCERY STORE one day, and fell in love the first time I used it – I’m already on my 3rd jar! I just wanna apply it over and over and over – it’s not greasy, absorbs quickly, and leaves a perfect base for your makeup.
  6. Lastly, I apply what I like to refer to as the “primer for my primer” if I’ll be wearing makeup – Fruit of the Earth 100% Pure Aloe Vera Gel – it adds an extra layer of moisture, helps with any redness and irritation, and since primers tend to break me out I like to have that barrier between my skin and the primer – sometimes the aloe gel is a perfect primer all by itself! I’ve been using it for awhile and LOVE IT!

So there’s my MORNING skin care routine. I don’t think a morning has gone by in years that I haven’t done this. I’ve switched moisturizers here and there, and I don’t like to use the coconut oil in the morning if I’ll be wearing makeup, but if I’m going bare faced I’ll use it.

Morning skin care doesn’t have to be a lengthy process. The basic idea is to get rid of the sweat and toxins that your pores have pushed out overnight, and then moisturize to hydrate your skin and provide a smooth base for your makeup to adhere to. I DO recommend, however, that if you’re going to apply your makeup after cleansing and moisturizing, do it within 30-45 minutes, that way if your skin tends to get a little oily, it won’t slide around on you, or make you looked like a greased chicken. What I love about the Garnier gel-cream versus a traditional cream or lotion type of moisturizer, is how quickly it absorbs into the skin. So if you’re in a rush in the morning, this isn’t a product you’ll have to wait around while it sets in. It absorbs almost instantly. It’s really incredible.

I’ll provide links for all the products below, or you can find EVERYTHING in your local drugstore, Walmart, Target, etc. And as always, don’t forget to follow me on Twitter and Instagram @dlynnesposito!

xoxo – Donna

THE BEST OIL CONTROL TRICK EVER!!

Can we just take a minute to talk about the HELLISH HAVOK that summer heat and humidity can wreak on our makeup? I mean, you take all this time to get yourself prettied up and put together, step back and admire yourself in the mirror, only to set one foot out the door and become a sweaty, oily mess in under an hour. AAAAHHHHH!!!! Now me personally, I tend to have pretty dry skin. But in the summer, like most, I get a little more oily. Which is all fine and dandy until I have somewhere important to go (like a family reunion this past weekend or a wedding coming up on the Fourth of July) and I NEED to look my best. Well, thanks to the magic of YouTube and a lovely gentleman by the name of Wayne Goss (go check him out!!) I’ve found the most unlikely product in my local Dollar Tree (that’s right, it’s $1!) to control my oily places for HOURS on end, no touch ups required! And that product is…..DRUMROLL PLEASE…..

MILK OF MAGNESIA!!

Yup, the old standby liquid laxative in the clunky blue bottle that gramma kept in her bathroom medicine cabinet, on call, and ready to strike. It’s the LAST thing I would have suspected, and frankly when I saw the video I was a little skeptical. But then I thought, “well, it’s only a buck, and if I’m gonna look like an ass I can do it in the comfort of my own home and no one ever has to know.” So here’s the deal, and how it works –

This chalky white liquid is like makeup magic in a bottle. It’s a pretty great primer, and when used sparingly, completely undetectable. Now there’s no need to get fancy with the mint or cherry flavored one. Regular old nasty original flavor is the way to go. So all you do is cleanse andmoisturize as normal, and then give the bottle a good shake. Pour a small amount (literally just a couple drops, as a little goes a long way) into the little plastic measuring cup that so graciously adorns the top of the bottle. Next, take a stippling brush (preferably a cheapie, I found one in my local Ocean State Job Lot awhile back) and dab it in, gently tapping off the excess. Then lightly stipple it on the areas you tend to get super shiny, typically the t-zone and the sides of the nose. Now just wait for it to dry to a white, powdery finish, and then apply your foundation over the top as you normally would. And it doesn’t need to be a full coverage foundation. I actually used a bb cream over the top and it covered up the white perfectly. The MoM filled in my pores, (I also applied my trusty aloe vera gel underneath for added moisture and primer power) and kept me shine free all day! I applied it at about 11am, and didn’t get oily until I got home at about 9 that night. And not ONCE did I reach for the powder or a blotting sheet throughout the day, which is unheard of for me! 

So TRUST ME my oily chicas, this is a fabulous trick to keep you matte all day without having a ton of product on. But be forewarned – only use it where you get shiny!! DO NOT PUT IT ON DRY SPOTS ON YOUR FACE!  It will feels super dry and tight! 

I hope this helped you guys, and as always, if you’re not already, follow me on Twitter and Instagram @dlynnesposito

Xoxo – Donna ❤️👂