
We’ve all been there – you’re sick as a dog, and maybe you were fortunate enough to get a day or two off of school or work, but it’s time to head back and time to pull yourself together.
A couple weeks ago I came down with a sinus infection and bronchitis – lucky me! NOT! Well with a busy little 1 year old, I can’t just crawl into bed and sleep it off the way I used to. I had to get up, keep going, and occasionally had to leave the house and be seen by the general public. And when you’re sick, the last thing you want to hear from anyone you run into is “wow you look really sick!”. So this is a look and products specifically for that purpose. Let’s jump in!
STEP 1. PRIMER
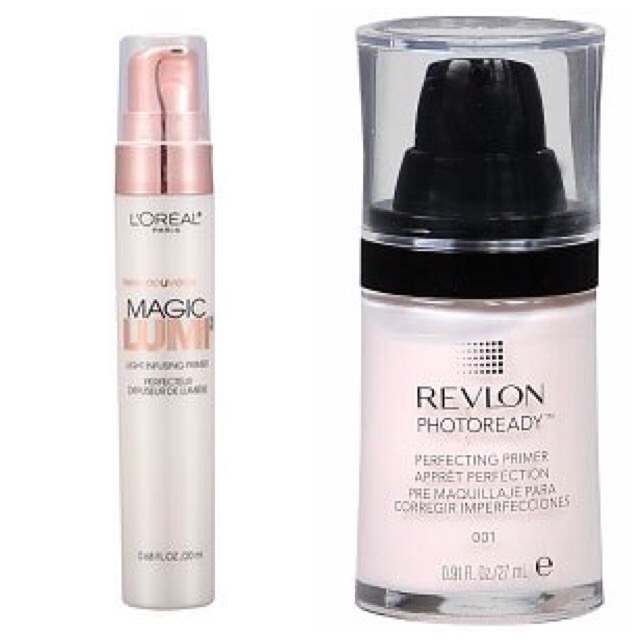 After you’ve cleansed and moisturized your skin, you’ll want to apply a primer. When your nose is runny and you’re constantly wiping at your eyes, you want something that will grab on to your makeup and keep it in place. Additionally, when you’re feeling blah, it can show in your skin, so I like to use a radiance boosting primer or an illuminating primer. Two that I swear by are L’Oreal Magic Lumi Primer ($13) and Revlon PhotoReady Primer ($11). You could even mix them to get the benefits of both.
STEP 2. UNDEREYE CONCEALER
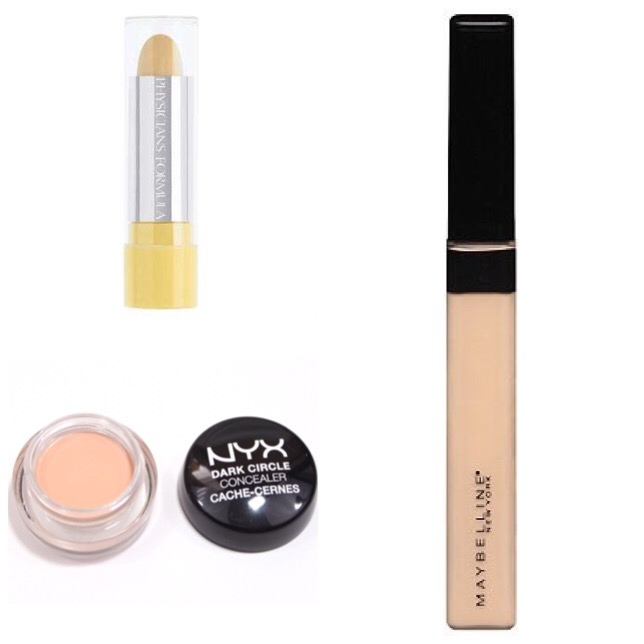 Whether you’ve been getting lots of rest or not much at all, being sick just seems to exaggerate the dark circles under our eyes. While covering them is the goal, an important and often overlooked step is color correcting them. Picture a color wheel from your elementary school art class – you always want to color correct with the OPPOSITE color on the color wheel – so in the same way that you would use a green concealer on a bright red blemish, you want a yellow/orange/peach concealer on dark circles. If they’re more blue in tone, use yellow, like Physician’s Formula Gentle Cover Concealer Stick in Yellow ($8). If they’re more purple, NYX Dark Circle Concealer ($6) is A-MAZ-ING. When you’re color correcting, the key is to ONLY put it where you need it, i.e. right on top of the blue/purple color. You don’t want to go all upside down triangle with this stuff – we’re not highlighting, we’re simply concealing. Apply it where you need it, blend it out, and then apply a skin toned concealer over the top, like Maybelline Fit Me ($7), and set it with a translucent or brightening powder, like E.L.F. Studio High Definition Undereye Setting Powder ($3).
STEP 3. BB/CC CREAM
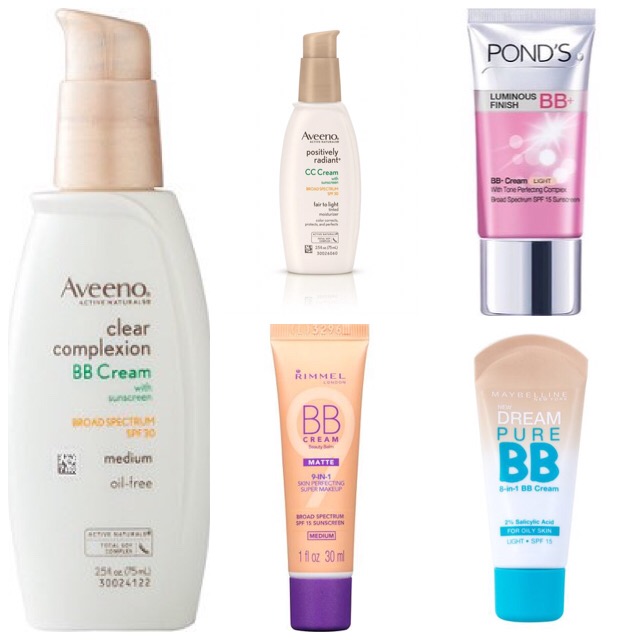 I don’t know about you, but when I’m sick the last thing I want is to FEEL like I’m wearing makeup. This is where I like to use BB and CC creams. They moisturize, provide a sheer coverage, and just bring the life back to your skin. For super sheer coverage, apply it with a damn sponge like the Real Techniques Miracle Complexion Sponge ($6), and for a more full coverage look, buff it in with a nice dense, synthetic brush like the Real Techniques Buffing Brush (from their Core Collection, here) or Expert Face Brush ($9). Always make sure your brush is made of synthetic bristles when applying cream or liquid products because they more evenly distribute the product on to the skin and they don’t soak it up like a natural hair brush will. Some of my favorite BB and CC creams are :
- Aveeno Positively Radiant CC Cream ($13)
- Aveeno Clear Complexion BB Cream ($15)
- Pond’s Luminous Finish BB Cream ($10)
- Rimmel Matte BB Cream ($6)
- Maybelline Dream Pure BB Cream ($8)
STEP 3. BRONZE, BLUSH & HIGHLIGHT
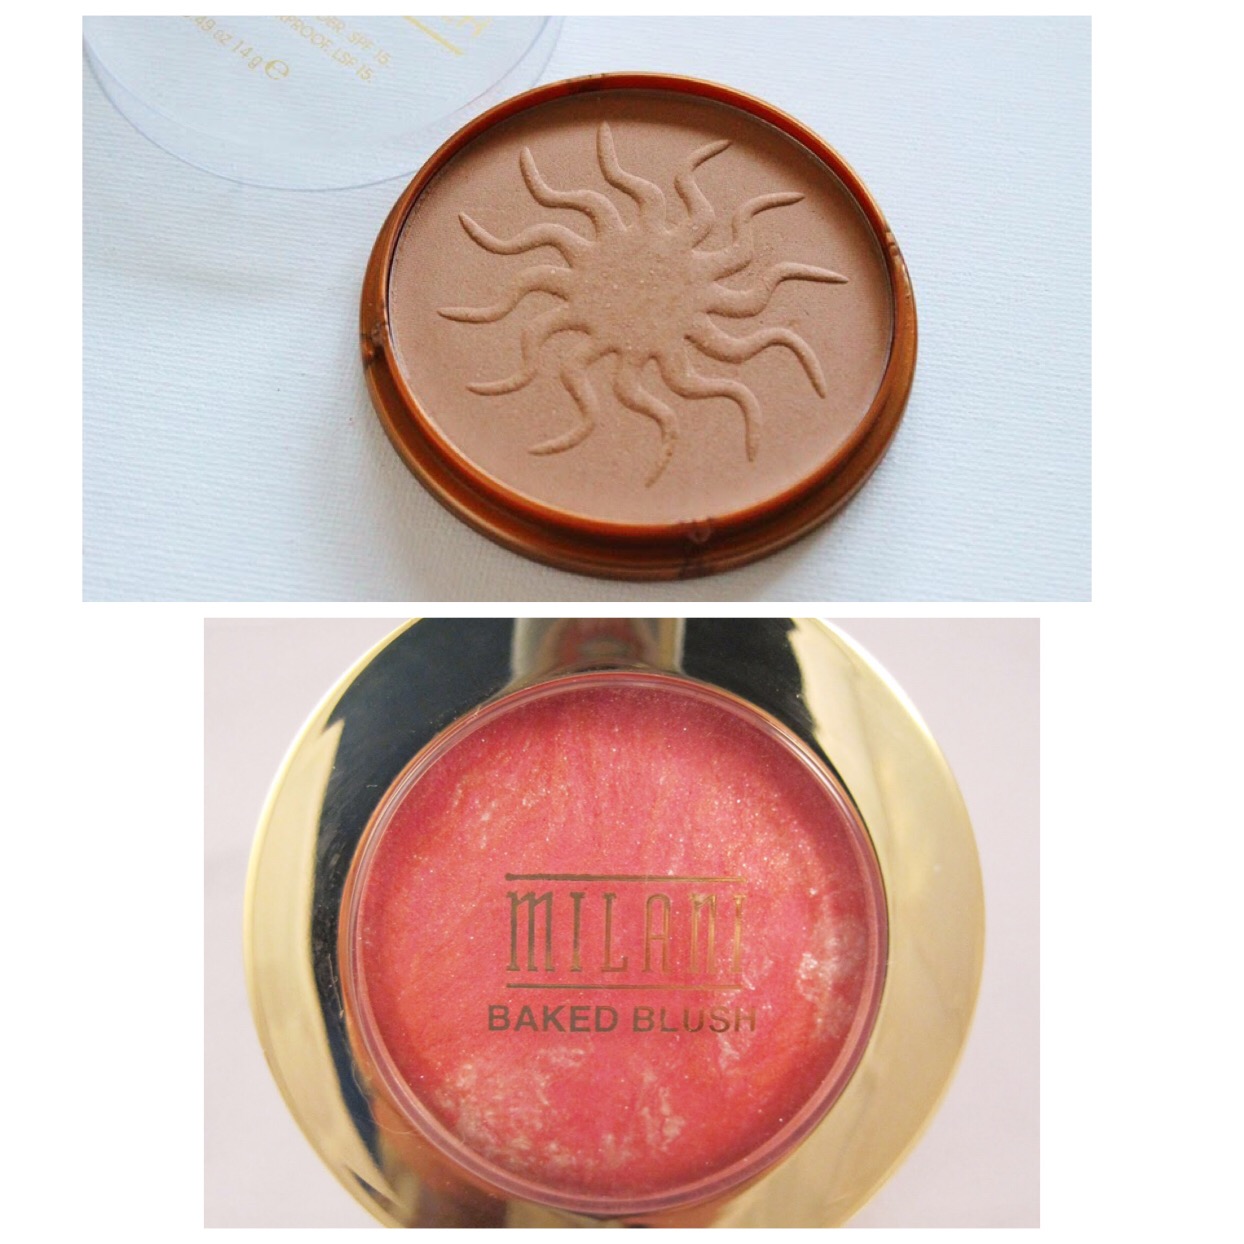 The last thing I want to be bothered with when I’m sick is a full on contour – let’s face it, it’s a wonder I’m putting on makeup AT ALL when I’m sick. But when you just feel like your face looks lifeless, one of the quickest ways to perk up is to bring some color back to your face. Taking a big fluffy brush, like the Real Techniques Powder Brush ($10), I like to apply a light bronzer (no Snooki, sit your ass down) like Rimmel Natural Bronzer in Sun Light ($4), to the perimeter of my face. It just warms you up so you don’t look….dead. Then a nice girly, pink blush like Milani Baked Blush in Corallina ($9), which has a slight sheen to it, to blush and highlight at the same time, just making you look awake and fresh and healthy. Apply that with an angled blush brush and you’ll notice a remarkable difference.
STEP 4. BROWS
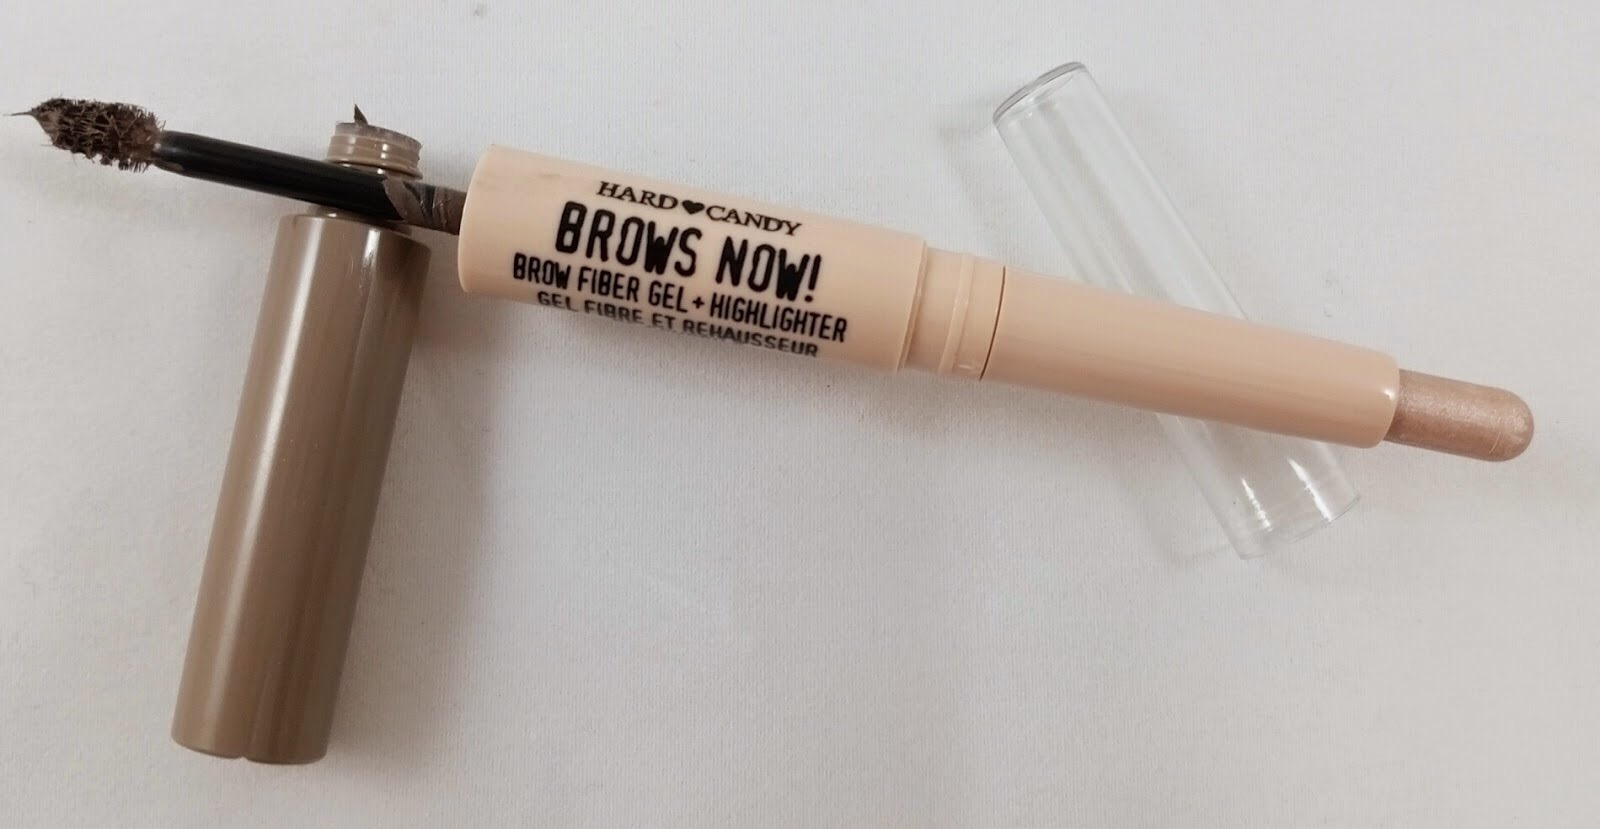 I am a firm believer that brows really do frame your face and just pull any look together, be it minimal or full on glam. But am I going to bother with a full brow routine when I feel like crap? Nope. So the easiest and most natural looking way that I’ve found recently is to use a tinted brow mascara with little fibers, that lightly fill in the brows making them look polished but not overdone. I love the Hard Candy Brows Now ($6) for this, and the other end has a retractable highlighting crayon that you can pop under the brow and in the inner corner of the eye for that wide eyed, fresh, awake look. Fake it ’til you make it baby.
STEP 5. EYES
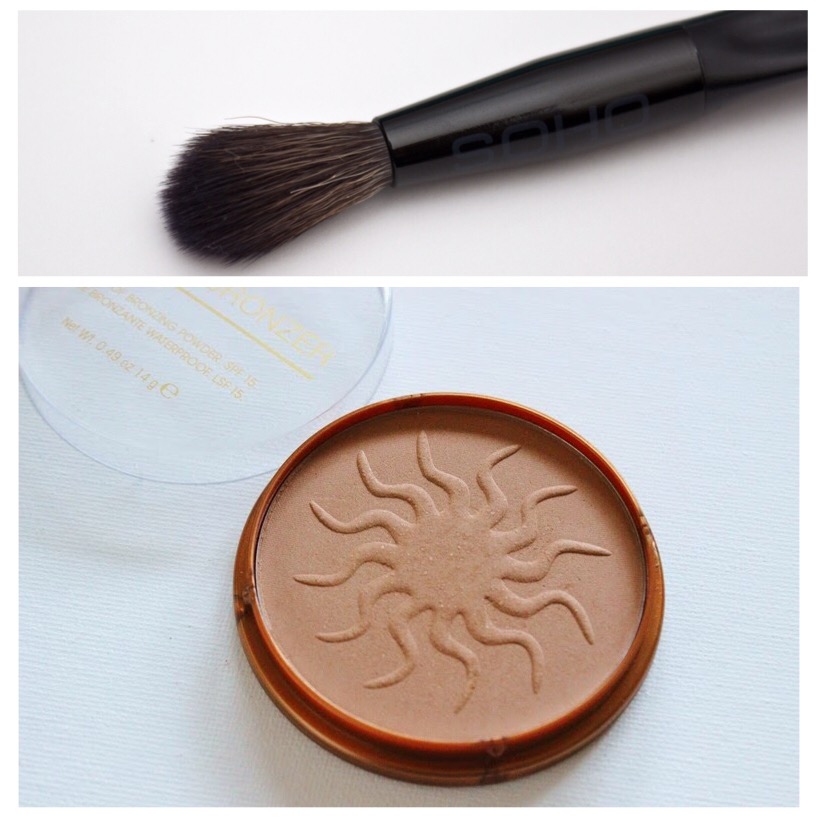 When I’m sick, it shows in my eyes. They’re red, watery, and probably the LAST place on my face I want to put any sort of product. But if shadow and mascara are things you simply can’t live without, here’s a little trick – go back to that Rimmel Natural Bronzer, and take a fluffy blending brush like the SOHO Pro Crease Brush ($11) and using windshield wiper motions, buff that into the crease of the eye. It gives dimension, plays off that highlighter that we applied when we did our brows, and doesn’t require 8 other shadows to blend. It’s just enough to look like you’re trying when you really just don’t want to. Then taking any waterproof mascara, apply one or two light coats just to make your tired eyes pop!
STEP 6. LIPS
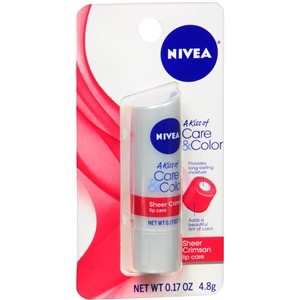 In my September Favorites post (read it here) I mentioned a tinted lip balm called Nivea Kiss of Care & Color ($5). This stuff was like my saving grace when I was sick. It’s super moisturizing, and looks like your own healthy, natural lip color with just a hint of shine. The tinted balm is wrapped around a moisturizing core, and it comes in 4 gorgeous sheer shades. My NEW favorite is Sheer Crimson.
Now throw that 3rd day hair up in a messy bun, pop on some pretty stud earrings, and we’re done! It may seem like a lot, especially when you’re feeling like death warmed up, but I’ve found that most times when I have to throw on some makeup and leave the house it actually helps me feel better, knowing that I’m just a little more put together and polished!
I hope this post was helpful! As always, make sure you’re following me on Twitter and Instagram – @dlynnesposito for lots of fun things coming up!
LoTs Of LoVe and ChIcKeN sOuP! ❤ ❤
XOXO – Donna
