90’s INSPIRED MAKEUP LOOK

Ahh, the 90’s.

F.R.I.E.N.D.S., music still played on MTV, good music at that. It was a great decade.

I’ve been dying for the 90’s looks to come back – some may say I’m even a little stuck in/on the 90’s; I’ve always preferred brown/nude lips, smokey, messy, smudgy eyes, flannels. What can I say, I grew up in the 90’s!
Well this morning, while (albeit late) perusing some of the runway looks for NYFW, discovered that some 90’s trends are making a comeback; particularly the lived in liner, dark lips, etc. And then, my loves, I made a mad dash for my vanity and got to work!

If you want to see how I created my 90’s inspired makeup look (which is super easy to recreate, nonetheless, then just keep reading!

*NOTE* you already know, please forgive my atrocious vanity lighting – I’m working on it!


When it came to foundation in the 90’s, the overall goal was flawless and totally matte. No shimmer, no highlight, minimal blush, just matte and clean. If you want to see how I achieve the base of my face (ha ha) then click here for my update foundation routine.

For the eyes, I used all shadows from the Morphe 35N palette – again, all matte. No shimmer. I went ahead and numbered them for you, since the palettes don’t have shade names.

  After priming my eyes with the Urban Decay Primer Potion, I picked up shade #1 on a Morphe M441 brush, and applied that from lid to brow bone. This will be our transition color. Then on a Morphe M330, which is a smaller, more tapered blending brush, I picked up shade #2, and applied that into my crease, from inner corner to outer corner, back and forth, in windshield wiper motions, and then went back with my M441 to blend out any harsh edges.

  Now, using a Morphe M169 pencil brush, I picked up a mixture of shades #3 and #4, and applied that to the outer ‘V’ of the eye, and then gently blended it into the crease with the M330. Try to keep as much product as you can off the actual lid, because we want to keep that nice and light. Then go back in with shade #1 on a synthetic flat shader brush, and apply some of shade #1 from the inner corner, to about halfway across the lid, and gently blend the lighter and darker shades together.

  Next, I used my Rimmel Scandaleyes Kohl Kajal Eyeliner in Black to create a messy line across my top lash line. It doesn’t have to be perfect, because now I’ll smudge it out with any angled liner brush; I used the Morphe M160 1/8. Moving to the lower lash line, I’ll apply the same pencil, but this time only to the outer third of the lower lash line. Then I’ll go back with shade #3 and my Morphe M169 brush, and blend out that black liner, so it looks more diffused, a bit softer, and more “I slept in this – so what??”. Then I applied a few generous coats of the L’Oreal Voluminous Mascara in Brown Black.

Next I filled in my brows as usual (click here for my brow tutorial), and then applied some Rimmel Natural Bronzer in Sun Light to the perimeter of my face with a Morphe M527 brush. Because I was feeling a bit too pale, even for the 90’s, I applied a little bit of ULTA Cheek Color in Sun Kissed using an angled blush brush. It’s the perfect muted, rosy brown blush for a look like this. And of course, what better way to complete this look than with Gerard Cosmetics Lipstick in 1995??!! I mean, come on!


There you have it! An easy, 90’s inspired makeup look! I mean, I could go real hardcore grunge and do a dark lip and heavily smudge liner that looks like I’ve been partying all weekend, but let’s be real; I was a freshman in high school in 1999. This is the kind of makeup I wore. Nothing crazy. If you guys want to see a 90’s grunge look, leave me a comment below!! I’ll totally do it for you!!

Come follow me around social media!
Twitter, Pinterest & Instagram : @dlynnesposito
Facebook : Affordable Gorgeous
Snapchat : dlynnesposito

And feel free to reblog and share my social media with your friends! Your support means so much!

LOTS OF LOVE!!
img_9363-2

EASIEST WINGED LINER EVER!

 Everyone loves a good, sharp, even winged liner. But so many struggle to achieve it. Believe me, for the longest time, it was probably my #1 most hated step in my makeup routine. I actually avoided many looks so I wouldn’t have to do it! But it’s easier than you think!

So that’s what we’re going to do today! I’m going to break it down for you, step by step, and when we’re done, you’ll see just how easy it really is to get the perfect winged eyeliner!

Let’s get started!


First you need a couple things:

  • a small angled liner brush
  • a gel eyeliner in the color of your choice
  • eye makeup remover
  • concealer
  • a business card or something with a flat edge

Go ahead and start by applying any eyeshadow you want. I was playing around with my Morphe 35O so that’s what I have on.

Now grab your brush – I’m using the Morphe M160 1/8 Angle Liner ($2.99/morphebrushes.com) and my ride or die gel liner, the Maybelline Eye Studio Gel Liner in Blackest Black ($7.94 / amazon.com). This is the absolute blackest black gel liner I’ve ever used. It dries down matte and doesn’t budge until you take it off. It does come with a little brush in the package, but honestly I just couldn’t make it work for me, so I just tossed it.

Dip your brush into the product, and then wipe off the excess on the sides of the pot. Or you can do like I do, and wipe the brush back and forth on the inside of the lid, which helps to press the product between the bristles and saturate the brush, and get the tip of the brush super tight and compact.

Take your business card or a post-it or even some Scotch Tape, and line it up by following the bottom lash line, and that natural angle up toward the tail of your brow. This is going to ensure that you get a crisp, even wing, every single time. Now take your brush with your liner on it, and start drawing down toward the lash line. You can make your line as thick or as thin as you want – it’s all about personal preference.

Once you’ve got your shape, begin filling it in with your liner. Then simply lift the card away, and you’ve got a razor sharp wing!


 As for the rest, because I have hooded eyes, I tend to keep it very thin along my lash line, basically just stamping the brush along my lashes to work the product into the root. And that’s it, you’re done!

TIPS

If your lines aren’t perfectly even, thats totally ok! There are two ways to fix it, depending on whether or not you’ve already applied your foundation.

If you haven’t done your foundation or concealer yet, just take a clean angled liner brush, and wet it with some eye makeup remover, and then draw along the lines that need some sharpening. This method works to clean up mistakes on your eyelid, or with the actual wing itself.

If you’ve already done your foundation, using makeup remover will only mess it up. But you can use concealer! It’s like a magic eraser for your liner! Just take a little on an angled liner brush and draw along the edge of your wing. Easy peasy!


Have you guys ever struggled with your winged liner? What were some tips or tricks that helped you? Leave me a comment and let me know!

Wanna follow me around on social media?!
Twitter & Instagram : @dlynnesposito
Facebook : Affordable Gorgeous
Snapchat : dlynnesposito

And feel free to reblog this post and share it and my social media with your friends!

LOTS OF LOVE!
img_9363-2

DRUGSTORE FAVORITES : EYELINERS

I feel like eyeliner is something I rarely talk about. Considering it’s one of the makeup items that most people wouldn’t dream of skipping, I thought today I would sit down and talk about some of my favorites!

I’ve mentioned in previous posts that eyeliner is one of the things I struggled with for a very long time. Finding the right formula, the right method/tools for application, the perfect trick for no-fail, sharp, even winged liner. After awhile I realized that I was avoiding it because I struggled with all those things.

So after probably about $100 spent on eyeliner alone, I’ve narrowed it down to 3 products that I can count on for the perfect look every time, and I want to share them with you! Because I’m sure somewhere out there, someone is just as frustrated as used to be!

So let’s get into it!

L’OREAL PARIS THE SUPER SLIM BY INFALLIBLE EYELINER ($7.99)

  There are so many things I love about this liner. It’s so easy to use, it has a super fine point 0.4mm felt tip applicator which is great for a slim line and a decent wing, it dries fast and matte, and it doesn’t budge. It also doesn’t skip, drag, or tug on the eye like some others. I recommend this to everyone who asks for a good liquid liner that’s easy to use!

MAYBELLINE EYE STUDIO LASTING DRAMA GEL LINER ($7.94)

  I have this in the shade ‘Blackest Black’, and it truly is the blackest black gel liner I’ve ever seen in my life. Hands down. It’s smudge proof and waterproof for up to 24 hours, and I can attest to that claim because silly me chose to wear this on my oily eye lids on one of the hottest and most humid days of the year (to an outdoor wedding) and by the end of the night, it was pretty much the only makeup left on my face! It comes with a little brush in the package, but I threw it out. It did nothing for me. I prefer to use this with my Morphe M160 1/8 Angle Liner Brush ($2.99) to get a cut-a-bitch wing and the sharpest, smoothest line possible. They’re like, a match made in makeup heaven.

RIMMEL LONDON SCANDALEYES WATERPROOF KOHL KAJAL EYELINER ($4.99)

  Waterproof kohl eyeliners are great for lining your water line for that smokey look, but this one in particular I like for the lower lash line, because of how easily it blends out. I personally never line my water line unless its with the Nude shade from this line (which makes the eyes look bigger) but to really draw attention to my eyes I like to run this on the outer third of my eye, and then blend it out with a medium, taupey brown shadow and a pencil brush. This claims to be an “ultra-smooth & creamy formula that glides on easily; waterproof, smudge-proof, sweat-proof, heat-proof, humidity-proof and scandal- proof” liner – all good things in my book!


I hope you guys enjoyed this post, and maybe found a few new products you’d like to try out for yourself! Have you used any of these? Let me know in the comments below!

And if you aren’t already, please go follow me on Twitter and Instagram @dlynnesposito, and go like the Affordable Gorgeous page on Facebook! Your support means so much!

LOTS OF LOVE!


TOP 10 BEAUTY BUYS UNDER $10

  I love a bargain – that’s no secret.

O.K. – I’m cheap. I like a lot of bang for my buck, but I don’t like to spend a lot of bucks to get all the aforementioned bang.

I’ve been working on this for awhile, because you guys should know by now that I will NEVER recommend products that I don’t 110% believe in. So today I bring you my top 10 beauty products under $10!

Let’s get started!


 MAYBELLINE FIT ME CONCEALER – $6.99 at ULTA


  I think you guys already know how much I love this concealer – it’s my Holy Grail, my ride or die. I have high expectations when it comes to concealer, because ideally I want one product that works on my dark circles, my blemishes, as a primer for my eyeshadow, everything. And this concealer delivers 100 times over!

It’s creamy, lightweight, blendable, neutral in tone, doesn’t oxidize, and is a solid medium to medium/full coverage. It comes in 6 shades, which are not only great for concealing, but cream contour and highlighting! It’s easy to blend out with your fingers, a brush, or a damp sponge. It just does it all.

NYX COSMETICS DARK CIRCLE CONCEALER – $5.99 at ULTA


  As I mentioned above, I generally don’t like to have to use multiple concealers, mainly because when I toss one in my bag for the day, I’d like it to be just ONE. But sometimes, like it or not, we all need a little color correction under the eyes. I’ve actually totally ditched my usual yellow stick concealer for this stuff! This is creamy, peachy toned, and it hides dark circles so well you can’t even tell that it’s there. Be sure to set it with some sort of powder though, because it’s so creamy it WILL crease! This comes in 4 shades, fair, light, medium, and deep.

NYC SMOOCH PROOF LIQUID LIP STAIN in ON EVERYONE’S LIPS – $3.49 on AMAZON


 For a long time I was on a lip stain kick – I wanted to find that perfect, neutral rosy shade that mimicked the color of those lucky women with naturally very pigmented lips, since mine are by nature, super pale. After watching a review by Emily Eddington (emilynoel83 on YouTube) I went and found this in my local Walmart (unfortunately I haven’t seen them since). Looking back I’m glad I bought like 4 of them! This shade is a beautiful mauvey rosy brown, and while it looks super pigmented in the tube, it sheers out really nicely on the lips, and it’s buildable. It doesn’t apply patchy or thick, it’s actually got quite a bit of slip in the formula, and it dries quickly. If you can find these in a Walmart, Target, or CVS, grab one! You’re gonna love it!

MAYBELLINE VOLUM’ EXPRESS THE FALSIES MASCARA – $6.99 at ULTA


 I have tons of drugstore mascara. I even have a few of those deluxe samples of higher end mascara. And this is my go-to lately, hands down. Some mascaras claim some pretty spectacular things but never really deliver – THIS STUFF DELIVERS! I love the natural bristle brush, I love that it’s tightly packed, I love that it’s curved, and I love that the formula isn’t too wet like the typical Maybelline formula – this hits that nice balance between ‘too wet‘ and ‘starting to dry out‘. It really does make you look like you’re wearing false lashes, but without all that time spent glueing them on and nearly sealing your eye shut tighter than King Tut’s tomb. Obsessed.

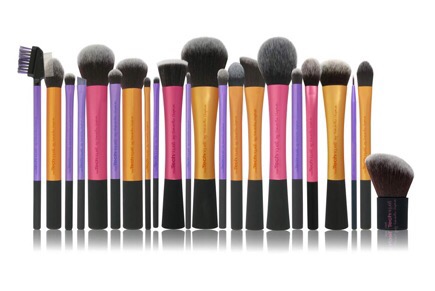
REAL TECHNIQUES ORIGINAL COLLECTION BRUSHES – $9.99 or less / realtechniques.com


 I have many, many makeup brushes – Real Techniques, Soho, Posh, e.l.f., Morphe,and some no name brushes. My Real Techniques brushes are without a doubt my most reached-for brushes on a daily basis. Their ‘Bold Metal Collection‘ is a bit too pricey for my blood, but their ‘Original Collection‘ is pretty amazing! They’ve got you covered with sponges, face brushes, eye brushes, you name it. Though I will say that the eye brushes are a little on the rough side. I don’t like them for my eyes, but I do love them for spot concealing! These can be found all over now – I’ve seen them in Walmart, Walgreens, some Targets, and at ULTA. If you’re just starting out and you want some inexpensive, professional quality brushes, these are AMAZING.

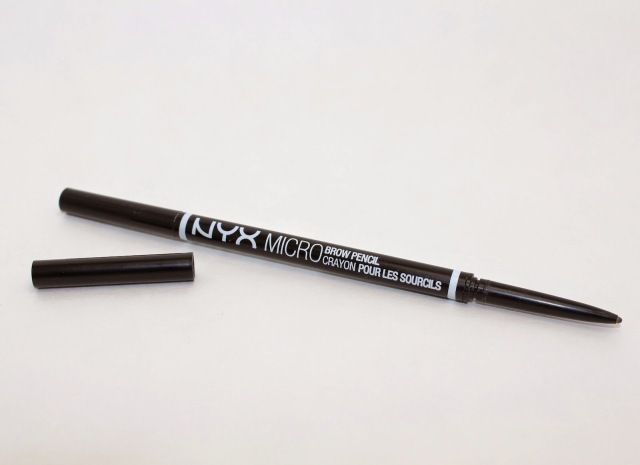
NYX COSMETICS MICRO BROW PENCIL – $9.99 at ULTA


 For a long time I struggled with the best way to fill in my sparse brows. I tried powders, pomades, pencils, tinted mascaras, everything. Pencils were never my favorite, but I realized that was because I never found a pencil that I really liked. Then Anastasia Beverly Hills dropped the Brow Wiz, and while everyone swears by it, it’s just too expensive to use every day and have to repurchase so frequently. But NYX has totally duped it with this product! It’s a slim, slightly dry pencil with a spoolie on the opposite end just like the Brow Wiz, but for half the price! And ULTA often has them for ‘Buy 1 Get 1 50% off‘ so you can stock up!

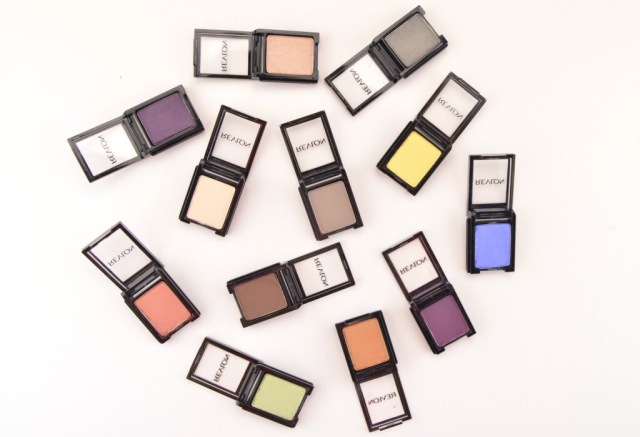
REVLON COLORSTAY SHADOWLINKS EYESHADOW – $2.84 ea at drugstore.com


 These little things are pretty cool! They’re individual eyeshadows, but they interlock together, so you can build your own personal eyeshadow palette! Available in 30 shades and 4 different finishes, the looks are endless! Revlon shadows are great quality and super blendable, so they’re easy to work with and create looks for both day and night!

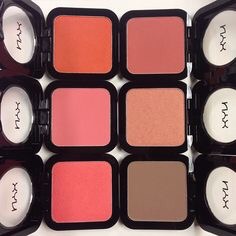
NYX COSMETICS HD BLUSHES – $6.99 at ULTA


 I don’t think I’ve ever loved a powder blush more than I love these – you can read my review on 2 of my favorites here. These are incredibly versatile, they compliment every single skin tone, and a few of the shades can even be used as a light bronzer for fair skin, or to contour! They’re so smooth and buttery and they blend out beautifully, and because they’re HD blushes they obviously photograph like a dream! They have great pigmentation and staying power – I just can’t say enough good things about this product!

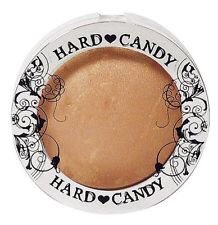
HARD CANDY SO BAKED BRONZER in TIKI – $9 at WALMART


 Are you guys getting sick of reading about this yet? Ha ha! #sorrynotsorry! I love this stuff! Like I’ve said in the past, this is the furthest thing from a bronzer – it’s a beautiful, champagne-y highlight! It’s very pigmented, so a little goes a long way. I usually use a fluffy crease brush to dust this on the top of my cheekbones, the cupids bow, the tip of the nose, the inner corner of the eye, and I even love to use this on the eyelid to just catch the light and open up the eyes on those super tired mornings where I just can’t seem to look awake no matter what I do! It’s great on all skin tones too! Light to dark, anyone can wear this! And it lasts forever because you need so little!

MAYBELLINE LASTING DRAMA GEL LINER in BLACKEST BLACK – $7.94 at WALMART


 I was never someone who really wore liner. Like ever. I still only bust it out for special occasions. But I could never find a good gel liner that was smooth and creamy, and truly BLACK. Then on a whim (and a recommendation by Jaclyn Hill) I decided to try this out. I’m glad I did. This truly is the blackest of the black gel liners you will find anywhere! And it’s nice and thick so you don’t need multiple layers to get a good, matte black line, but not so thick that it drags on the lids making it impossible to work with. I will say, however, that I absolutely H-A-T-E the brush that comes with it – it’s useless. I prefer to use a nice teeny, tiny angled liner brush, like the Morphe M160 1/8 ($2.99) for a nice clean, crisp, cut-a-bitch sharp line!


Alright guys, that’s it! My top 10 under $10! What do you guys think? Have you tried any of these products? What are some of your favorites? Leave me a comment and let me know!

And don’t forget to go follow me on Twitter and Instagram @dlynnesposito, and go like the Affordable Gorgeous page on Facebook!

I WILL BE DOING A GIVEAWAY SOON AND YOU WON’T WANT TO MISS IT!

LOTS OF LOVE!


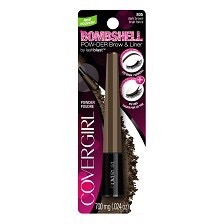
COVERGIRL Bombshell by LashBlast Pow-der Brow & Liner Review – HOT OR NOT?


As I was getting ready this morning, and sitting down to do my makeup (minimal, for what it’s worth), I stopped at my brows. Now, I took the time to groom them last night, tweeze, trim, the whole 9. And I must say they’re lookin’ pretty ok. But no matter how incredible my brows look, I always feel the need to fill them in even just a LITTLE bit. I have some sparse patches that just don’t look right without a little something there.

I have TONS of different products with which to fill in my brows. A whole drawer full of pencils, tinted brow gels, fiber infused brow mascaras, powders, pomades, you name it. If it’s meant to go on your brows, I probably own SOME variation of it. And by the same token, I have probably an equal amount of different eyeliners, as well.

But on one of my MANY trips to the drugstore, I noticed this new product by Covergirl.


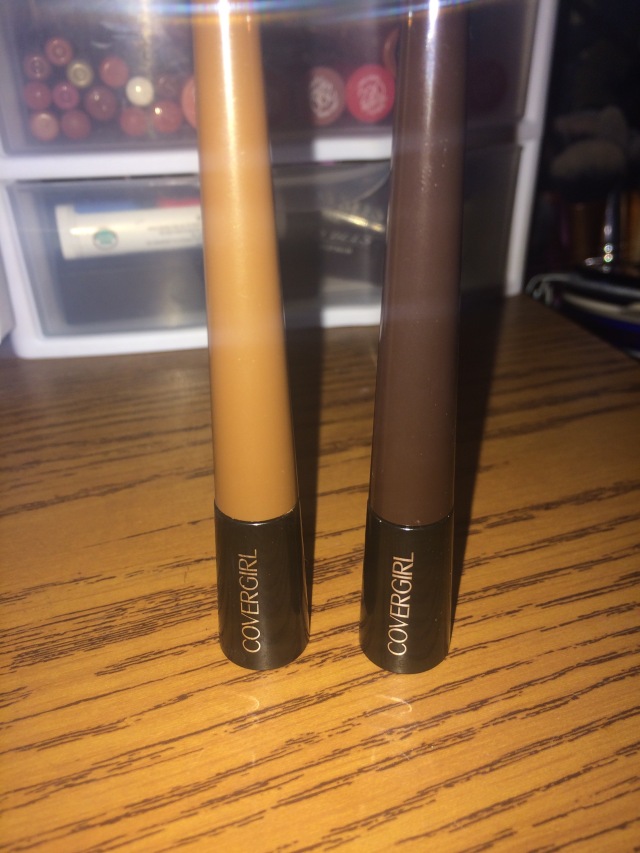
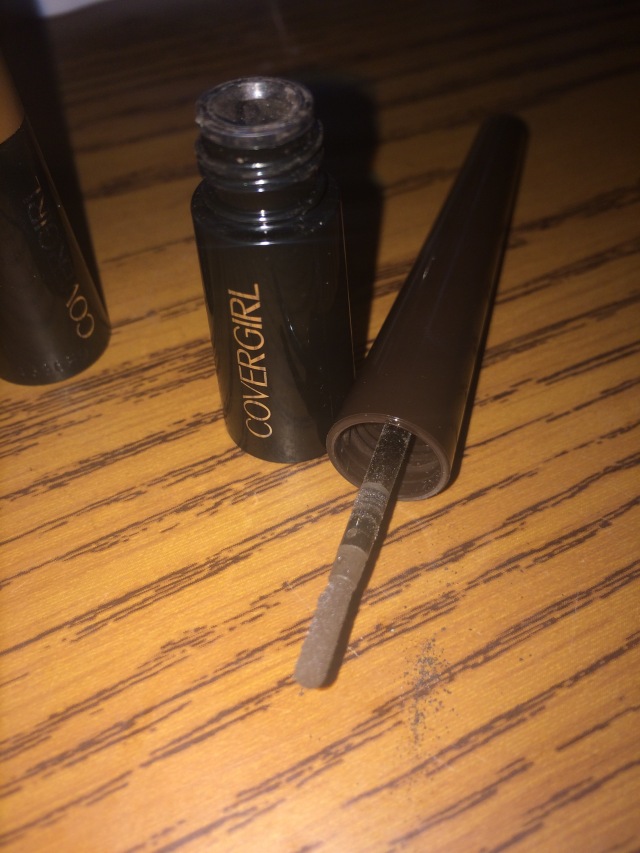
The Covergirl Bombshell by LashBlast Pow-der & Brow Liner. I was drawn in because I LOVE LOVE LOVE all of the LashBlast mascaras (really, I own all of them). Initially it looked like the little bottles of liquid liner, that cone shaped little container. But upon reading the package, it claimed that it “brings sexy smolder to eyes and brows. Soft powder adheres to brows and defines eyes.” Well, I love me a product that can multitask, so I grabbed two of their 4 shades, because I tend to go slightly lighter or the same color as my hair, depending on the overall look I’m wearing.

I brought it home, and unfortunately forgot about it until this morning. But when I saw it in the drawer, looking all sad and unloved, I picked it up and decided it was time to give it a try. Now mind you, I tried this on BOTH my brows and as a liner. And I’ll be honest, I don’t love it…and here’s why:

  • as a brow powder, it’s way too dense to use with the applicator alone – however with some patience and practice, and a clean spoolie brush, it CAN brush out to an ok finish – I would recommend setting it with a brow gel because the formula alone WILL smudge –
  • as an eyeliner, it has almost ZERO staying power, and when I tried to smudge it out a little for a more smokey effect, it disappeared entirely,
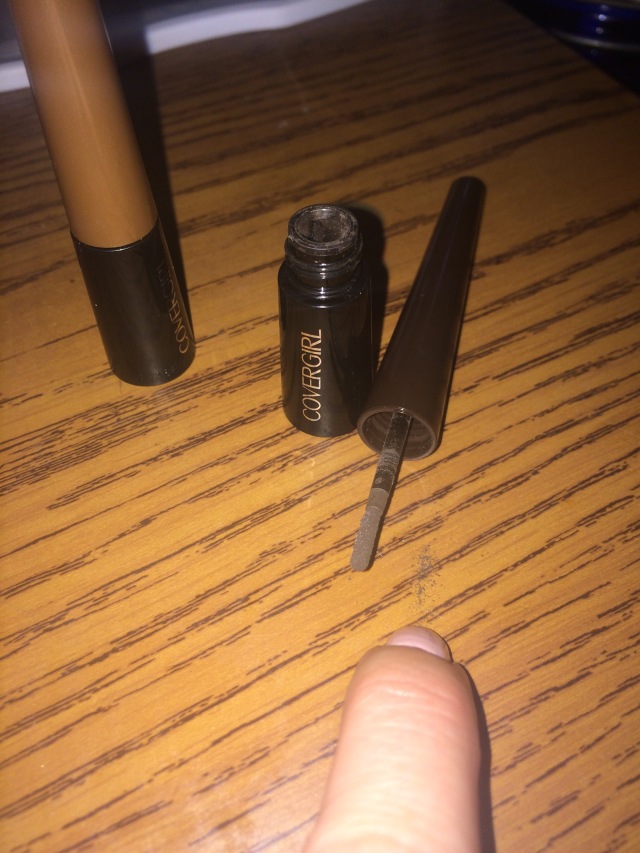
  • I HAD TONS OF FALLOUT ALL OVER MY CHEEKS. Which normally I can deal with by just dusting away with a clean fan brush, but this decided it was best to hang around, smear EVERYWHERE, and THEN not come off. Thank goodness for high coverage concealer.
  • The wand is a small, thin, spongey like applicator which made me feel like I had very little control over the product.


Immediately above you can see me pointing to the small amount of product that fell down just from setting the applicator down on my desk.

Initially the price was right, at right around $9 (depending on where you purchase), but as for the application, I was not impressed. Which really saddened me because as I stated before, I have a deep appreciation for products that can multitask. But I’m also open to the fact that there may be a trick to applying it, so if you know a better way, please leave it in the comments. I would hate to just trash the product, but it’s also (at least as of right now) something I would feel comfortable passing on to someone else if I don’t honestly believe I could recommend it. LET ME KNOW WHAT YOU GUYS THINK!

And don’t forget to follow me on Twitter  and Instagram @dlynnesposito!

xoxo – Donna