BECCA HIGHLIGHTER DUPES

So unless this is your very first time here, y’all know 2 things about me for certain; I love a good highlighter, and I LOVE a good dupe!

When it comes to dupes, I’m super particular. I want color, formula, application, performance, all of it. It really needs to tick all the boxes for me. And if it doesn’t, I don’t share it with you guys because, well, that would make me a liar. And I’m here to bring you real, honest reviews and opinions – no bullsh*t here!

I also prefer something with a natural luminosity vs. something that’s super glittery – you know the kind I mean, the ones that sit on top of the skin and emphasize texture and leave behind noticeable chunks of glitter. I love a good, finely milled, creamy, pearly finish that looks like you’re glowing from within. Like you’ve been eating your fruits and veggies.

But that’s just my personal preference – if you want to glow to the heaven’s, do you, boo!! If you can rock it then by all means, rock it! I’m just too old to do that anymore! But in my day….girrrlllll….

So I pulled a bunch of my favorite Becca highlighters, and a bunch of my favorite affordable/drugstore highlighters, and got to swatchin’!

So….are you ready? I’m ready! Let’s do this!


BECCA SHIMMERING SKIN PERFECTOR PRESSED – MOONSTONE vs. MARY-LOU MANIZER by THE BALM 

I remember the first time I swatched Moonstone – it was the most pigmented, creamy, buttery, amazing highlight I’d ever laid eyes on. But then I got a glimpse at the price tag – $38! As a broke single mom taking care of HER mom and working part time at Ulta, it was just not in the budget. But I was in love. And I set out on a quest to find a suitable dupe.

Enter Mary-Lou. Just as soft, smooth, pigmented, and gorgeous as Moonstone. I’ve managed to track down the Mary-Lou Manizer for $12 on Amazon – and while both offer a generous amount of product, considering how little it takes for such AMAZING payoff, The Balm gives you 8.5g of product, while Becca gives you 8g. Not a huge difference, but notable when you take into account that it’s a near perfect dupe – just look at the swatches!

L: Moonstone R: Mary-Lou Manizer


BECCA SHIMMERING SKIN PERFECTOR PRESSED – OPAL vs. WET N’ WILD MEGAGLO HIGHLIGHTING POWDER – PRECIOUS PETALS

Originally, when I pulled the Wet N’ Wild shade out of my collection, I was thinking “I think I may have finally found a dupe for Champagne Pop!” (another beautiful shade by Becca x Jaclyn Hill) – it had that same peachy sheen that CP has – but what about the formula?

You see, the Wet N’ Wild Megaglo Highlighting Powders are notoriously hit or miss depending on the shade you grab – some are gorgeous and smooth and just….yum, while others are chalky, chunky, glittery, and patchy. So I was initially hesitant, as I’d kind of set it aside in my collection and never really picked it up again. But when I swatched it next to Champagne Pop, I noticed that it was identical in formula (yay!) but just slightly off in color…..hmm…..wait a minute…..this look JUST like……

OPAL!

So I swatched THOSE side by side, and I’ll be damned if it wasn’t exactly the same! Glides on the same, blends out the same, not chalky or chunky or streaky! Look at the swatches and see for yourself! Then save yourself the $$$’s and go buy MORE makeup! Ha! At 5.4g of product, yeah, you’re getting less than you are with Becca, but since a little goes a long way, will you REALLY miss it?

L: Opal R: Precious Petals


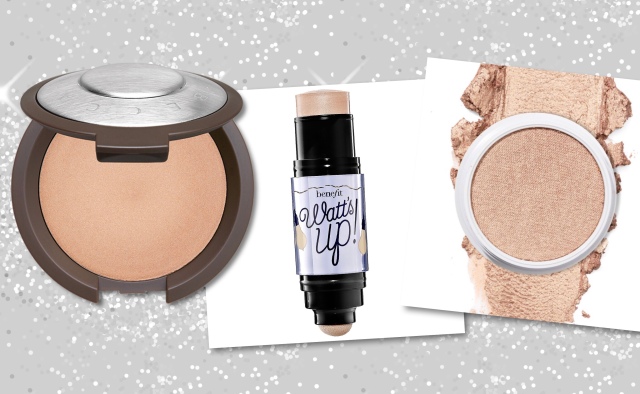
BECCA SHIMMERING SKIN PERFECTOR POURED – OPAL vs. BENEFIT WATT’S UP! vs. COLOURPOP SUPER SHOCK CHEEK – WISP

When I was pulling together a list of potential dupes, this was one of those last minute discoveries as I was sifting through drawers (GOD I sound like a hoarder, don’t I?). And I realized that almost every highlighter dupe post I’ve ever seen seems to exclusively mention powder highlights – not many people incorporate cream highlighters.

Well I had a couple deluxe sample size ones floating around of the Becca Poured in Opal (2.5g mini, 5.4g full size) – I got them for free when I worked at Ulta, and just kind of tossed them into my kit and never looked back. And then I realized it’s striking similarity to both the Benefit Watt’s Up! (9.4g) and the Colourpop Super Shock in Wisp (4.2g). At least in color – let me explain.

The Becca product is VERY creamy, which is great on someone with dry skin or maybe even mature skin. I think I never used it because I can tend to be very oily and was worried about it just sliding right off.

The Benefit product is slightly drier, comes in a cream stick, and has a little more staying power. The Colourpop one, if you’ve ever used them, has that sort of cream-to-powder kind of formula that stays put on the skin, blends out really nicely, and has a beautiful smooth finish.

Now while they’re all SLIGHTLY different in formula (remember I said we had some pretty close dupes?), the shades themselves are pretty much spot on – they all have that slight peachy golden shift, with very fine shimmers that are minimally detectable on the skin.

L to R: Opal, Watts Up!, Wisp


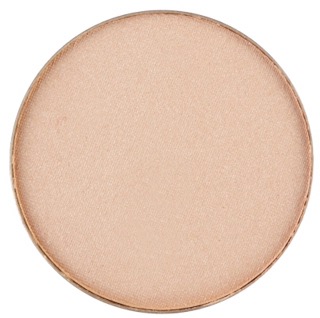
BECCA SHIMMERING SKIN PERFECTOR PRESSED – PEARL vs. ESSENCE MONO EYESHADOW – SNOWFLAKE

This may be one of my favorite Becca dupes of all time, but I really hesitated when it came to incorporating this particular one…..BECAUSE I CAN’T FIND IT ANYWHERE!

I’ve searched Amazon, eBay, Ulta, even the Essence website, and I can’t find ‘Snowflake’ anywhere – now to be fair, I purchased this a few years ago, and I know, I know; brands cycle through things all the time. So this is one of those instances where, if you’re lucky enough to have this one in your collection, hold onto it!

I’d forgotten about it, de-potted it and stuck it in a palette, because it truly is a beautiful highlight, and while I was “gathering” for this particular post, had an “AH-HAH!” moment and remembered this little treasure.

Yes, “little”; it’s a freakin’ eyeshadow! But it’s so incredibly pigmented that the smallest amount creates the most beautiful glow, it will likely last for ages (mine has – at LEAST 3-4 years now!). They swatch the same, blend the same, neither emphasizes any texture on the face – they’re both beautiful! Look!

L: Pearl R: Snowflake


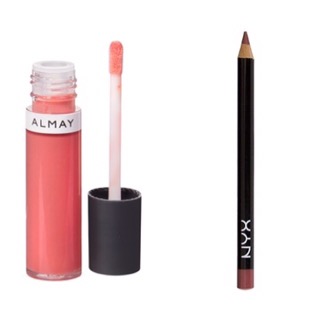
BECCA SHIMMERING SKIN PERFECTOR PRESSED – ROSE GOLD vs. NYX BAKED BLUSH – CHIFFON

Some may consider Rose Gold a highlight – personally I think it’s more of a blush topper – depends on your skin tone. Nonetheless it’s gorgeous. Warm rose pink with a gorgeous golden shift – who wouldn’t love this shade?

But I think this may be the one that I get the LEAST amount of use out of – *insert sad face*.

But that got me thinking – for something you don’t use often (mine is actually in the Becca x Chrissy Teigen palette) this is the PERFECT occasion for a dupe! And my mind immediately went to the NYX Baked Blush in the shade Chiffon – the consistency is noticeably different. But the color is pretty damn close! I would say that the NYX blush is every so slightly pinker that the Becca. But it’s one of those difference that’s virtually undetectable! Take a look at the swatches for yourself!

L: Rose Gold R: Chiffon


Have you tried any of these? Do you have any favorites? Leave a comment and let me know!

And as always, feel free to follow me on social media!

Facebook : Affordable Gorgeous
Instagram & Snapchat : dlynnsaunders

XOXO,

img_7250

VIVA LAS VEGAS | DAY TO NIGHT MAKEUP TUTORIAL

Hey guys!

So as you may or may not know, from time to time I get some wonderful opportunities to work with awesome companies and create looks for them inspired by various things, which I in turn, share with you all. Well today, I’m participating in a challenge presented to me from Vegas.com, in which I was asked to create a day to night makeup tutorial! Pretty cool, right?

Now personally, I’ve never been to Las Vegas; I’ve never even left the East Coast. But when I think Vegas, I think glitz and glam and drama (not necessarily in a bad way!) and shows and clubs and music and……I could go on and on. But in browsing their amazing hotel package deals page, I found myself immediately drawn to and inspired by one place in particular; The Venetian. There’s just something about warm tones and gold accents that makes this very “Vegas” to me. And it’s good to know that if I ever get the chance to visit, they’ve taken the time to put together a page of some of their best deals and packages for shows, attractions, and more!

So if you want to see my day to night transition, just keep on reading!


DAYTIME MAKEUP LOOK 

If nothing else, when I initially think of Vegas, I think hot! I mean, it’s super ridiculously hot there, and although it’s (to my knowledge) dry, desert heat, it’s still hot! So when it’s hot, the last thing I want is a full face of makeup!

All I’ve done for daytime (which is, let’s be real, no different than my usual daytime looks) is fill in my brows with my Salon Perfect Brow Defining Kit, using and angled brush and spoolie, and a mixture of the taupe shade and dark brown shade (taupe for the inner part, dark brown for the tail), and set it in place with my HG Anastasia Beverly Hills Clear Brow Gel. Then, I spot conceal with my MAC Pro Longwear Concealer and a Morphe M173 brush. Since I’m currently very light (for summer), I’m going to set my concealer in place with my Coty Airspun Translucent Loose Powder and an e.l.f. Powder Brush, and then warm up the entire perimeter of the face with the Physician’s Formula Butter Bronzer and a Morphe M527. Next I pop on a little Milani Baked Blush in Luminoso, using a Morphe E4, and some Maybelline Lip Studio Color Jolt in Stripped Down.

You may be thinking ‘what about the eyes?’. Lately I’ve noticed that when it’s super hot out, mascara just bothers my eyes, whether it’s waterproof or not. It’s just not comfortable in extreme heat. Besides, if you happen to be sitting poolside at a swanky hotel and decide to cool off in the water, you won’t have to worry about flakes and raccoon eyes when the cabana boy eyes you toweling off!


NIGHTIME MAKEUP LOOK

Ok, so here’s where we punch up the drama a little bit! I’m not one for loud, crowded clubs, but I do enjoy a nice meal, a frozen margarita, and a great show, so of course I want to look my best!

Anytime I’m doing a super dramatic look, I like to start with the eyes; why? Because as you’re working with smokier, darker shadows, or even glitter, you’re bound to have fallout, and it’s easier to wipe it off clean skin than fix my foundation and concealer! I also like to fill in my brows before starting with shadows, because I feel like the structure of the brow helps to guide where my shadow will go, if that makes sense.

I’m going to first prime my brows with some LORAC Behind the Scenes Eyeshadow Primer, which is a great trick if you find your brows tend to fade on you throughout the day or night. Then I’m going to fill them in pretty dramatically with my NYX Micro Brow Pencil in  Brunette. If you want more detailed steps as to how I fill in my brows, you can click here for my blog post, or here for my YouTube video. After my brows are filled in, I’m going to prime my eyes with MAC Pro Longwear Concealer in the shade NW20, and blend that out with a damp beauty blender. I prefer the beauty blender over say, my fingers because I’ve noticed I get a much more even base on my lids, and then while I have the concealer out, I’m going to grab any flat definer brush (I used the Karity E26) to clean up and carve out my brows, making them nice and neat and defined. Then I’ll set the entire area with Coty Airspun Powder and a Real Techniques Setting Brush, to ensure that the shadows I’m using next will blend smoothly.

Now I’m going to grab my Morphe M441 (any long hair blending brush will do) and pick up some Makeup Geek ‘Beaches and Cream’ to use as my transition shade. It’s just slightly darker than my skin tone, and using a shade like this will help any darker shades go on so much more smooth. I’m going to work this all over the crease area, back and forth, blending in circles, making sure there are no harsh lines.
Then I’ll take a Morphe M433 (which is just a smaller, shorter hair blending brush) and picking up some Makeup Geek ‘Cupcake’, start working that into the crease just a little lower than the transition shade. Same motions, back and forth, just keep it a little lower. You want to be careful when you’re working with pink shades, because you can end up looking sick or like you have pink eye if you get too crazy; the next step will help us avoid that!
Next, on a tapered blending brush (I used the Morphe M330), I’m going to pick up some Makeup Geek ‘Frappe’, which is a nice warm, medium toned brown shade that will create a beautiful shadow or contour to the eye. I’m going to focus that more on the outer third of the eye, and once I don’t have as much product on my brush, I’m going to begin to swoop it into the crease, but no further than about the middle of the eyebrow. Then I’ll go back with my M433 and use whatever is left of ‘Cupcake’ on that to blend out any harsh edges (don’t add additional shadow to the brush for this step, just blend!).

Now for the fun part – I’m going to first apply some NYX Glitter Primer to my lid, but only the inner half, and here’s why; I don’t want it all the way to the outer corner because after we apply this next shadow, and then sort of ombre them together, using a matte shadow on a blending brush over a tacky glitter primer will just make your shadow patchy and impossible to blend.
So rather than use my finger, I’m going to use a tiny little flat, synthetic haired eyeshadow brush from ULTA (it came in a ‘gift with purchase’) and apply my primer from the very inner corner, following along my natural crease, and sort of start to feather it across the lid as there is less and less on my brush; so you want the most product on the inner corner, then less and less as you move across the lid.
Then, using a Morphe M167 brush (or any flat packing brush), I’m going to apply L’Oreal Infallible Eyeshadow in Amber Rush pretty generously on that inner corner, and lighter towards the center, kind of feathering it out. Once you have every tacky, primered area covered, you can go back with that ‘Frappe’ color we used on the outer corner, and gently blend it together with the ‘Amber Rush’.

I felt like this look called for a pretty dramatic winged liner, so using my absolute favorite Maybelline Eyestudio Gel Liner in Blackest Black, and a Karity E22 brush, I’m going to create the most perfect, razor sharp wing I think I’ve EVER done on myself in one try! If you want to see a winged liner tutorial, I’ll link that blog post here.

Moving on to the skin, finally! I’m going to start by using two different primers, for two different reasons; I get oily in my t-zone, so for that I love the Hourglass Veil Mineral Primer. Everywhere else on my face has gotten very dry lately (I blame my turning 30 two days ago!), so to add some luminosity, I’ll use the L’Oreal Magic Lumi Light Infusing Primer everywhere else. Once my primer has a chance to sink in, I’m going in with the L’Oreal True Match makeup in N3, and after dotting it all over my face (lightly; you can always add more!), I’m going to begin blending it out with a flat top kabuki, like a Sigma F80, first in stippling motions, then buffing, and then I’ll pounce over everything with a very damp beauty blender to make sure I’m picking up any excess foundation that might make me look cakey.

Now to conceal and highlight, I’m using my absolute HG concealer, the Urban Decay Naked Skin Weightless Complete Coverage Concealer in Light Warm, and blending it out with a, you guessed it, damp beauty blender (this thing does it all for me!).
Once my concealer is all blended,  I’m going to use that same damp sponge to pick up my It Cosmetics Bye Bye Pores Loose powder and bake under the eyes, my chin, my upper lip, and from the center of my forehead, down the bridge of my nose. To set the rest of my foundation, I’ll apply the same powder using an e.l.f. Powder Brush.

After a few minutes, I dust away the excess powder from baking, and grabbing a large angled contour brush from Walgreens (it’s old but it’s amazeballs!) I’m going to apply my Benefit Hoola Bronzer to my forehead, the cheeks, and my jawline and neck, just to bring some color back to my face.
To contour, I’m going to use one of my faves, the NYX HD Blush in Taupe, on a NARS Ita brush, and take that to the hollows of my cheeks, my temples, jawline, and down the sides of my nose.
Still feeling pretty pale, I grabbed my trusty Morphe E4 and my favorite “drugstore” blush, the ULTA Cheek Color in Sunkissed. This even has a little bit of a sheen to it, making it a beautiful color for any occasion, but you know me, I wanna glow to the heavens!
Using Colourpop Super Shock Cheek Highlight in Wisp, which is a beautiful golden shade, I’m going to apply that with my fingers (the best way for this formula, I think!) to the top of my cheekbones, down the center of my nose as well as on the very tip, and my cupids bow.

With my powder and concealer and basically the rest of my face done, it’s time to move onto the lower lash line. Grabbing another (clean) flat definer brush like the Morphe M432, I’m going to pick up some black eyeshadow (I used a Morphe single eyeshadow in the shade Coal), and I’m going to really work that as tight as possible against my lower lash line, and bring it tight into the outer corner to meet that wing. I also want to bring it towards the inner corner (which I rarely do) to get that super squinty, smokey look. Then taking a Morphe M431 (any pencil brush works fine) I’m going to pick up a little more Makeup Geek ‘Frappe’ and use that to smoke out that black shadow. Just run it over the black line that you created on your lower lash line, back and forth; don’t be afraid to really smoke it out – that’s what makes this eye look so dramatic and fun! Then I lined my upper and lower waterline with Rimmel Scandaleyes Waterproof Kohl Eyeliner in Black, and rather than use falsies (because not everyone is comfortable with them) I really loaded on the Maybelline The Falsies Mascara to both my top and bottom lashes, after priming my lashes with Tarte Opening Act Lash Primer.

And finally, since my eyes are so bold, I really wanted to keep a neutral lip, so I lined and filled in my lips with NYX Slim Lip Pencil in Peekaboo Neutral, and then topped it off with Revlon Colorburst Lip Butter in Creme Brûlée. After a quick blast of your favorite setting spray, you’re ready to take on Vegas!!


I hope you guys enjoyed this makeup look! If you recreate it, be sure to tag me on Twitter or Instagram!

What are some of your favorite products for getting glam?! Leave me a comment and let me know!

Come follow me around social media!
Twitter, Pinterest & Instagram : @dlynnesposito
Facebook : Affordable Gorgeous
Snapchat : dlynnesposito
YouTube : DonnaLynn Esposito

And feel free to reblog this post and share my social media with your friends!

LOTS OF LOVE!!
img_9363


BACK TO SCHOOL MAKEUP LOOK | ALL DRUGSTORE! |

Hey guys! I know it’s been awhile sincce I’ve posted anything, and without going into great detail my personal life has been a little…..hectic! However, I fully intend to get back into the swing of things and get into more of a routine again!

I actually have a pretty cool project coming up that I’m super excited to share with you all (don’t worry, you won’t have to wait long!) but in the meantime, check out this super easy, all drugstore back to school look I put together, using all affordable brushes!

Please don’t forget to give the video a thumbs up, and please subscribe and maybe even share it with your friends! All my social media is also listed in the video if you’d like to follow along and stay updated!

Love to all!!

XO – Donna

HOW TO SAVE BIG ON HIGH-END MAKEUP

img_1973

While I’m all about affordable beauty (obvi!), there’s nothing that quite gives me the feels like luxurious, high end makeup products.

But alas, I’m a stay at home mom. I was born with expensive taste and a limited availability of funds – dammit.

For awhile, I had take to eBay to satisfy my high-end desires, but well, there are more and more people than ever selling counterfeit beauty products, containing God-knows-what kind of ingredients, and I will not put those on my skin. But I’ve found another way, guys.

Keep on reading if you want to know how I get high end products at discount prices, along with what I’ve purchased and what I’ve paid!


It’s no secret that I’m a Pinterest-lover from way back. I mean, 20K plus pins speaks volumes about me, I think. But I digress.


On a Pin-binge late one night, amid a case of insomnia and a bag of Cheetos (#sorrynotsorry), I kept seeing advertisement-style pins referencing something called Poshmark. So I clicked.
And my life changed forever.

Poshmark is an app that’s available on both Android and Apple platforms (phones, tablets) that allows you to search for almost anything you can think of; shoes, bags, clothes, makeup, skin care, accessories, you name it, it’s probably on there. But you don’t just have to buy, you can sell your own stuff on there, too!

The way it works, is you sign up and create an account. You make a profile, and you can build your ‘closet’, where if you’re interested in selling items, you list them there. I haven’t sold anything just yet, so I’m not entirely sure of the process, but I can research that better and address it later on.

Let the search begin! Type in anything you’re looking for; large tote bag, sunglasses, concealer, swimsuits, scarves, lipstick, anything! From there, you can ‘like’ a listing, which saves it so you can go back later, you can communicate with the seller and ask questions about the item, you can make an offer (which the seller can either accept, decline, or counteroffer) and you can make a purchase. There is a standard $5.95 shipping fee paid by the buyer, so bear that in mind as you’re making an offer or purchase.

Some things are brand new and unused, some things are lightly used, some heavily, and some only swatched. These things should be mentioned in the listing, however if they aren’t, you can simply leave a comment and the seller will respond and happily answer any questions you may have.

Sometimes people try to sell counterfeit items on here as well, whether they know it or not, but if you know what to look for and do your homework, you should be alright. And if you’re unsure, just ask!

Now onto what I’ve purchased!

Notice the prices; many of them were offers that I made and the seller accepted – sometimes they’re very flexible! If you see the two cancelled orders, the MAC Face and Body Foundation was counterfeit (though the seller wasn’t aware, and has since removed the listing), and the Urban Decay Naked Skin Color Corrector was just taking far too long to ship (they have up to seven days from the date of purchase to ship the item). But I think these are incredible deals! I’ve yet to be disappointed in a purchase!

Poshmark has a guarantee that if the item is not as described or arrives damaged, or even not at all, you get your money back – so you can shop with confidence!


Have you guys heard of Poshmark? Have you used it to buy or sell? Leave me a comment with your thoughts!

Come follow me around social media!
Twitter, Pinterest & Instagram : @dlynnesposito
Facebook : Affordable Gorgeous
Snapchat : dlynnesposito

And feel free to reblog this post and share my social media with your friends!

LOTS OF LOVE!!
img_9363

MORPHE MONTHLY BRUSH CLUB | JULY 2016

img_9623

Hey guys! It’s that time again!

Time for the unbagging of the Morphe Monthly Brush Club!

If you haven’t read one of these posts before, this is a monthly subscription service, much like an Ipsy or Boxycharm, except instead of getting some sample size cosmetics from brands you may or may not have heard of before, you’re getting at least $30 worth of full size brushes each and every month!
And they’re Morphe brushes, so you know they’re amazing!!
This service is $19.99 a month with free shipping to the US and Canada, and you can sign up yourself at www.liveglam.com – and if you pay a whole year up front, they send you a FREE Morphe 35O Palette – which if you been around on YouTube or the blogosphere or the makeup world in general, you know just how coveted an item that palette is!

So let’s jump in and see what they sent out this month!


MORPHE EE48 (*coming soon*)

Screen Shot 2016-07-01 at 10.03.21 AM

EE48

This natural bristle, small tapered powder brush looks to be great for setting under the eyes or even for a super precise contour! I can’t wait to try it out and see how it stacks up to my beloved M438!

MORPHE EE18 (*coming soon*)

Screen Shot 2016-07-01 at 10.03.35 AM

EE18

This small, round crease brush looks promising for sure! If you’re someone who prefers smaller brushes for the crease (like me, #hoodedeyeproblems), or even using it to smoke out the lower lash line, you’ll love it!

MORPHE M310 ($4.99)

Screen Shot 2016-07-01 at 10.03.42 AM

M310

I have several fan brushes that I’ll be honest, I rarely use. But this is a favorite of Jaclyn Hill recently for applying highlight, so of course, I’ll give this one a go! I really love the M510 for highlighting, which is another natural bristle, goat hair brush, so I can’t wait to try this one too!

MORPHE EE22 (*coming soon*)

Screen Shot 2016-07-01 at 10.03.49 AM

EE22

I don’t know about you, but I can never have too many pointed blending brushes! I love how they place the right amount of color and blend it softly and seemlessly every time! We all know if there’s one thing I hate, it’s harsh lines!

MORPHE M432 ($3.99)

Screen Shot 2016-07-01 at 10.03.56 AM

M432

This synthetic flat definer brush is already a part of my collection, but I love it so much already I was just getting ready to order another one! I’m glad I waited! This is perfect for packing color really tightly along your bottom lashes, and some people even like to use it for a cut crease, though I haven’t tried that! It’s also amazing for carving out your brows with concealer since it’s so thin and flat!


By the way, guys, I mentioned last month that Morphe is discontinuing their original Elite Collection, and they’ve reduced the price even further! Everything is now 60% off! Head over to morphebrushes.com to grab them before their gone!

If you wanna sign up to receive this incredible monthly subscription service, please use my referral link! Just click here : https://liveglam.com/morphe-brushes/

Have you guys signed up for your monthly subscription yet? Leave me a comment and let me know what you think of it!! I love to hear from you!

Come follow me around social media!
Twitter, Pinterest & Instagram : @dlynnesposito
Facebook : Affordable Gorgeous
Snapchat : dlynnesposito

And feel free to reblog this post and share my social media with your friends! Your support means so much!

LOTS OF LOVE!!
img_9363-3

JUNE 2016 FAVORITES


Hey guys! It’s monthly favorites time again!

I’ve pulled a few items that I can’t seem to live without this month, and I thought I’d share them with you!
Let’s get started!


MAC COSMETICS EYESHADOW PRO PALETTE REFILL PAN – NYLON ($6/maccosmetics.com)

I’ve been using this nearly every day (that I apply makeup, anyway) to highlight my brow bone and my inner corners (tear ducts), and I just love it. It’s a very frosty, very pale gold shade that just beams off the skin. I love, love, love this for the spring and summer, when I have more of a tan!

SALON PERFECT PERFECTLY GLAMOROUS FALSE LASHES – #614 ($2.98/Walmart)

These are hands down some of my favorite lashes of all time! I love how long and wispy they are, adding just the right amount of volume and drama to both everyday looks, as well as something a little more glam. They have a super easy, thin and flexible band, which I prefer over a thick band, because I don’t always like to wear eyeliner – with these, you can get them super close to the lash line and barely notice them. And they’re so lightweight, it literally feels like nothing on your eyes!

ALMAY COLOR + CARE LIQUID LIP BALM – ROSY LIPPED ($5.99/ULTA)
NYX SLIM LIP PENCIL – PEEK-A-BOO NATURAL ($3.49/ULTA)

This has been my fave pinky/nude lip combo lately. The liner is basically MLBB (my lips but better), but I like to overdraw them just a bit, and then top it off with this semi-glossy liquid lip balm, which again, is basically my lip color with just a little bit of sheen to it. Super pretty, and super easy! Plus, since lip pencils alone can be a little bit drying, the balm gives enough moisture to make it a comfortable, long lasting combo without breaking down the lip pencil, giving you the dreaded ‘butt-hole lips’.

HOURGLASS VEIL MINERAL PRIMER ($52/Sephora)

I just did a whole review on this primer, so I won’t repeat myself – but seriously, if you’re anywhere from normal to oily-skinned, and want something that keeps your makeup in place, keeps you matte, fills in pores, fine lines, little wrinkles, helps to neutralize redness, and more, go check this stuff out! (Clicking the link will bring you to my review, so click away!)

L’OREAL BROW STYLIST PLUMPER BROW GEL MASCARA – MEDIUM TO DARK ($9.99/ULTA)

A few weeks ago, I noticed that my cleanser (which contains Benzoyl Peroxide) had begun bleaching my eyebrows; fabulous. So rather than reaching for my usual pencil or powder, I remembered I had this product stashed in my brow drawer. On minimal or no-makeup days, I just swipe it over my brows and go; it’s a very neutral dark shade that contains little fibers that stick to my brow hairs, thickening them, and covering up the weird yellow shade they’ve become. For a more sculpted brow, I’ve been outlining them with pencil, filling in the bare spots, and then applying this over the top. Perfect brows, every time.

ANASTASIA BEVERLY HILLS CONTOUR REFILL – SAND ($14/anastasiabeverlyhills.com) 

Let’s face it, all the hype surrounding the original contour kit centered around the ‘Banana’ shade – it’s famous, and for good reason. But an often underrated shade in the kit, is that slightly shimmery one at the top right; Sand.
Clearly, it’s not secret that when I highlight, I like to beam rays of shine off satellites, but on days where I just want something a little more subtle (yes, I can do subtle, believe it or not!), I reach for this. It’s got just enough sheen to it to make you look healthy and dewy, without settling into the pores and fine lines on my face. If I really want to amp it up, but still not be ‘over the top’, I mist my face with setting spray, and immediately apply this while my skin is still a little damp. Perfect glow, every time.


What are some of your favorites this month? Leave me a comment and let me know!

Come follow me around social media!
Twitter, Pinterest & Instagram : @dlynnesposito
Facebook : Affordable Gorgeous
Snapchat : dlynnesposito

And feel free to reblog this post and share my social media with your friends! Your support means so much!

LOTS OF LOVE!!
img_9363-2

MOTD 6.23.16| DATE NIGHT MAKEUP

FACE 

Smashbox Photo Finish Primer Water (as a primer and setting spray)
Hourglass Mineral Veil Primer
L’Oreal Infallible Pro Matte 24HR Foundation (103 Natural Buff)
Urban Decay Naked Skin Weightless Complete Coverage Concealer (Light Neutral)
It Cosmetics Bye Bye Pores Silk HD Micro Powder
Benefit Hoola Bronzer
Makeup Geek Blush (Spellbound)
BECCA Shimmering Skin Perfector (Champagne Pop)

EYES & BROWS

Makeup Geek Eyeshadows:
Peach Smoothie (transition/upper crease)
Cupcake (lower crease)
Shimma Shimma (lid)
MAC Eyeshadows:
Swiss Chocolate (lower crease, blend out lower lash line)
Embark (outer V, lower lash line)
Nylon (inner corner and brow highlight)
Rimmel Lash Accelerator Mascara
Maybelline The Falsies Mascara
L’Oreal Voluminous Mascara
ULTA Brow Tint (Medium)

LIPS

NYX Slim Lip Pencil (Mauve)
Essence Long Lasting Lipstick (Barely There)

MY GO-TO SUMMERTIME GLAM | MAKEUP TUTORIAL 

When I sat down yesterday to get ready for the day, I realized I hadn’t done anything really special in awhile, and I had a fresh new pack of lashes to play with, and well, this is what happened!

If you want to see how I created this super easy, long wearing, natural glam look, just keep reading!


After cleansing and moisturizing, I prepped my skin with some aloe vera gel, and went straight for foundation. Mixing the L’Oreal Infallible Pro-Matte 24HR Foundation and the L’Oreal Magic Lumi Light Infusing Primer on the back of my hand, I dotted it onto my face and blended with a damp Real Techniques Miracle Complexion Sponge. After applying a little of my Urban Decay Naked Skin Weightless Complete Coverage Concealer in ‘Light Neutral’, I again, blended it out with my damp sponge.

Next, grabbing my Kat Von D Shade+Light Contour Palette and a fluffy angled blush brush (mine came from Walgreens on clearance, but I love it!) I used the shade Shadowplay to bronze up my face. Then, with a NARS Ita brush, I very lightly contoured my cheekbones with Subconscious, and used Sombre to contour my nose. I then set my under eye area and t-zone with Lyric, and sharpened up my contour with Lucid, both on a Morphe M438 brush.

Grabbing a Morphe E4, I applied some Milani Baked Blush in ‘Luminoso’ to the apples of my cheeks, and then, because I wasn’t yet visible from outer space, I applied a generous amount of BECCA Shimmering Skin Perfector Pressed in ‘Champagne Pop’ right over the blush, and to the tops of my cheekbones, and a little dab right on the tip of my nose.

I wanted to keep the eyes super simple, so using a Morphe MB23, I applied a little bit of Sombre from the Kat Von D Shade+Light Palette right in the crease of the eye to sort of contour it. Next, I applied a light coat of Rimmel Lash Accelerator Mascara to my top and bottom lashes, and popped on a pair of Salon Perfect Lashes in 614, which have become my new faves! For my brows, I simply ran through them with some L’Oreal Brow Stylist Plumper in ‘Medium to Dark’.

On to the lips! I lightly overdrew them and filled them in with NYX Slim Lip Pencil in ‘Ever’, and then applied some Gerard Cosmetics Color Your Smile Lip Gloss in ‘Madison Avenue’. Give yourself a bath in the setting spray of your choice (I used Makeup Forever Mist & Fix Setting Spray) and you’re all done!


What are some of your go-to products for an everyday glam, summertime look? Leave me a comment and let me know!

Come follow me around social media!
Twitter, Pinterest & Instagram : @dlynnesposito
Facebook : Affordable Gorgeous
Snapchat : dlynnesposito

And feel free to reblog this post and share my social media with your friends! Your support means so much!

LOTS OF LOVE!!
img_9363-3

REVIEW | BECCA X JACLYN HILL CHAMPAGNE COLLECTION FACE PALETTE

img_1657
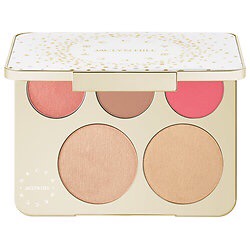
Recently in my ‘May 2016 Favorites’, I mentioned that I had managed to grab the Becca X Jaclyn Hill Champagne Collection Face Palette ($52 / Sephora *Limited Edition*) during the ‘Snapchat Launch’. By that I mean that during an event in NYC, she took to Snapchat to announce that a limited quantity was available that night on the Sephora mobile app, and it could only be found by entering ‘#champagneglow’ in the search bar. Needless to say, I didn’t even finish watching the Snap Story before rushing to open up the Sephora app on my phone, whipping out my debit card, and placing my order (I didn’t even choose complimentary samples or use the 300+ points that I had saved – thats dedication!).

Here’s what Sephora and Becca have to say about the palette :

What it is:
A limited-edition, iconic face palette, featuring five shades of highlighter and blush—in collaboration with Jaclyn Hill, creator of the original Champagne Pop.

What it does:
This palette gives you all the glow you could want—all in one place. This limited-edition, covetable BECCA x Jaclyn Hill Champagne Collection Face Palette features five shades of highlighter and blush to illuminate all skintones, allowing you to customize your looks. Get the iconic Champagne Pop and new shades designed by Jaclyn Hill. It includes two Highlighter shades, two Mineral Blush shades, and a Luminous Blush hue in Rosé Spritz for a pop of color. Mix and match the shades to create endless layers of light and color for your perfect, custom glow. Just sweep the creamy powders across the face, or layer them to highlight your favorite features with universally flattering shades. This palette is perfect for achieving your own, glowing look.

So, is it really all it’s hyped up to be? Let’s find out!


PACKAGING

img_1657This ‘meaty’ palette (Jaclyn’s words, and I agree) feels sturdy and solid. The very front is a glossy white, with a sprinkling of golden dots, said to be similar to popping a bottle of champagne (very JH, if you ask me!), with the Becca name forming a circle around Jaclyn’s name. When you open it up, there’s a huge mirror, the size of the palette, and the three blushes and two highlighters are set into a shiny gold base that is nothing short of gorgeous.

FORMULA

The formula is exactly what you would expect from Becca; smooth, buttery powders with high pigmentation and a beautiful, lightweight, long wearing finish.

APPLICATION & WEAR

Like I mentioned above, these babies are highly pigmented, especially the blushes! Rosé Spritz is a ‘Luminous Blush’, and it’s a gorgeous pink color with a golden shimmer. Amaretto is a ‘Mineral Blush’ in a toasted almond shade, and Pamplemousse is another ‘Mineral Blush’ in a matte, coral pink. I recommend applying these with a very light hand, and blending well.
Both of the highlighters are the classic ‘Shimmering Skin Perfector Pressed’ formula, and apply beautifully as well. Champagne Pop is included in the palette, as well as a new, exclusive-to-the-palette shade, Prosecco Pop, which is a very obvious warm gold. Check out the swatches, all with no primer, and one swipe!

img_1760Left to Right: Rosé Spritz, Amaretto, Pamplemousse, Champagne Pop, and Prosecco Pop.

I’ll admit, I don’t use the palette much because of it’s limited nature, but it was worth every penny to be able to have it in my collection! I have a separate ‘Champagne Pop’ that I’ll be more inclined to use more often knowing that I have another one waiting patiently for me in this palette.

OVERALL RATING : 5/5


I think of every, single palette I own, this is by far my favorite, and the most beautiful one I’ve ever seen! If you haven’t been able to get it yet, it will be re-released on June 16th, 2016, but that’s the last time; once it’s gone, it’s gone forever! 

Will you be picking one up for yourself? Do you already have it? Leave me a comment with your thoughts!

Come follow me around social media!
Twitter, Pinterest & Instagram : @dlynnesposito
Facebook : Affordable Gorgeous
Snapchat : dlynnesposito

And feel free to reblog this post and share my social media with your friends! Your support means so much!

LOTS OF LOVE!!
img_9363-2

MAY 2016 FAVORITES

May oh my, it’s been a hell of a month….

But that’s alright, that simply means it’s time to sit down and chat about some monthly favorites! I’ve got some new items, some rediscovered faves, an overall mix of beauty related wonderfulness.
If you want to see what I’ve been loving this month, then just keep reading!


BECCA X JACLYN HILL CHAMPAGNE COLLECTION FACE PALETTE ($52 / Sephora) *LIMITED EDITION*

I haven’t had it for a whole month yet, and quite frankly I’ve barely used it, but this has to be the most beautiful palette I’ve ever seen, hands down! I managed to snag this gorgeous item during the ‘Snapchat Launch’, in which there were a limited number of palettes available, though they were restocked (and subsequently sold out again in hours!). The three blushes and two highlighters in this palette are beyond beautiful, and complimentary to every skin tone; don’t you worry, my loves, there will be a full review coming on it in just a matter of days!

MAKEUP GEEK EYESHADOW in MIRAGE ($6 / makeupgeek.com)

img_1658I actually love every single one of their eyeshadows, but I find myself reaching for this shade a lot lately for a soft highlight under the brow, or better yet, as sort of a magic eraser when your smokey eye gets away from you, which is probably what I use this most for. All you do is lightly dust a little over everything from your crease to your brow, and it diffuses the look just enough so it looks like your blending skills are pro-status!

NYX COSMETICS GLITTER PRIMER ($5.99 / ULTA)

A less expensive alternative to the Too Faced Shadow Insurance Glitter Primer, this stuff is pretty great. I bought it for my husband’s cousins prom makeup to use with some pigments and let me tell you, it really lasts! It goes on relatively smooth and gets tacky quickly, but it also really punches up the intensity of the shades you’re working with. Just make sure you work in patting motions for the best result when working with products like these.

ANASTASIA BEVERLY HILLS CREAM CONTOUR KIT in FAIR ($40 / Sephora)

As my skin has gotten drier lately (thanks to my skin care I believe) I’ve noticed that powder contouring has left me looking a little streaky and patchy. Awhile back I had ordered this kit (I was waiting until the ‘Fair’ kit launched) and I am in love. Even though my summer skin tone is far from fair, I’m still able to use the contour shades in this kit, which run a little cooler in tone than the ‘Light’ kit. It blends beautifully, looks natural, and was totally worth the money!

MAKEUP FOREVER MIST & FIX SETTING SPRAY ($30 / Sephora)

I love using this in the same way one would use say, MAC Fix+; to dampen my brush before applying shadow, or to help blend out a thicker foundation. The advantage that this has over MAC Fix+, however, is that because it’s a setting spray, I find that it adds a touch more staying power to whatever I’m applying it with. You can use it in the traditional way, of course, but for actually setting my makeup, I prefer to use my Urban Decay Chill Makeup Setting Spray.

REAL TECHNIQUES FINE LINER BRUSH ($5.99 / drugstore.com) 

As it’s gotten warmer, I’ve been wanting to wear less and less (face) makeup, and sticking to spot concealing where necessary, generally with something thick and long wearing. I love this brush for that purpose. It’s super fine pointed bristles let me pinpoint any spots without overloading with so much concealer that I have to blend it all over my face. I got mine as part of the “Your Eyes Enhanced Starter Kit”, but it can be purchased separately on drugstore.com, just click the link above.

COLOURPOP CHEEK HIGHLIGHT in WISP ($8 / colourpop.com) 

Usually in the summer I try to look as matter as possible, but since my skin has been so dry lately, I want to look as dewy as possible; I want to glow on my terms! This highlight is amazing for that! It’s got a very unique formula that feels like a cream, but applies and dries like a powder. I like to apply this with my fingers, and just kind of pat and drag it on the apples of my cheeks, back along the tops of my cheekbones, and around the sides of my eyes, as well as my nose and cupids bow. It’s super pigmented but blends well, and this light golden shade is super complimentary on light to  medium skin tones (don’t worry, they have a bunch of others!). Colourpop is a fantastic, inexpensive brand! If you haven’t checked them out yet, you should!


What are some of the things you’ve been loving this month? Leave me a comment and let me know!

Come follow me around social media!
Twitter, Pinterest & Instagram : @dlynnesposito
Facebook : Affordable Gorgeous
Snapchat : dlynnesposito

And feel free to reblog this post and share my social media with your friends! Your support means so much!

LOTS OF LOVE!!
img_9363-2