I feel like it’s be a hot minute since I’ve done a dupe post! But boy, oh boy, do I have a great one for you today!
So today, I feel like we’ve got the “mac”-daddy (a little pun intended) of all dupes. We’re duping the cult classic, makeup artist favorite; MAC Pro Longwear Concealer!
With everyone and their mother raving about this concealer, I had to try it for myself – so off to Macy’s I went, looking for the MAC counter.
I was color matched in store (though I think he gave me the wrong undertones) to NW15 and NW20 (back in the winter) and sent home with samples. I’m still working through them, jussayin’.
While I was testing it out over the course of a few days, I noticed that it was super similar to something I already had in my collection – the Maybelline Face Studio Master Conceal!
Could it be? Could the cult fave have a drugstore cousin? Keep reading to find out!
MAC PRO LONGWEAR CONCEALER ($21 / maccosmetics.com)
 While my samples are in a little plastic pot with a screw-off lid (hello, unsanitary!) the full size, which contains 0.30 fl oz of product comes in a glass tube with a pump – while a pump is typically the more desirable in terms of packaging for hygienic reasons, I’ve heard that it can tend to spew out too much product, making it wasteful. And who the hell wants to waste high end makeup?! Not me!
This concealer comes in 16 shades – NC is used to describe skin with warmer undertones, and NW is used to describe skin with cooler undertones, and the number is your ‘level’, if you will. For reference, I’m an NC15 in the winter, and right now (mid-July) I’m about an NC25/30. The associate matched me under fluorescent lights in a Macy’s, and got my undertone wrong (I’m fair with yellow undertones), but it’s alright – fluorescent lights are hardly forgiving.
In terms of formula, this concealer claims to be medium to full coverage, matte, water and transfer resistant coverage for up to 15 hours. Whoa. It’s also made with a built in technology for priming your eyes (one of my fave ways to use it!), but it can be just a little on the heavy, drying side, which is ok for someone with combination or oily skin, but someone with normal to dry skin may find it too drying, as it sets matte rather quickly, and can tend to cling to dryness if you don’t exfoliate and moisturize prior to use.
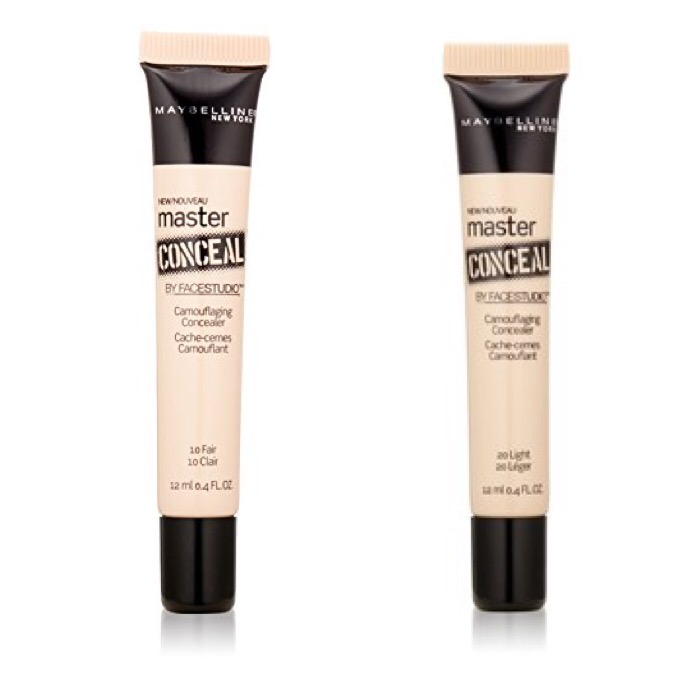
MAYBELLINE FACE STUDIO MASTER CONCEAL ($8.99 / drugstores)
 The packaging of these concealers couldn’t be more different – while the MAC one comes in a glass vial with a pump, this one comes in a plastic squeeze tube with a twist off cap, which in all honesty, I prefer. There is far less wasted product, because you can control the amount that comes out. And since you’re essentially using less, the 0.4 fl oz will last you quite some time!
This one only comes in five shades, however they are neutral in tone, and I’ve never had any trouble finding my match – I use ‘Fair’ in the winter, ‘Light’ in the spring and fall, and ‘Light/Medium’ in the summer. They adapt to skin tones incredibly well, which is quite impressive for drugstore concealer, and more specifically Maybelline, which tends to run cooler/pinker in undertone.
The formula of this concealer is incredibly similar to MAC, claiming to be a full coverage, high-resistence concealer with an undetectable finish. I absolutely believe that this is everything it claims to be. The only difference would be that this one takes a bit longer to set, unless you powder it right away, which can make it appear a bit dewy after you’ve blended it out. Personally, I set every concealer with a powder, whether it’s recommended or not, just out of habit – #oilygirlproblems. The upside to this one is that I have no trouble with it clinging to any dry areas on my face, with my problem spot being the creases on either side of my nose.
So, is it a dupe?

I absolutely recommend trying the Maybelline concealer if you’re in the market for something full coverage and similar to the cult classic from MAC, but just can’t see yourself “makin’ it rain” for a high end concealer. They’re both great products, and MAC is definitely worth the buy, but if you’re being budget-conscious, then the Maybelline is a perfectly acceptable dupe!
Have you guys tried any of these concealers? Which one is your fave? Leave me a comment and let me know!
Come follow me around social media!
Twitter, Pinterest & Instagram : @dlynnesposito
Facebook : Affordable Gorgeous
Snapchat : dlynnesposito
And feel free to reblog this post and share my social media with your friends!
LOTS OF LOVE!!

 I swear the weather up here in New England has reached a whole new level of crazy. Like ‘Britney Spears when she shaved her head’ crazy. And with that has come parched lips. This lip mask is a God send. So much so that despite it’s $26 price tag, I ordered three of them. One for my vanity, one for my purse, and one as a backup. I know. I’m nuts, right? But it’s that good. It’s got a gorgeous universal red-wine tint, and it’s packed full of high quality ingredients like Lanolin, vanilla extract, natural olive fruit, and jojoba oil. It comes in an un-tinted formula, as well as one thats a rosy champagne-y color, but this sheer red just spoke to me. And it’s freakin’ amazing.
 This is one of those ‘rediscovered favorites’. It kinda got buried in my collection, and recently while I was searching for something to conceal my ‘mommy hasn’t slept in a week’ dark circles, this all but jumped out of the drawer at me. It’s thick and creamy, but blendable, and has amazing coverage. I use the shade ‘Light’ under my eyes, and ‘Fair’ to conceal any blemishes, and it does the job without fail. Because it’s so creamy, though, this is one of those concealers that you must set with a powder, or it will absolutely crease. But it’s awesome.


 Almost everyone here knows about Milani Baked Blush in ‘Luminoso’ – and if you don’t, crawl out from under your rock, run to your nearest CVS, and buy it! All of the Milani Baked Blushes are nice, but most I find to have chunky glitter in. This one though….*le sigh*….not only is it a drugstore dupe for a high end brand, but it’s got this incredibly natural peachy pink glow with the slightest champagne shimmer in it. It’s like having your blush and highlight all in one. It’s like heaven shined down on your cheeks, from a little round, golden compact. This is one of those staples that absolutely everyone needs in their collection, whether you’re a drugstore goddess or high-end hoarder.

 First things first, I typically start with a primer. Depending on my needs, I use different products to prime. If I’m oily, I reach for the