HEAT-PROOF BEAUTY PRODUCTS THAT REALLY WORK!!

Ahh, summer.

Weddings, barbecues, beach days, boating…..all things that we want to look our best for. But let’s be real – that can be hard to do when you’re sweating from places you didn’t know could sweat. And your makeup is facing a meltdown of epic proportions.

Personally I don’t wear makeup at all in the summer. I’ll fill my brows in and throw on some tinted lip balm – that’s about all I can tolerate. I can literally FEEL it on my face. But maybe you’re getting hitched. Maybe you have an event to attend. Maybe you’re just one of those people that no matter what, wants to be glam everywhere you go – and that’s awesome!

So I’ve pulled together a list of my tried and true products that I can PROMISE you will help you beat the heat! Check it out!!


PRIMERS

img_7726

Photo Credit – Google Images

Primers are a necessary item when trying to lock in a look and defend it against the summer temps. Realistically, there is very little you can do about facial sweating, but if you’re the type of person who gets oilier than normal when the mercury rises, a good mattifying primer will be your new best friend. This is especially important if you’re an artist and you have a summer wedding – all bridal meltdowns should be strictly emotional, not makeup related! Two of my favorites are the Hourglass Veil Mineral Primer ($54, Sephora) and the Smashbox Photo Finish Light Primer ($36, ULTA). Both are oil free and not only mattify, but smooth the skin and fill in fine lines and pores as well, while still giving your foundation something to grip to. And as an added bonus, coming from someone who has super sensitive skin – these don’t irritate or break me out at all!


FOUNDATION

img_7727

Photo Credit – Google Images

Probably the hardest thing about summer makeup is finding a foundation that ticks all the boxes – good coverage, long wearing, budge-proof, doesn’t break apart, doesn’t feel or look cakey.

And yes, while the product itself is important, so is application. And knowing what’s IN your products helps too; for example, if you use a silicone primer and a water based foundation, it’s guaranteed that you’ll start to see the foundation break apart and slide around on the skin. Oil and water don’t mix – right? So keep an eye on the ingredients.

Also, regardless of what you pick, the key is to work in thin layers. The idea is to even out your skin tone and reduce redness. You can always go back and spot conceal as needed. The best way method of application I’ve found is a light layer with a brush, and then going over it with a damp beauty sponge – this technique picks up any excess product but also helps to press it into the skin, and mimic the skins texture leaving you with a barely detectable base!

Some of the summer foundations that are must haves for me, especially when I’m freelancing, are Lorac POREfection Foundation ($38, ULTA), L’Oreal Infallible Pro-Matte Foundation ($10.97, Walmart), Marc Jacobs Re(Marc)able Foundation ($56, Sephora), and Revlon ColorStay Whipped Creme Foundation (discontinued). The Revlon one in particular, if you can still find it anywhere, is AMAZING – it literally looks BETTER the longer you wear it!


CONCEALER & POWDER

img_7728

Photo Credit – Google Images

I’ve probably tried hundreds of concealers over the years – I’m not even exaggerating. And I’ve probably only been truly satisfied with a handful of them. Concealer is one of my desert island items – I need it to stay put, not oxidize, not crack, not settle, not cling to dryness. Most of the time, I’ll spot conceal where I need to and call it a day; like I said, I HATE feeling a full face of makeup in the summer. One of the concealers I’ve had the best luck with is the Ulta Full Coverage Liquid Concealer ($9, ULTA) – it’s got a pretty decent shade range with warm, cool, and neutral undertones, and good-for-skin ingredients like aloe, chamomile, and tea tree that help to heal as it conceals. Plus the wear time is pretty impressive – I’ve gotten a solid 9 hours without having to touch up. And while we’re on the topic, their color correctors are pretty great, too!

Some other great ones for long wear are the Tarte Shape Tape Concealer ($27, ULTA) and of course, MAC Pro Longwear Concealer ($25, maccosmetics.com). Though I’ll say this; there’s something in the Tarte one that breaks me out, and it DOES oxidize a little bit (plan to go 1 shade lighter if you’re trying to match your skin tone) but it’s SUPER matte and long wearing – it really takes a lot to get this concealer to budge!!

img_7729

Photo Credit – Google Images

In terms of powders though, there are only 3 that have every really impressed me, and for different reasons. The Coty Airspun Loose Setting Powder ($5.97, Walmart) is great for baking on a budget – you get a lot of it for a little bit of dough (get it? Dough? Baking? OK, I’m done…), and since it’s SO inexpensive, it’s not one of those powders that you have a mini-stroke every time you look down and see all the product that just fell off your face. I hate baking with an expensive powder because I know that like, 95% of it is just going to get dusted away. But if you’re just looking to set your makeup in place, stay matte, and blur your pores to porcelain doll status, then iT Cosmetics Bye Bye Pores Loose Powder ($29, Sephora), or it’s drugstore cousin NYX HD Setting Powder ($5.79, Target), are the sh*t! With a brush or a damp sponge, they both apply like a dream, and I promise you you’ll never feel your skin so soft as with one of these little babies. Beware of the NYX one though, to make sure you very thoroughly dust off any excess – that one can flash back pretty viciously in photos!


BLUSHES, BRONZERS, & HIGHLIGHTS

Ok, so this is where things can get a little dicey – because these are usually some of the first things to break down and fade away on a hot day. I don’t know about you, but my face will literally EAT these products; they’re freshly applied and looking fabulous, and then 15 minutes later I look like someone finally unzipped the forgotten body bag – no bueno, yo. While your prep, base, and application are all still SUPER important, so are your products!

img_7730The Tarte Amazonian Clay 12-HR Blushes ($29, ULTA) are great for beating that mid-day fade. I know, I know, I said that Tarte products tend to break me out. Listen, sometimes you gotta take one for the team. Another great option are the Morphe Blush Palettes ($22, morphebrushes.com) – these things are CRAZY pigmented! And they last! I remember when I first bought my 9B palette, and I was in love. But then, they dropped the 9N palette….a little more natural in terms of shades and finishes, and probably my favorite of the two. Hell, at that price, buy them both!

Bronzers and I tend to have a love/hate relationship. I like a neutral bronzer. Something not too matte but DEFINITELY not shimmery. And it was always a struggle to find the right one. But some years ago, L’Oreal dropped their Glam Bronze ($9.99, buymebeauty.com) line, which are 3 shades (light, medium, and dark) that have a beautiful, healthy sheen – no detectable glitter anywhere. Since then they’ve renamed it a few times, but the formula remains the same from what I can tell! No fade out here!

So I have sort of an unconventional highlighter here that will absolutely beat the heat. Hear me out – Ulta Tinted Eye Primer ($12, ULTA) in Champagne. YUP! So I got this as a freebie with something – might have been a gift with purchase, I don’t really remember. But I tossed it aside, until one day I was cleaning out my kit, and swatching things, and you guys….this is just beautiful. Such a pretty universal shade. Shimmery but not glittery. And then I tried to wipe it off, and it would. not. budge. It ultimately took some coconut oil and a little light scrubbing to remove it. So now, when I want a pretty glow and I need it to stay put, I apply a little with a small beauty sponge, and it’s just so gorgeous. If you wanted to amp it up some more, just apply your favorite powder highlight over it while it’s still tacky – it IS a primer, after all!!


SHADOW, LINER, & MASCARA 

Typically in warmer weather, I tend to forego any eye makeup, but if you’re someone that feels your look isn’t complete without it, or maybe you’re attending an event, then you’re gonna wanna pay attention here!

img_7731

Maybelline Eye Studio Color Tattoo ($3 and up, Walmart) shadows and Revlon ColorStay Creme Eyeshadow’s ($4.99 and up, Walmart) are some of the best around. They go on beautifully, come in plenty of colors to suit any look you’re creating, and they don’t fade, crease, or smudge. I would advice to work quickly though, as they do dry down and set REALLY fast! But once they do, they’re not going anywhere!!

So whether you need a touch of liner to maximize your eyes, or you like a little wing action (or a lot!), I’ve got some reliable lines that have yet to disappoint. One is another Maybelline product (what? They’re sooo good!) – the Maybelline Eye Studio Gel Liner ($7.49, Target) (my fave is the shade ‘Blackest Black’). But if you prefer a liquid, the Kat Von D Tattoo Liner ($20, Sephora) and the NYX Epic Ink Liner ($9, ULTA) are both totally summer resistant! And between you and me, the only difference I can spot between the KVD and NYX is the price!

Mascara is one of those finicky things that while one works for one person, it may not work for another. I’ve tried so many different mascaras over the years. Only one has really left me impressed in both application and longevity – the Maybelline Volum’ Express Pumped Up! Colossal Volume Mascara ($6.79, Target). I actually never tried the waterproof version of this because the regular one wore so well for me with no smudging, smearing, transferring, or flaking that I never felt the need to stray. But the big, fat, full brush and Maybelline’s notoriously not-too-wet, not-too-dry formula are like the absolute best combination. You get full, fluffy lashes with great separation, but you can always comb through with a clean spoolie if you feel like you need just a little more. Guys. Put this down right now and GO BUY IT.

And if you want details on how to heat-proof your brows, check out my updated brow routine here, which is full of tips, products, and everything you need to keep them in place all day!!


Feel free to comment below with some of YOUR favorite heat-proof products! I’m always looking for feedback from you guys!
Come follow me around social media!
Facebook : Affordable Gorgeous
Snapchat & Instagram : dlynnsaunders
XOXO,
img_7250

REVIEW – IT COSMETICS BYE BYE PORES

 When you’re a seasonally (or year-round) oily gal like me, you need a good translucent, loose powder in your collection.

Hell, everyone should have one.

For setting, baking, blending, what have you; you need a good powder. And for a long time I relied on my Mary Kay Translucent Loose Powder (which I still love!) but when I got a peek at ULTA’s ’21 Days of Beauty’ ad, I immediately spotted this:

The It Cosmetics Bye Bye Pores Silk HD Anti-Aging Micro-Powder ($24 regular retail, I paid $12). I was immediately drawn to the claims; seriously, like a freakin’ moth to a flame:

What is it : An award winning anti-aging, face finishing powder that delivers a face-perfecting airbrush effect. It absorbs oil and shine, and blurs away the look of pores, without settling into lines and wrinkles. It sets makeup and helps to diffuse the appearance of wrinkles and pores instantly.

Who is it for: Anyone who wants anti-aging benefits and wants to instantly blur away the look of pores and imperfections, diffuse the look of lines and wrinkles on the face, and achieve a more radiant looking, flawless and air-brushed looking complexion.

Why is it different: Developed with leading plastic surgeons, and using anti-aging ingredients including hydrolyzed collagen, and vitamins A, C, E & K, this award-winning micro-finishing powder helps treat skin with anti-aging benefits and give a more youthful radiance while blurring away the look of imperfections. Translucent and colorless. Formulated without talc, parabens, sodium lauryl sulfate mineral oil, petrolatum, synthetic fragrance, and phthalates.

Did you know that once you hit 25, you’re considered to have mature skin?! Dude….I’m 29….and a half…..oy.

Let’s get started!


PACKAGING


 When you open the small, matte black box with the product name printed on the outside, you find your typical small, round container with a twist-off top. Inside is a sticker over the sifter, traditional of loose powders. The top is black, the pan itself is a slightly opaque, white plastic. It does come with one of those little powder puff things, but I tossed it. I prefer to apply this with a brush.

FORMULA


 This translucent powder actually appears to have the palest yellow hue, however it doesn’t show on the skin. It’s incredibly finely milled, probably the finest powder I’ve ever seen.

APPLICATION & WEAR


 My favorite way to apply this, whether its over foundation, concealer, or on it’s own for a smoother appearance to my bare skin, is to tap a very small amount into the lid, and apply it with an e.l.f. Powder Brush (the flat-top one), pressing it into the skin before buffing it out.
One of the most notable qualities of this powder is that it doesn’t not cling to or accentuate any dryness on my combination skin. Almost every single powder I own grabs onto the dry patches around my nose or between my brows, and highlights it like a neon sign in a bar window. Not this one.
It blurs out my large pores; it doesn’t totally eradicate them, but it definitely makes them far less noticeable. It also glides over those pesky little lines under my eyes without settling into them and making them look like the Grand Canyon. Much appreciated.
I’ll be totally honest; now that I’ve had the opportunity to try this at 50% thanks to ULTA’s month-long sale, this is something I would totally pay full price for! It’s worth every penny!!

Overall Rating : 5/5


Considering I tend to steer clear of most powder products for fear of the Sahara-like finish they tend to leave behind, I’m very, very impressed with this particular powder! This is something that is totally worth the price tag!
ULTA’s ’21 Days of Beauty’ is a fantastic time to grab some of your high-end lusts at almost drugstore prices!
Have you guys done any ULTA shopping during this event? What did you pick up? Have any of you tried this powder? Leave me a comment and let me know! I love to hear from you!

Come follow me around social media!
Twitter, Pinterst & Instagram : @dlynnesposito
Facebook : Affordable Gorgeous
Snapchat : dlynnesposito

Please feel free to reblog this post and share my social media with your friends! Your support means so much!

LOTS OF LOVE!!
img_9363-2

JANUARY 2016 FAVORITES

Is it me, or does it seem like this month went by way too fast?!

In any event, it’s time for my January Favorites! Below, I’ve compiled a list of the things I’ve been loving this month (like every month) and I want to share them with you! Who knows, maybe you’ll discover some new faves of your own!

Let’s get started!


MORPHE M173 MINI BUFFER ($4.99)

img_9627I received this brush in my January Morphe Monthly Brush Club package, and I haven’t been able to stop using it! It’s intended to be an eyeshadow brush, but you guys….it is the most unbelievably flawless concealer brush!! It’s like a baby M439!! All of your imperfections blend away like magic with this brush! I’ll be ordering a few more to have as backup. Like, right now…hold on…..ok, all set!

L’OREAL COLOUR CARESSE WET SHINE STAIN ($9.79)

img_9862These are hardly new. But if you’d like to read the review on them, click here. I used them religiously when I first bought them, but eventually they disappeared somewhere in the land-of-the-lost-lippes. I managed to rescue them right around the first week of the month though, and since then I have been wearing the shade ‘Lilac Ever After’ on an almost daily basis! It’s the most beautiful mauvey, every day shade, and it stays put! And recently they were marked down 50% in my local CVS, so check yours if you wanna try them – at that discount, they’re less than $5!

ALMAY CLEAR COMPLEXION OIL FREE CONCEALER ($8.49)


 You guys know my love of concealer. This one treats breakouts (it contains Salicylic Acid), has coverage that rivals my holy grail, high end concealer (dupe post coming? maybe!) and doesn’t accentuate my dry patches! The only downside is that it only comes in three shades; light, light medium, and medium. Light works perfectly for my fair skin tone, however this probably isn’t the product for someone with deep skin. I’m sorry!!

LORAC PRO CONTOUR PALETTE ($45)


 I know, it’s not the most affordable thing in the world. I don’t necessarily love this for the contour shades (they’re a little warm for my fair skin) as much as I do for the highlight shades. The beige and banana powders are great for the under eye area, and the shimmer highlight in the palette is the most natural looking, glowy, dewy finish I’ve ever seen. The palette itself has a variety of tones which I can use when freelancing, and as a bonus it came with a brush, which is a little too dense to use with such a pigmented palette, but I love it with other contour products I have!

L’OREAL VISIBLE LIFT BLUR BLUSH ($12.99)


 Since winter is in full swing here in New England, I’ve been trying to scale back on the powder products for the sake of my lizard-like dry skin. This somehow got lost in my collection, so when I found it, it was like using it for the first time all over again! It’s a super natural looking peachy pink cream blush (I have it in the shade Soft Peach) that comes in a nice, sanitary squeeze tube, and the formula contains ‘Blur Technology’ to help you look young and fresh! For the most natural look, try applying your cream blush BEFORE your foundation – a neat little trick I picked up awhile back!

MARY KAY TRANSLUCENT LOOSE POWDER ($16)


 I’ve been using this lately to set my makeup, and even to bake with. And I can’t stop! This powder….is probably the only powder that doesn’t accentuate my flaky, dry skin. And it contains the itty-bittiest light reflecting particles that make you look like you’re walking around with photo-shopped skin all day long! It blurs aways imperfections and fine lines, it keeps my concealer from creasing, it’s brightening – it’s absolutely amazing!


What are some of your favorites from this past month, or in general? Have you tried any of these products?? Leave me a comment and let me know!

And please take a moment to go follow me on Twitter and Instagram @dlynnesposito, and give a like to the Affordable Gorgeous page on Facebook – your support means so much to me!

LOTS OF LOVE!
img_9363-3

THE BAKING METHOD : WHY TO, HOW TO, & WHAT TO USE!

 I know you’ve all heard of ‘baking’ or ‘cooking’ your makeup – no, no, don’t preheat the oven. Let’s chat!

‘Baking’ or ‘cooking’ can do wonderful things for your makeup – it can clean up a sloppy contour, lock in your concealer, and keep you flawless from sun up to sun down. But it can be a little tricky, and messy, so don’t worry, we’ll get through all of it today, together!

Let’s get started!


WHY TO…

Baking isn’t a new thing – it’s been around for years in the drag community (so that’s how they look so damn amazing!) but it’s one more technique that Kim Kardashian and many other celebs, not to mention YouTubers have brought front and center. It basically helps to lock in your concealer for a crease-proof, budge-proof finish, and it helps in highlighting your face as well. Most of us, on a daily basis, tend to just finish off our look with a dusting of translucent powder all over the face – well, this is a little more involved than that – but not by much! Stick with me here…

HOW TO…

So basically, what you’re going to need is a translucent powder (preferably loose but pressed will work in a pinch), as well as either a damp sponge, or just a good semi-dense brush. I prefer a sponge, because since I’ve been so dry lately, I feel like the hydration of the sponge helps the powder not suck the remaining little bit of moisture from my skin.
This step is for after you’ve applied your foundation, concealer, and contour, but before you highlight with say, a shimmery highlighter.


 So I’ve already contoured, applied my under eye concealer, and now, we’re gonna bake! Dip your sponge into your loose powder, and tap it on in a thick layer under your eyes in an upside down triangle shape (just like your concealer), underneath your contour line, down the center of your nose, on your chin, and anywhere else your foundation and concealer may tend to crease. It’s gonna look like flour, and that’s perfectly fine, it’s supposed to!


 And now we wait….about 5-10 minutes, but the longer the better….

Ok I only waited like 8 minutes….now just take a fluffy brush and dust it away. And voila! You’ve baked!


WHAT TO USE…

img_9552Just as important as the technique is, so is using the right products and tools. If you can find an ‘HD’ loose powder, go for it! The NYX HD Studio Finish Translucent Powder ($10) is a great option, as is the e.l.f. High Definition Powder ($6). I’ve been using my Mary Kay Translucent Loose Powder ($12) lately, and I really love it – not only does it bake well, but it has these itty bitty light reflecting particles in it that makes my skin look naturally airbrushed. img_0018

IMG_9194In terms of tools, you can use a damp BeautyBlender ($19), a Real Techniques Miracle Complexion Sponge ($8), or even a good pointed contour brush like the Morphe M438 ($10) to apply your powder – all three work wonderfully! Even the old school foam cosmetic wedges from the dollar store work great – their nice, sharp edges are awesome if you’re baking to clean up your contour!


I hope you guys found some helpful information in this post! Have you tried baking/cooking your makeup? What do you think of the technique? Leave me a comment below and let me know! I love to hear from you guys!

And as always, please take a moment to go follow me on Twitter, Instagram, and Pinterest @dlynnesposito, and go like the Affordable Gorgeous page on Facebook! Your support means so much!

LOTS OF LOVE! 

img_9363-3

DRUGSTORE FOUNDATION ROUTINE


A national study, commissioned by Neutrogena, has suggested that American women expect their cosmetics to deliver flawless skin and sun protection, over fashion-forward colors. Read the whole article here.

I must be one of the women that falls into that category, because I would totally choose flawless skin over anything else, any day of the week. If I could have it naturally, that would be wonderful. But since I don’t, I fake it with foundation, concealer, powder, etc., as do many of us.
So today, that’s exactly what we’re doing! This is going to be a simple tutorial, just on how I achieve the base of my face – no eyes, lips, brows, nothing like that. This is simply foundation, concealer, powder, and maybe I’ll throw in a little natural contouring.

So let’s get started!


img_9596First things first, I typically start with a primer. Depending on my needs, I use different products to prime. If I’m oily, I reach for the Revlon PhotoReady Perfecting Primer – if I’m dry and dull, I tend to go for my L’Oreal Magic Lumi Light Infusing Primer – which is what I’m using today. After cleansing and moisturizing (super important if you want your makeup to look F-L-A-W-L-E-S-S!) I apply my primer and give it a few minutes to really absorb into my skin.
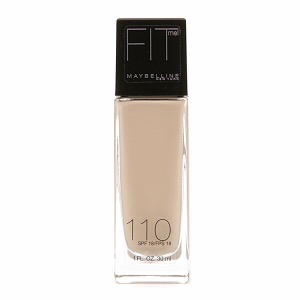
 

 Next, you want your ride or die foundation – something that you know is your perfect color match, the coverage that you want and/or need. On days that I need really full coverage, I grab my Revlon ColorStay Liquid Foundation – this stuff with cover EVERYTHING. But today, since I really just want a nice, light to medium coverage, I’ll be using the Maybelline Fit Me Foundation, and I am in the shade 110 Porcelain. I’ll be applying it first with my Real Techniques Expert Face Brush, and then going over my dry spots (cheeks, sides of my nose, forehead) with a damp sponge, just to make sure that the foundation isn’t clinging to any dry patches, and really just infuse as much hydration as possible.


 Now, for concealer – I’ve been super dry under my eyes lately, and I’m also battling a hormonal breakout (thanks a lot, Aunt Flo!) so I’m using two different shades of the same concealer. Under the eyes, I’m using the Maybelline Face Studio Master Conceal in the shade ‘Light’ because it has a slightly yellow undertone to it, which is great for my dark circles, and the shade ‘Fair’ for concealing blemishes and highlighting. This concealer is super creamy, which means it will crease if not blended and set properly, so I’ll blend it out with a damp beauty blender and set it with my NYC Smooth Skin Loose Powder in Translucent, using my Morphe M438 brush. Be careful not to get any powder on your cheeks or forehead for the next step.


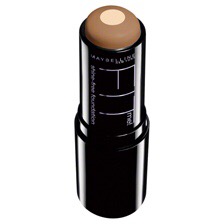
 Next we’ll do a little cream contouring. I like cream contouring (especially on dry skin) because it looks so incredibly natural. All you need is a foundation or concealer a few shades darker than your skin tone, so I’m using the Maybelline Fit Me Stick Foundation in the shade 355 Coconut – it’s the darkest shade they offer, but also the most neutral/least warm. I simply draw a line from the top of my ear diagonally down toward the corner of my mouth, but going no further than the tail of  my brow, and a few lines on either side of my forehead right above the brow, and start blending – since it’s so dark, I blended it out with my foundation brush, but with no additional product on the brush – I only used the leftover to blend it seamlessly into my skin.


From here, you can go ahead and finish your makeup the way you normally would! I just added a little blush, mascara, filled in my brows (if you want to read my brow tutorial, click here) and added a lipstick/gloss.

What are your favorite foundations and concealers? Leave me a comment and let me know!

And please take a moment to go follow me on Twitter, Instagram, and Pinterest @dlynnesposito, and like the Affordable Gorgeous page on Facebook!

LOTS OF LOVE!!

img_9363-2

TOP 5 UNDER-RATED BEAUTY PRODUCTS

 There are a lot of beauty products out there on the market. I mean A LOT. And when you’re standing in front of a seemingly endless array of them in your local drugstore or Walmart or Target or ULTA or Sephora, it can be insanely overwhelming.

My personal little trick is to make a list of what I’m looking for ahead of time, otherwise I’ll either leave with NOTHING but anxiety, or a whole mess of stuff I probably didn’t want or need in the first place.

But there are some products that tend to be overlooked, or highly under-rated. So I’m here today to bring you some of MY favorite under-rated beauty products!  Let’s go!


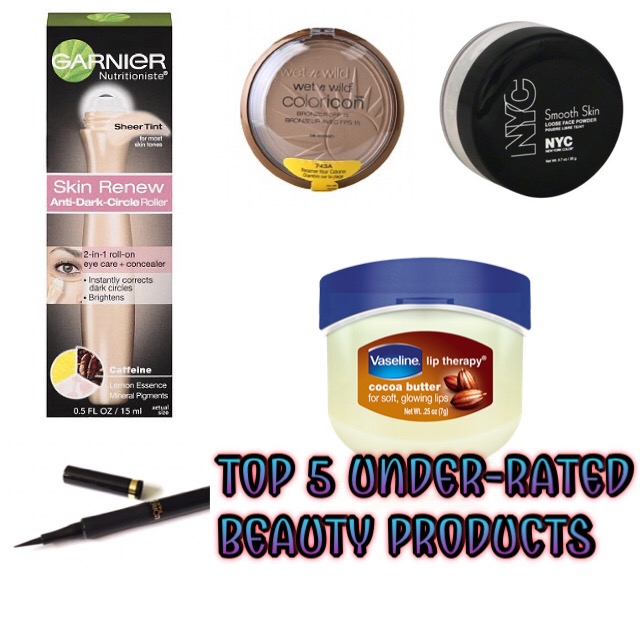
GARNIER NUTRITIONISTE SKIN RENEW ANTI-DARK CIRCLE EYE ROLLER ($13)

 For my 27th birthday my sister made me a bag of anti-aging products (wise ass). This product was in there, and at first glance I was like ‘I’m only 27, I don’t need this stuff!‘. Well hold on a minute. This isn’t your typically eye roller. It’s tinted, so if you fall into the fair to light category, it’s basically a really nice, sheer concealer that can not only be used on the under eye area, but for that hormonal redness on either side of your nose, or to tone down a blemish that reared its ugly head in the overnight hours. If you’re more light to medium, it’s a great, subtle, every day under eye highlight, because it’s just enough to brighten that area without being all WHOA! It contains lemon essence, caffeine, and mineral pigments, which help to depuff and brighten the under eye area while nicely concealing any darkness.

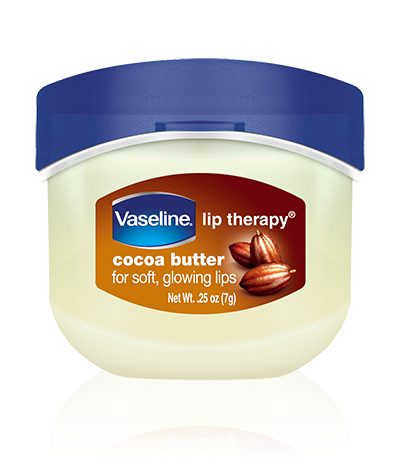
VASELINE COCOA BUTTER LIP THERAPY ($4)

 You might be thinking ‘this is under-rated? I’ve been using this forever!’, but hear me out. I have a bunch of these – when I saw they were making little ones, I ran out and bought one of each – the original, the cocoa butter, the creme brûlée, and the rose tint one. But lately I’ve been using the cocoa butter one at night ON MY LASHES! Now I’m still testing this one out, but it’s been about 2 and a half weeks, maybe 3 weeks now, and I’ve noticed my lashes are growing longer and thicker, and I’ve had no more lash breakage and shedding like I had been seeing for quite some time. I’ve also been removing my mascara with coconut oil, so I’m sure that helps too. I’m going to give it another couple of weeks and then I will most certainly be updating you on whether or not it’s working for sure! I just take a very small amount (like what you apply to your lips) and warm it up on the back of my hand, and work it into my lashes right before bed. So far, so good!

WET N WILD ICON COLLECTION BRONZER in RESERVE YOUR CABANA ($3)

This is actually NOT a bronzer. It has no bronze pigment whatsoever. But it IS an absolutely beautiful HIGHLIGHTER. I’ve seen it swatched next to theBalm Mary-Lou Manizer Highlighting Powder and to be quite honest I can’t tell the difference. For $3 you get a GENEROUS amount of product. For how little you really need to use, it will take you a very long time to hit pan. I’m a die hard fan of Hard Candy So Baked Bronzer in Tiki ($9) for highlighting, but lately I’ve been reaching for the Wet n Wild more. It’s not too white, not too gold, it’s somewhere in between, and it’s great for every day use.

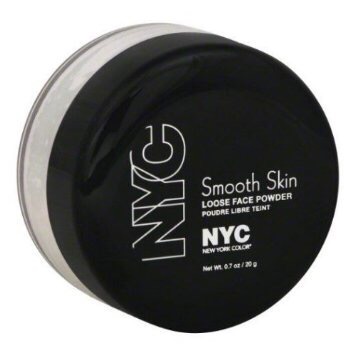
NYC SMOOTH SKIN LOOSE FACE POWDER in TRANSLUCENT ($3)

 This is for sure used for more than just setting your makeup or keeping shine at bay. By now I’m sure we’ve all heard of the terms ‘baking‘ and ‘cooking‘ when it comes to our makeup. It’s far from a new thing – it’s been around for years in the drag community. But if you’re familiar with highlighting and contouring at all, then let’s just refer to it as highlighting on steroids. Basically what you do is take a translucent loose powder like the NYC brand (you DO NOT need anything super expensive for this) and a damp makeup sponge like the Real Techniques Miracle Complexion Sponge ($6), and apply a thick layer under the eyes, down the center of your nose, or under your contour (along the top of your jawbone), to set, highlight, sharpen, and seriously define those areas to make them POP! Just let it sit for about 5 minutes, and sweep it away carefully with a fluffy brush. Done!

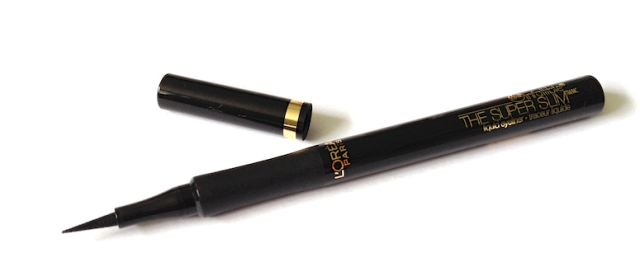
L’OREAL PARIS INFALLIBLE THE SUPER SLIM LIQUID EYELINER ($9)

 I’m not generally one for eyeliner. I may whip it out for special occasions, but that’s pretty much it. Maybe it’s because I’ve always struggled with applying it so I didn’t look ridiculous. And I’ve tried them all – pencil, kohl, liquid, gel, everything. This is pretty much the only one, out of the 40 some odd eyeliners I own that I actually enjoy using. And I NEVER see or hear it talked about on Pinterest, YouTube, other blogs, anywhere. It’s a liquid liner in pen form, with a super slim (duh) fine point applicator. It’s blacker than black, dries matte, stays put, and SOOOO easy to use! Thick lines, thin lines, barely there wing, full blown cat eye, this little liner has you covered! If I can do it, ANYONE can do it!


Have you guys tried any of these? Or do you have some under-rated favorites of your own that you could recommend? Leave me a comment below!

And as always, go follow me on Twitter and Instagram @dlynnesposito. There’s some exciting stuff coming that you won’t want to miss out on!

LOTS OF LOVE!!

XOXO – DONNA