If you’ve been with me here awhile now, most of you know that my skin isn’t specific to one type; it’s seasonally temperamental. No, it’s downright sassy.
In the winter, I’m dry and flakey; in the summer, I look like a greased chicken – and in the spring and fall, I tend to relate best to the combination category. I swear, there’s no happy medium!
With the fluctuating temperatures that accompany New England living in the late winter and early spring, my dry winter skin is starting to produce more oil by the day, specifically in the t-zone. So naturally, I’ve had to adjust my foundation routine to accommodate it, and that’s what I’ll be sharing with you today!
This tutorial is for those of you with skin similar to mine, or oilier even, that want a medium to full coverage, but still want a natural look and lightweight feel!
So if you want to know what I use and how I achieve this look, keep on reading!
First things first, as always, you want to start with freshly cleansed and moisturized skin. I have had to adjust my skin care routine, and if you want an updated skin care routine, don’t worry! It’s coming!
Once your skin is clean and hydrated, you’ll want to apply a primer. I have larger pores and some deep, pitted acne scarring to cover, so what I do is use Fruit of the Earth 100% Aloe Vera Gel ($4) all over my skin first, to hydrate more, control my oil, and tighten my pores, and also sooth any sort of redness I have going on. Once that’s sunken into my skin, I apply my trusty Revlon PhotoReady Perfecting Primer ($14) to any areas that I want to smooth, which is primarily the pores in my t-zone and immediately on either side of my nose. Let that absorb for a minute or two.
Next I go in with my foundation, and lately I’ve been loving the L’Oreal Infallible Pro Matte Foundation ($13). It’s long wearing, medium to full coverage, and a nice, natural looking, demi matte finish. The best part is that it doesn’t break apart on me during the day, and any oil that makes it through my primer doesn’t make me look oily, just dewy and glowing (come back tomorrow for the full review!!). I fall in between shades 101 and 102 (Classic Ivory and Shell Beige) so I tend to mix 2 parts Classic Ivory to one part Shell Beige, and it matches me perfectly. I don’t self tan in the winter, and my neck is pretty pale, so I always match my foundation to my neck.
After mixing, I dot the foundation on my face starting in the center, where I tend to need the most coverage, and stipple it all over with a Sigma F80 Flat Top Kabuki Brush ($24) (dampened with a little spritz of the MUFE Mist & Fix ($30)) before buffing in circular motions and blending it out from the center of my face.
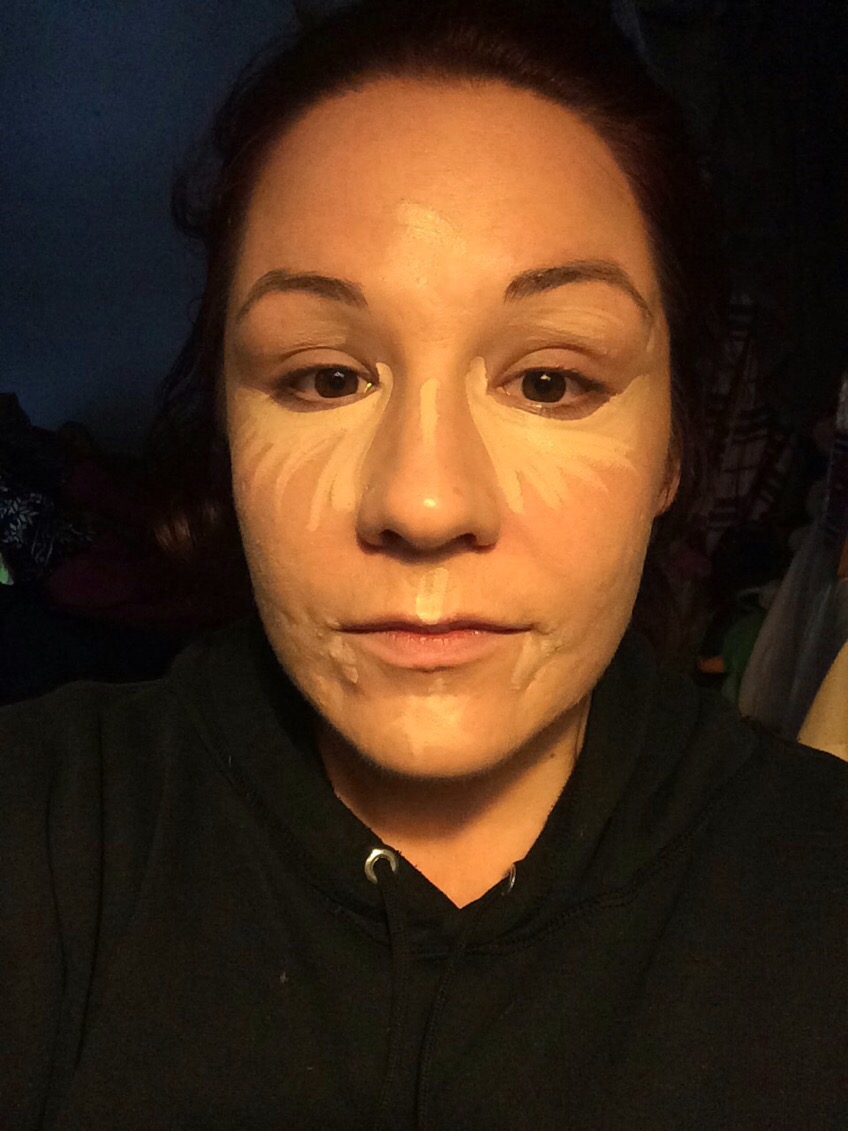
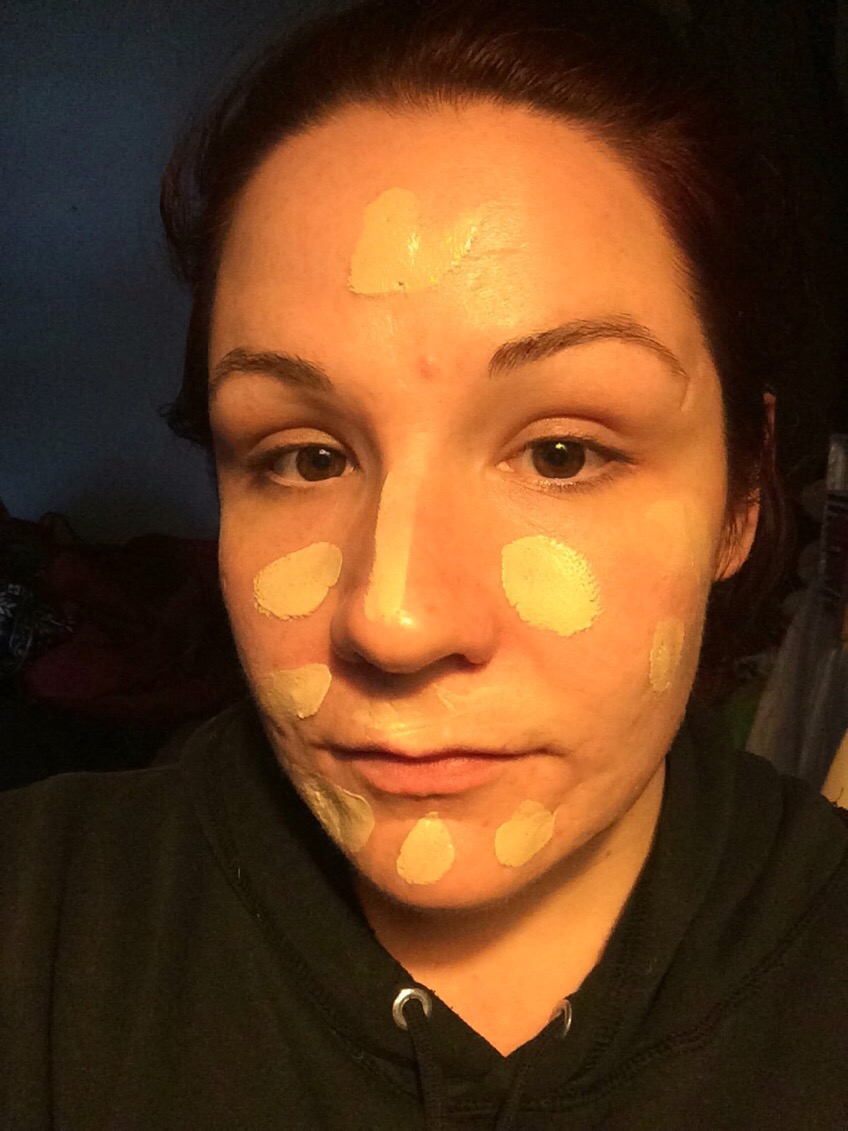
Because the foundation is so high coverage, I find I need very minimal concealer. I do have a lot of darkness on the inner corners of my eyes, so for that I really love the NARS Radiant Creamy Concealer ($29) (I wear the shade Vanilla) because it’s brightening, light reflecting, and full coverage. I dab a little on the inner corners, drag it down the side of my nose, and feather it out in an upside down triangle shape under my eyes, making sure to extend it up towards my temples to give a lifted appearance to the face. Then I blend it out with a damp sponge like the Real Techniques Miracle Complexion Sponge ($7), making sure to tap it out really, really well. To balance the highlighted under eye area, I usually put a little in the center of my forehead, down the center of my nose, on either side of my nose, the cupids bow, and the chin, as well as any blemishes I may have to cover.

Then I immediately set all of my concealer with a yellow powder and a Morphe M438 ($10) brush; I go back and forth between ‘Banana’ from the Anastasia Beverly Hills Contour Kit ($40) and ‘Lyric’ from the Kat Von D Shade + Light Contour Palette ($46). (If you’re looking for a good yellow powder but don’t want to (or can’t afford to) buy a whole kit, the ‘Banana’ shade is sold in refill pans here for just $14!) When I set my under eye area, I always make sure to tap the powder in back and forth motions to make sure I’m not setting any creases in my concealer. I mean, I’m turning 30 this year, so it happens.

Now you can go ahead and set the rest of your face with any translucent setting powder (I use the Mary Kay Translucent Loose Powder ($16)) and a fluffy brush. Because you’re likely going to apply bronzer, blush, contour, and highlight, I find that all of those products (presuming you’re using powders like me) blend much more smoothly over powder. If you don’t set your foundation and go over it with your bronzer and blush, it can look very patchy.
Now that my foundation is on and set, it’s time for bronzer, because we need that warmth and dimension back to our skin. I’ve been reaching a lot for my Rimmel Natural Bronzer ($5) in ‘Sun Light’, which is a totally matte bronzer that has a little warmth, but nothing overwhelming on my pale skin, and applying it with a big, fluffy Morphe M140 ($13) brush – and when I say big, I mean big! This thing is literally the size of my face! I like to focus the bronzer on the perimeter of my face, and keep the center where I highlighted nice and bright.
And of course, the final touches – blush, contour, and highlight, because well….I can’t do anything minimally! For blush, I’ve been loving the L’Oreal True Match Blush ($9) in ‘Innocent Flush’ on the Real Techniques Blush Brush ($9), and applying it just behind the apples of my cheeks – I feel doing it this way makes my face look slimmer and more lifted.
For my contour, I’ve been crazy about the Makeup Geek Contour Powders ($10) in ‘Breakup’ and ‘Infidelity’ with a NARS ITA ($55) brush, mixing the two shades for the perfect natural ‘shadow’, and applied just under my cheekbones, the temples, the sides of the forehead, under the jawline, and a little tiny bit down either side of my nose.
And finally, taking my Morphe M501($8), I apply a little bit of the BECCA Shimmering Skin Perfector Pressed ($38) in ‘Opal’ to the tops of my cheekbones, the bridge and tip of my nose, and the cupids bow. Finally, I set everything with a light layer of Urban Decay Chill Makeup Setting Spray ($30).
And that’s it, all done!
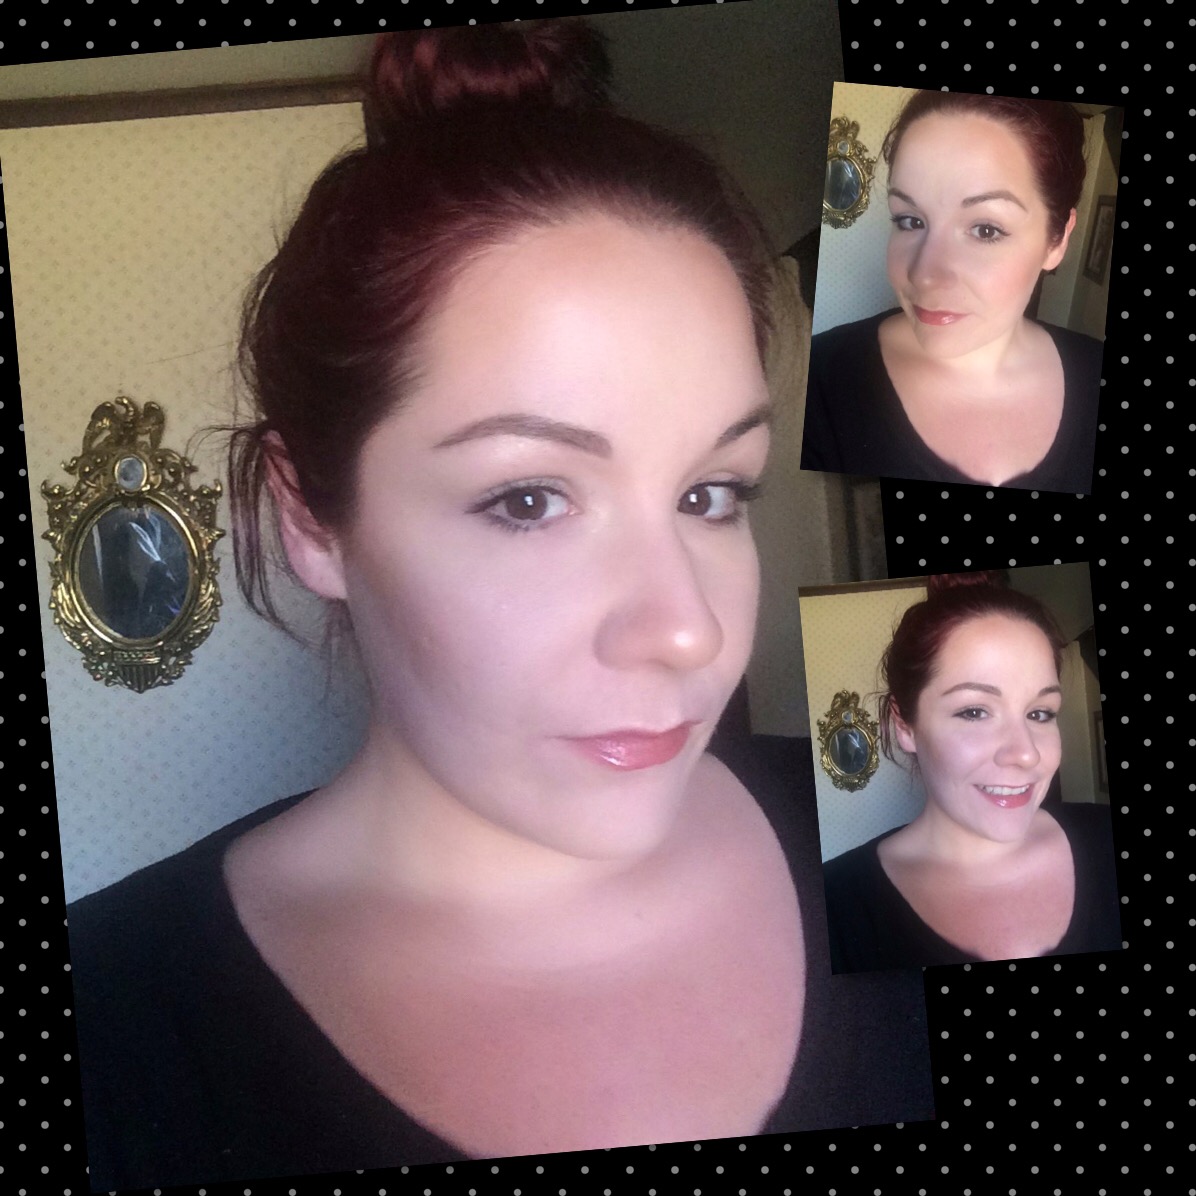
From here you can literally take your look anywhere. This is just the base; you can add a smokey eye, a red lip, a bold winged liner, or a touch of mascara and some gloss, it’s all up to you! But this is my current, everyday, go-to foundation routine! I hope you enjoyed it!
What kind of products are you loving lately? Leave me a comment and let me know!
Come follow me around social media!
Twitter, Pinterest, & Instagram : @dlynnesposito
Facebook : Affordable Gorgeous
Snapchat : dlynnesposito
And feel free to reblog this post and share my social media with your friends! Your support means so much!
LOTS OF LOVE!!