TOP 10 BEAUTY BUYS UNDER $10

  I love a bargain – that’s no secret.

O.K. – I’m cheap. I like a lot of bang for my buck, but I don’t like to spend a lot of bucks to get all the aforementioned bang.

I’ve been working on this for awhile, because you guys should know by now that I will NEVER recommend products that I don’t 110% believe in. So today I bring you my top 10 beauty products under $10!

Let’s get started!


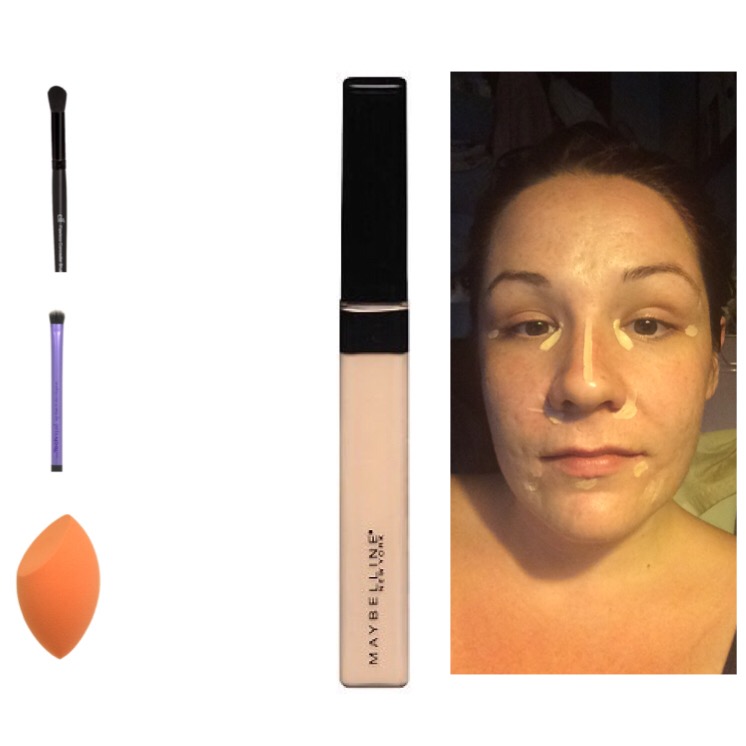
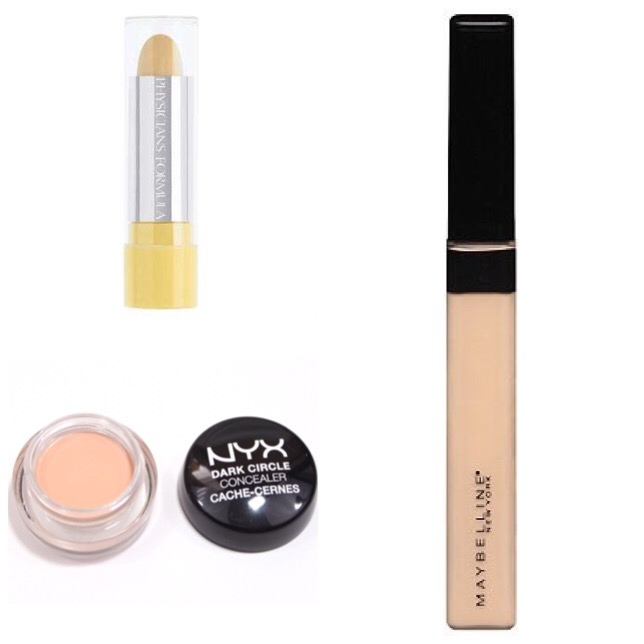
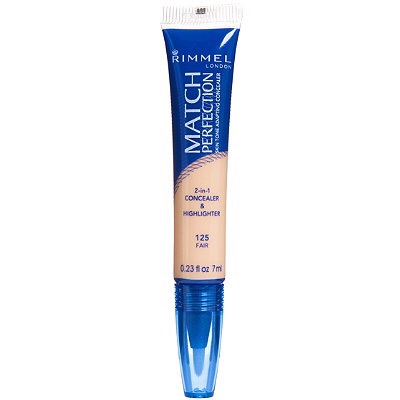
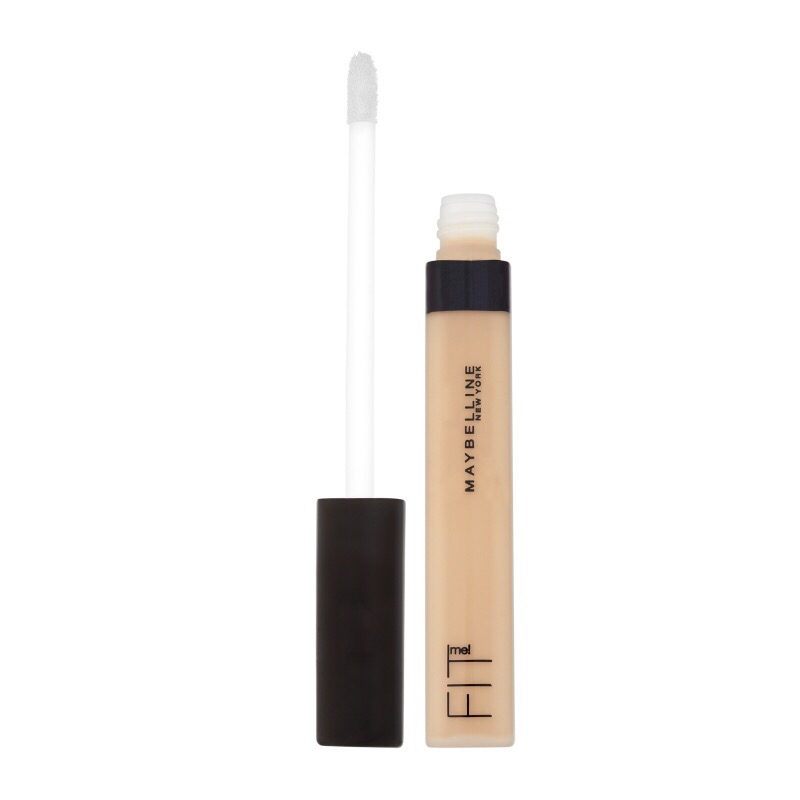
 MAYBELLINE FIT ME CONCEALER – $6.99 at ULTA


  I think you guys already know how much I love this concealer – it’s my Holy Grail, my ride or die. I have high expectations when it comes to concealer, because ideally I want one product that works on my dark circles, my blemishes, as a primer for my eyeshadow, everything. And this concealer delivers 100 times over!

It’s creamy, lightweight, blendable, neutral in tone, doesn’t oxidize, and is a solid medium to medium/full coverage. It comes in 6 shades, which are not only great for concealing, but cream contour and highlighting! It’s easy to blend out with your fingers, a brush, or a damp sponge. It just does it all.

NYX COSMETICS DARK CIRCLE CONCEALER – $5.99 at ULTA


  As I mentioned above, I generally don’t like to have to use multiple concealers, mainly because when I toss one in my bag for the day, I’d like it to be just ONE. But sometimes, like it or not, we all need a little color correction under the eyes. I’ve actually totally ditched my usual yellow stick concealer for this stuff! This is creamy, peachy toned, and it hides dark circles so well you can’t even tell that it’s there. Be sure to set it with some sort of powder though, because it’s so creamy it WILL crease! This comes in 4 shades, fair, light, medium, and deep.

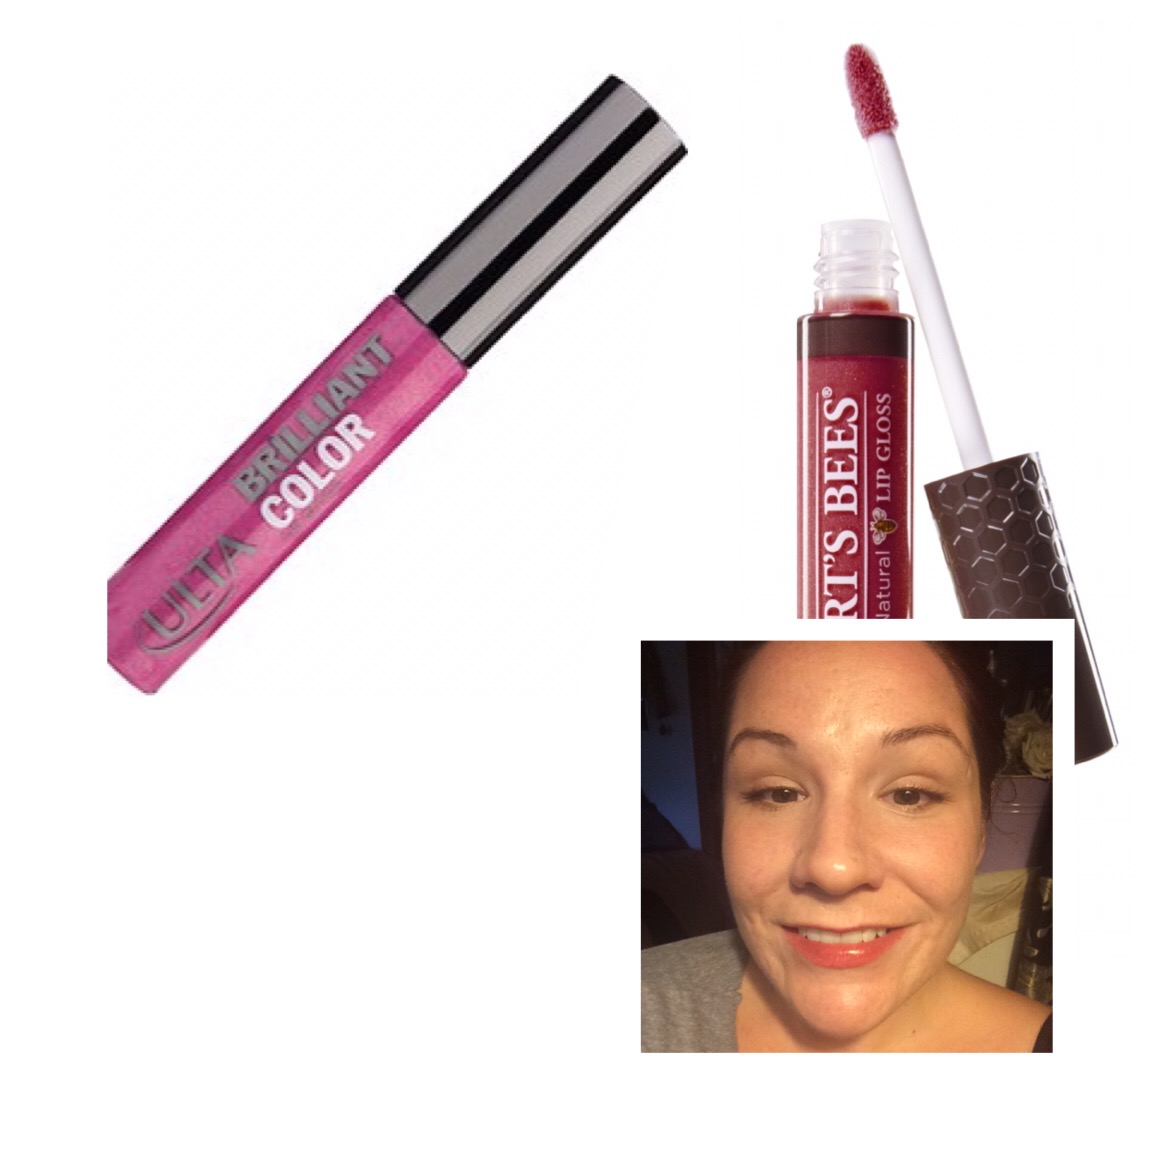
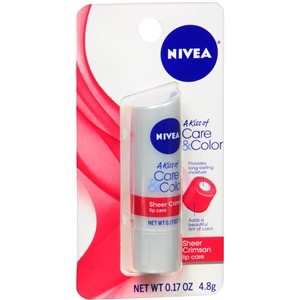
NYC SMOOCH PROOF LIQUID LIP STAIN in ON EVERYONE’S LIPS – $3.49 on AMAZON


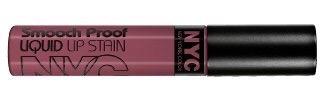
 For a long time I was on a lip stain kick – I wanted to find that perfect, neutral rosy shade that mimicked the color of those lucky women with naturally very pigmented lips, since mine are by nature, super pale. After watching a review by Emily Eddington (emilynoel83 on YouTube) I went and found this in my local Walmart (unfortunately I haven’t seen them since). Looking back I’m glad I bought like 4 of them! This shade is a beautiful mauvey rosy brown, and while it looks super pigmented in the tube, it sheers out really nicely on the lips, and it’s buildable. It doesn’t apply patchy or thick, it’s actually got quite a bit of slip in the formula, and it dries quickly. If you can find these in a Walmart, Target, or CVS, grab one! You’re gonna love it!

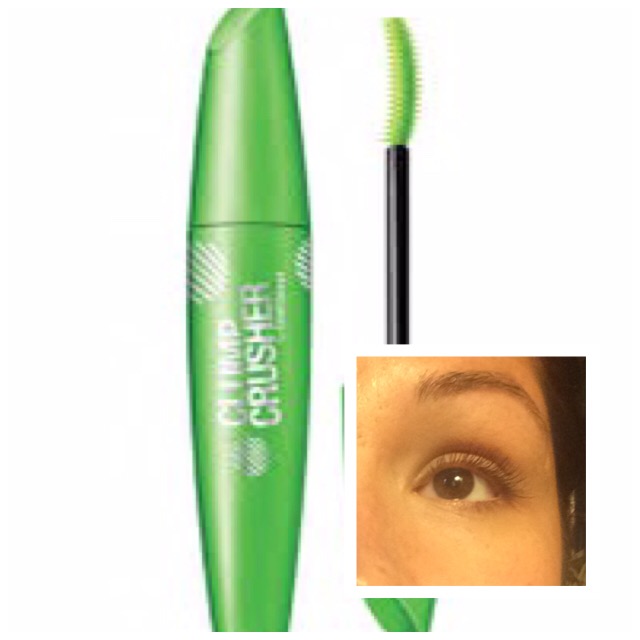
MAYBELLINE VOLUM’ EXPRESS THE FALSIES MASCARA – $6.99 at ULTA


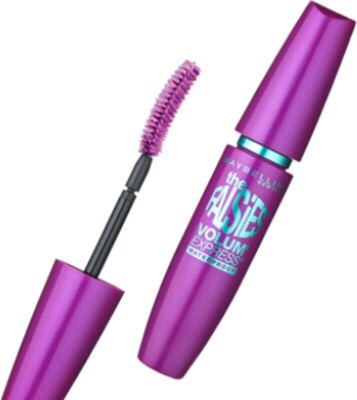
 I have tons of drugstore mascara. I even have a few of those deluxe samples of higher end mascara. And this is my go-to lately, hands down. Some mascaras claim some pretty spectacular things but never really deliver – THIS STUFF DELIVERS! I love the natural bristle brush, I love that it’s tightly packed, I love that it’s curved, and I love that the formula isn’t too wet like the typical Maybelline formula – this hits that nice balance between ‘too wet‘ and ‘starting to dry out‘. It really does make you look like you’re wearing false lashes, but without all that time spent glueing them on and nearly sealing your eye shut tighter than King Tut’s tomb. Obsessed.

REAL TECHNIQUES ORIGINAL COLLECTION BRUSHES – $9.99 or less / realtechniques.com


 I have many, many makeup brushes – Real Techniques, Soho, Posh, e.l.f., Morphe,and some no name brushes. My Real Techniques brushes are without a doubt my most reached-for brushes on a daily basis. Their ‘Bold Metal Collection‘ is a bit too pricey for my blood, but their ‘Original Collection‘ is pretty amazing! They’ve got you covered with sponges, face brushes, eye brushes, you name it. Though I will say that the eye brushes are a little on the rough side. I don’t like them for my eyes, but I do love them for spot concealing! These can be found all over now – I’ve seen them in Walmart, Walgreens, some Targets, and at ULTA. If you’re just starting out and you want some inexpensive, professional quality brushes, these are AMAZING.

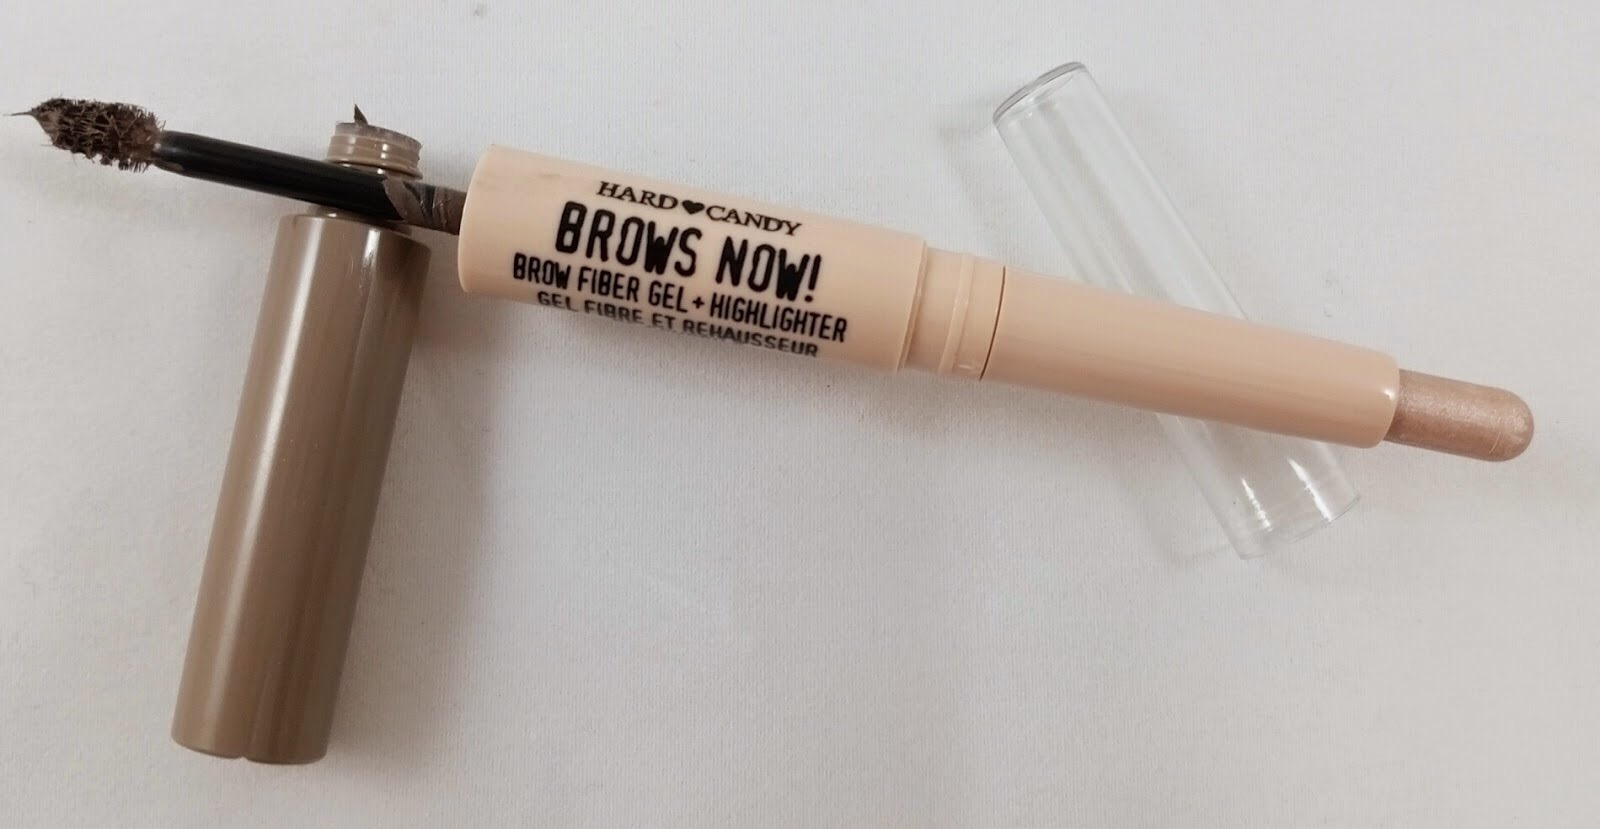
NYX COSMETICS MICRO BROW PENCIL – $9.99 at ULTA


 For a long time I struggled with the best way to fill in my sparse brows. I tried powders, pomades, pencils, tinted mascaras, everything. Pencils were never my favorite, but I realized that was because I never found a pencil that I really liked. Then Anastasia Beverly Hills dropped the Brow Wiz, and while everyone swears by it, it’s just too expensive to use every day and have to repurchase so frequently. But NYX has totally duped it with this product! It’s a slim, slightly dry pencil with a spoolie on the opposite end just like the Brow Wiz, but for half the price! And ULTA often has them for ‘Buy 1 Get 1 50% off‘ so you can stock up!

REVLON COLORSTAY SHADOWLINKS EYESHADOW – $2.84 ea at drugstore.com


 These little things are pretty cool! They’re individual eyeshadows, but they interlock together, so you can build your own personal eyeshadow palette! Available in 30 shades and 4 different finishes, the looks are endless! Revlon shadows are great quality and super blendable, so they’re easy to work with and create looks for both day and night!

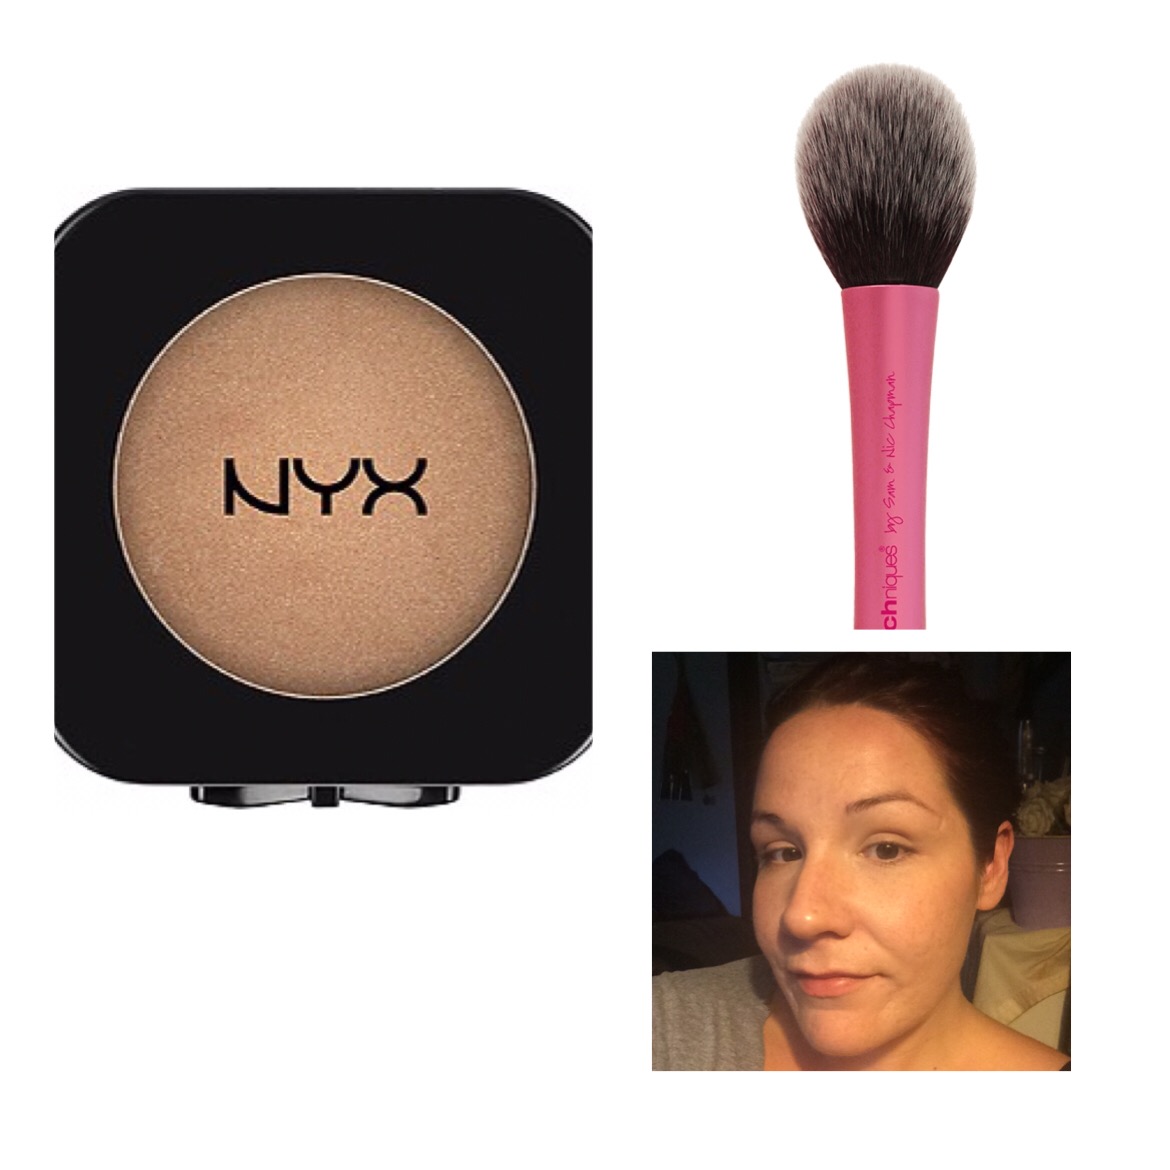
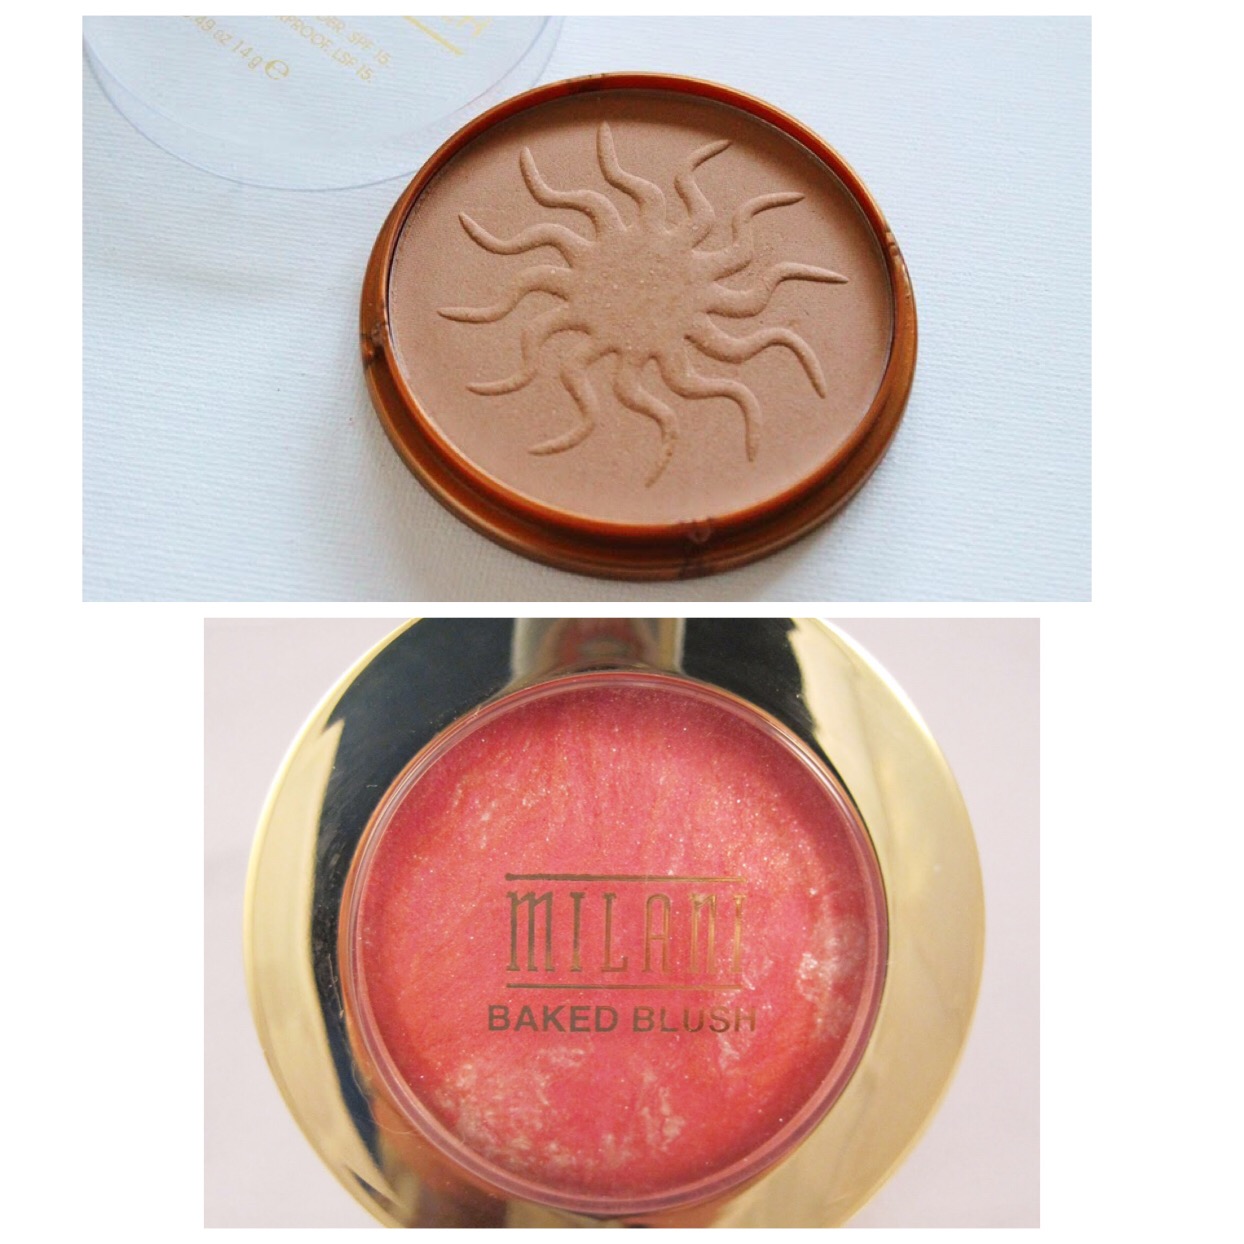
NYX COSMETICS HD BLUSHES – $6.99 at ULTA


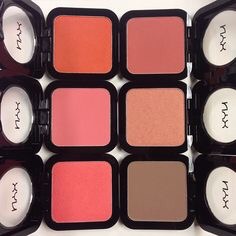
 I don’t think I’ve ever loved a powder blush more than I love these – you can read my review on 2 of my favorites here. These are incredibly versatile, they compliment every single skin tone, and a few of the shades can even be used as a light bronzer for fair skin, or to contour! They’re so smooth and buttery and they blend out beautifully, and because they’re HD blushes they obviously photograph like a dream! They have great pigmentation and staying power – I just can’t say enough good things about this product!

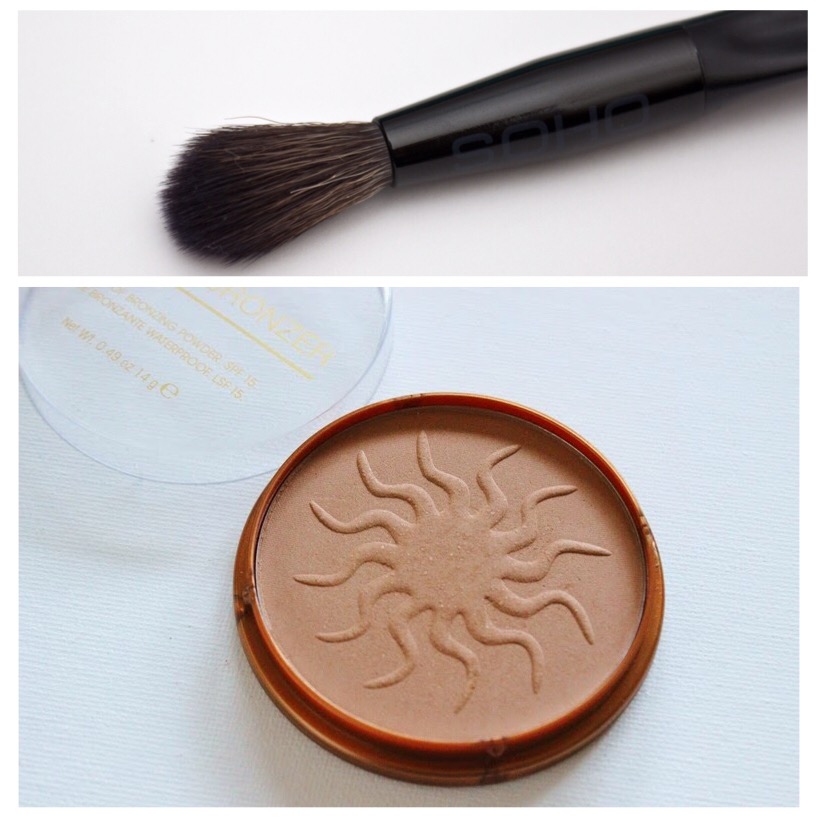
HARD CANDY SO BAKED BRONZER in TIKI – $9 at WALMART


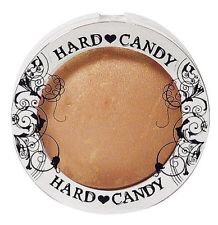
 Are you guys getting sick of reading about this yet? Ha ha! #sorrynotsorry! I love this stuff! Like I’ve said in the past, this is the furthest thing from a bronzer – it’s a beautiful, champagne-y highlight! It’s very pigmented, so a little goes a long way. I usually use a fluffy crease brush to dust this on the top of my cheekbones, the cupids bow, the tip of the nose, the inner corner of the eye, and I even love to use this on the eyelid to just catch the light and open up the eyes on those super tired mornings where I just can’t seem to look awake no matter what I do! It’s great on all skin tones too! Light to dark, anyone can wear this! And it lasts forever because you need so little!

MAYBELLINE LASTING DRAMA GEL LINER in BLACKEST BLACK – $7.94 at WALMART


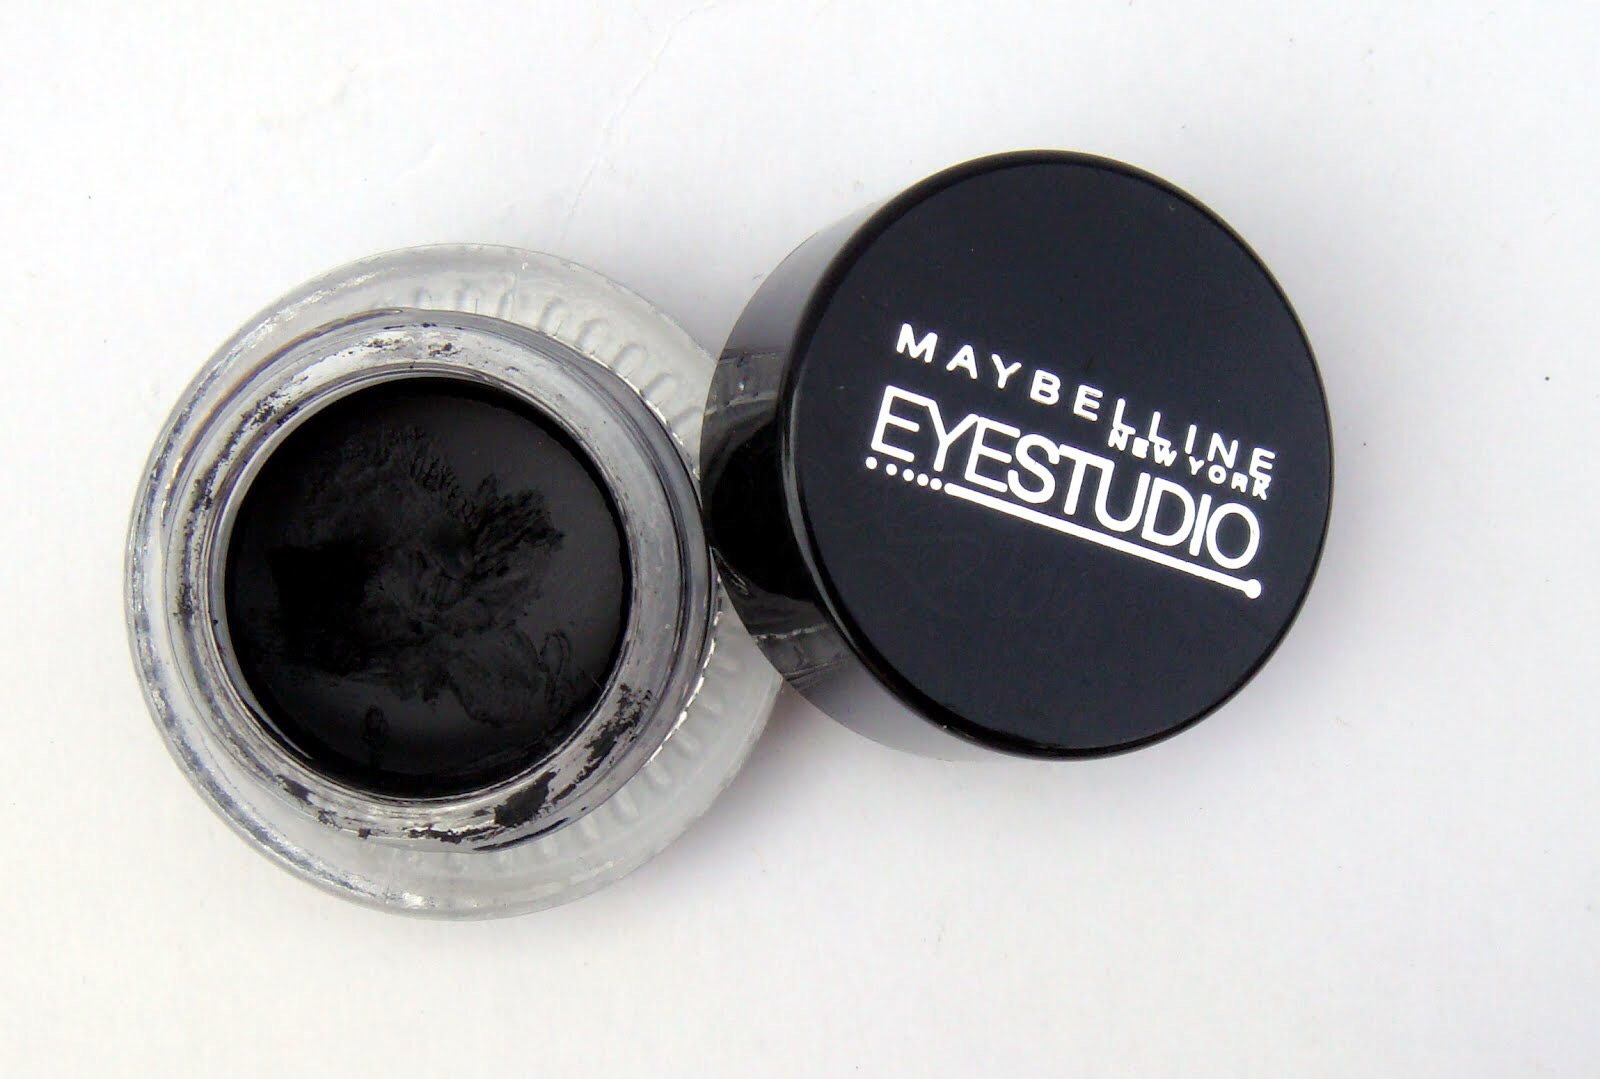
 I was never someone who really wore liner. Like ever. I still only bust it out for special occasions. But I could never find a good gel liner that was smooth and creamy, and truly BLACK. Then on a whim (and a recommendation by Jaclyn Hill) I decided to try this out. I’m glad I did. This truly is the blackest of the black gel liners you will find anywhere! And it’s nice and thick so you don’t need multiple layers to get a good, matte black line, but not so thick that it drags on the lids making it impossible to work with. I will say, however, that I absolutely H-A-T-E the brush that comes with it – it’s useless. I prefer to use a nice teeny, tiny angled liner brush, like the Morphe M160 1/8 ($2.99) for a nice clean, crisp, cut-a-bitch sharp line!


Alright guys, that’s it! My top 10 under $10! What do you guys think? Have you tried any of these products? What are some of your favorites? Leave me a comment and let me know!

And don’t forget to go follow me on Twitter and Instagram @dlynnesposito, and go like the Affordable Gorgeous page on Facebook!

I WILL BE DOING A GIVEAWAY SOON AND YOU WON’T WANT TO MISS IT!

LOTS OF LOVE!


5 PRODUCTS FOR A 5 MINUTE FACE

Most days when I’m not going anywhere, I don’t bother to put on makeup. I like to let my skin breathe as much as possible. Yesterday was one of those days. But later in the evening I had to run out briefly to pick up my husband from work and run to the grocery store. Usually I’ll go out without a drop of makeup on and not think twice. But for whatever reason, my brain said ‘just put on a little‘, so to the vanity  I went.

As I sat down, I knew I wouldn’t have much time, so I figured I would make a game of it. A challenge. I wanted to use as few products as possible, as quickly as possible, and get out the door looking polished and pulled together. So I got to work.

This is a look that you can do in 5 minutes or less, with 5 products and 3 tools – fantastic for busy mornings or just a minimal makeup day, this will have you out the door in no time at all!

Let’s get started!


CONCEALER – 1 min 16 sec


 Naturally this is the first step after your skin care. If you feel the need to use a primer, that’s fine. But for the sake of keeping time and products to a minimum, I skip primer and foundation and go straight for the concealer. My Holy Grail concealer at the moment is my Maybelline Fit Me Concealer ($7), and I have mine in the shade ‘fair’. I apply it only to the areas that need the most attention – the very inner corner of the eye, the outer corner of the eye (I sometimes get a little bit of redness in that area), on the sides of my nose (another place of great redness, but almost all women get redness here, it’s just hormonal), a stripe down the center of my nose (gets a little red here too) and of course any blemishes. Then I like to blend it out with the e.l.f. Studio Flawless Concealer Brush ($3), or for more pinpointed areas like blemishes, the Real Techniques Shading Brush ($7), keeping it pretty much in the areas I need the coverage, but I will take whatever is leftover on the brush and use it on my eyelids, because they can get pretty veiny. You could also use a damp beauty sponge, the choice is yours. I recommend the Real Techniques Miracle Complexion Sponge ($7), and between you and me – I like it BETTER than a Beauty Blender! SSSHHHHH!

BRONZER – 16 sec


 After all that concealer (even though it wasn’t really that much) it’s time to bring some color back to the face. I found myself reaching for a blush and thought “well if you do that, you’ll look like a porcelain doll and not like a HUMAN”, so instead I grabbed a bronzer. Well, kind of. The NYX HD Blush in ‘Nude’Tude’ ($7) is technically a blush, but it’s a pretty, not too warm honey shade that just brings you back to LIFE! I lightly dust that on the outside of my face and a little tiny bit on either side of my nose with a Real Techniques Blush Brush ($9).

BROWS – 37 sec


 Brows make your look. When they look more polished, even if it’s just basic grooming with a little clear brow gel, you feel like you can take on the world. Yup, brows are pretty powerful like that! So I like to use the Anastasia Beverly Hills Clear Brow Gel ($22) for this step. I know, it’s not drugstore. It’s a little on the pricey side for a clear brow gel, or ANY brow gel – but this stuff is SUPER GLUE on your brows – and I actually got mine for $11 when ULTA ran their ‘21 Days of Beauty‘ promotion back in September – and I’m such a believer that my cheap butt WILL be purchasing more when I run out! If you’re someone who absolutely needs a some color to their brows, the ULTA Brow Tint ($10) is a great option, and it has that teeny tiny brush reminiscent of the Benefit Gimme Brow ($24), but for way less!

EYES – 1 min 36 sec


 I kept it simple here – just curling my lashes (any old lash curler will do, mine came from TJ Maxx) and applying 2-3 coats of CoverGirl Lash Blast Clump Crusher Mascara ($8) in Brown. A brown mascara looks more natural, so you don’t feel like the rest of your face has to compete with your lashes. I did both my top and bottom lashes, because the curved brush fits perfectly and I don’t have to reach for something totally different for those pesky little bottom ones.

LIPS – 18 sec


 Here you can do whatever you want. But back in August I discovered the ULTA Brilliant Color Lip Glosses ($8), and fell in love. My favorite shade is Guava, and I think I have a few stashed away as backups too, in case they go and discontinue the shade! It’s a pretty, very glossy but not too sticky, natural pink shade that just looks fresh and girly. If you like something a little richer in pigmentation, you could always use the Burt’s Bees Lip Gloss in Evening Glow ($7), which is a little on the redder side, and not too sheer or too opaque, it’s pretty much right in the middle. When I’m doing minimal makeup, I just feel like I need a glossy lip. A lot of the ULTA brand cosmetics I feel are very underrated, and I don’t hear them mentioned often, but I really love them. There are some great quality items, but I’ll save that for another time!


There you have it! Now all you need is a messy bun or some cute earrings and you’re ready for your day! This is a go-to look for me most days because, like many moms of toddlers, I treasure any extra moments of sleep I can salvage!


How do you get ready on busy mornings? What are your HG products to achieve an effortless, put together look? Leave me a comment below!

And don’t forget to follow me on Twitter and Instagram @dlynnesposito, and go like the new Affordable Gorgeous page on Facebook!

LOTS OF LOVE AND EXTRA ZZZ’S!!


MAKEUP FOR SICK DAYS!

We’ve all been there – you’re sick as a dog, and maybe you were fortunate enough to get a day or two off of school or work, but it’s time to head back and time to pull yourself together.

A couple weeks ago I came down with a sinus infection and bronchitis – lucky me! NOT! Well with a busy little 1 year old, I can’t just crawl into bed and sleep it off the way I used to. I had to get up, keep going, and occasionally had to leave the house and be seen by the general public. And when you’re sick, the last thing you want to hear from anyone you run into is “wow you look really sick!”. So this is a look and products specifically for that purpose. Let’s jump in!


STEP 1. PRIMER

  After you’ve cleansed and moisturized your skin, you’ll want to apply a primer. When your nose is runny and you’re constantly wiping at your eyes, you want something that will grab on to your makeup and keep it in place. Additionally, when you’re feeling blah, it can show in your skin, so I like to use a radiance boosting primer or an illuminating primer. Two that I swear by are L’Oreal Magic Lumi Primer  ($13) and Revlon PhotoReady Primer ($11). You could even mix them to get the benefits of both.

STEP 2. UNDEREYE CONCEALER

  Whether you’ve been getting lots of rest or not much at all, being sick just seems to exaggerate the dark circles under our eyes. While covering them is the goal, an important and often overlooked step is color correcting them. Picture a color wheel from your elementary school art class – you always want to color correct with the OPPOSITE color on the color wheel – so in the same way that you would use a green concealer on a bright red blemish, you want a yellow/orange/peach concealer on dark circles. If they’re more blue in tone, use yellow, like Physician’s Formula Gentle Cover Concealer Stick in Yellow ($8). If they’re more purple, NYX Dark Circle Concealer ($6) is A-MAZ-ING. When you’re color correcting, the key is to ONLY put it where you need it, i.e. right on top of the blue/purple color. You don’t want to go all upside down triangle with this stuff – we’re not highlighting, we’re simply concealing. Apply it where you need it, blend it out, and then apply a skin toned concealer over the top, like Maybelline Fit Me ($7), and set it with a translucent or brightening powder, like E.L.F. Studio High Definition Undereye Setting Powder ($3). 

STEP 3. BB/CC CREAM

  I don’t know about you, but when I’m sick the last thing I want is to FEEL like I’m wearing makeup. This is where I like to use BB and CC creams. They moisturize, provide a sheer coverage, and just bring the life back to your skin. For super sheer coverage, apply it with a damn sponge like the Real Techniques Miracle Complexion Sponge ($6), and for a more full coverage look, buff it in with a nice dense, synthetic brush like the Real Techniques Buffing Brush (from their Core Collection, here) or Expert Face Brush ($9). Always make sure your brush is made of synthetic bristles when applying cream or liquid products because they more evenly distribute the product on to the skin and they don’t soak it up like a natural hair brush will. Some of my favorite BB and CC creams are :

STEP 3. BRONZE, BLUSH & HIGHLIGHT

  The last thing I want to be bothered with when I’m sick is a full on contour – let’s face it, it’s a wonder I’m putting on makeup AT ALL when I’m sick. But when you just feel like your face looks lifeless, one of the quickest ways to perk up is to bring some color back to your face. Taking a big fluffy brush, like the Real Techniques Powder Brush ($10), I like to apply a light bronzer (no Snooki, sit your ass down) like Rimmel Natural Bronzer in Sun Light ($4), to the perimeter of my face. It just warms you up so you don’t look….dead. Then a nice girly, pink blush like Milani Baked Blush in Corallina ($9), which has a slight sheen to it, to blush and highlight at the same time, just making you look awake and fresh and healthy. Apply that with an angled blush brush and you’ll notice a remarkable difference.

STEP 4. BROWS

  I am a firm believer that brows really do frame your face and just pull any look together, be it minimal or full on glam. But am I going to bother with a full brow routine when I feel like crap? Nope. So the easiest and most natural looking way that I’ve found recently is to use a tinted brow mascara with little fibers, that lightly fill in the brows making them look polished but not overdone. I love the Hard Candy Brows Now ($6) for this, and the other end has a retractable highlighting crayon that you can pop under the brow and in the inner corner of the eye for that wide eyed, fresh, awake look. Fake it ’til you make it baby.

STEP 5. EYES

  When I’m sick, it shows in my eyes. They’re red, watery, and probably the LAST place on my face I want to put any sort of product. But if shadow and mascara are things you simply can’t live without, here’s a little trick – go back to that Rimmel Natural Bronzer, and take a fluffy blending brush like the SOHO Pro Crease Brush ($11) and using windshield wiper motions, buff that into the crease of the eye. It gives dimension, plays off that highlighter that we applied when we did our brows, and doesn’t require 8 other shadows to blend. It’s just enough to look like you’re trying when you really just don’t want to. Then taking any waterproof mascara, apply one or two light coats just to make your tired eyes pop!

STEP 6. LIPS

  In my September Favorites post (read it here) I mentioned a tinted lip balm called Nivea Kiss of Care & Color ($5). This stuff was like my saving grace when I was sick. It’s super moisturizing, and looks like your own healthy, natural lip color with just a hint of shine. The tinted balm is wrapped around a moisturizing core, and it comes in 4 gorgeous sheer shades. My NEW favorite is Sheer Crimson.


Now throw that 3rd day hair up in a messy bun, pop on some pretty stud earrings, and we’re done! It may seem like a lot, especially when you’re feeling like death warmed up, but I’ve found that most times when I have to throw on some makeup and leave the house it actually helps me feel better, knowing that I’m just a little more put together and polished!

I hope this post was helpful! As always, make sure you’re following me on Twitter and Instagram – @dlynnesposito for lots of fun things coming up!

LoTs Of LoVe and ChIcKeN sOuP! ❤ ❤

XOXO – Donna

BEST DRUGSTORE CONCEALERS 

There are many, many reasons we all reach for concealer as part of our daily routine. Some to cover dark circles, some to camouflage blemishes, some just to brighten our complexion instead of a heavy layer of foundation.

Personally I go for all three. If I can get away with just concealer, then I will. And I’ve been grabbing it most recently to cover up a couple stubborn blemishes while I give my skin a break from everyday makeup.

But here’s where it gets tricky – some are too thin to cover blemishes, or too thick for the delicate and sometimes slightly drier under eye area. Some fade away, some crease, and some just look…..wrong when put to the big bad zit test. And some can multitask with the best, offering just the right coverage and consistency to win the top spot in your makeup bag as your holy grail pick. So below are my top picks and how they perform –

  
GARNIER SKIN RENEW ANTI DARK CIRCLE EYE ROLLER ($11 at Ulta)
I feel like this is such an underrated product. I actually first discovered this while watching a Jaclyn Hill video on YouTube, and she not only used it under her eyes, but on a few blemishes as well. So of course I rushed right out and bought it. It has a thin consistency, blends easily, and really does detract from the crawled-out-of-the-depths-of-hell dark circles under my eyes (#momproblems). It offers sheer coverage on small blemishes too. Would I use this to cover a big, honkin’, angry looking one? NO. But for those little guys that pop up on a monthly basis? Sure. I’m not sure of the color range, as I’ve only ever found it in a fair/light tint but I use light to light/medium depending on the brand so with some blending and maybe a tinted powder you might find that it works for you just fine.

  
RIMMEL MATCH PERFECTION CONCEALER($6 at Ulta)
This stuff.  Oh this stuff. It’s pretty great. Covers dark circles, blemishes, and it really does adapt to your skin tone. It seems to have to most neutral undertones of any of the concealers I own. It doesn’t do the “looks great now, but orange in an hour” thing that I’ve been struggling with for YEARS. It comes in several shade options, and it’s packaged in a sleek little squeezy tube. The only thing I don’t like about this product is the brush tip applicator. I feel like it sops up a lot of product from you. But if you can get past that (I did) this concealer is one of my absolute favorites.

  
MAYBELLINE FACE STUDIO MASTER CONCEALER ($8 at Walmart)

I gotta say, I’m pretty crazy about this stuff. It’s pretty full coverage, making it great for blemishes, as well as dark circles, but I would air on the side of caution when you use this under your eyes – it CAN cling to any little bit of dryness you may have going on under there, so I would suggest moisturizing well, or using a hydrating primer on the under eye area. The colors tend to run a little light, so where I usually fall between fair and light I’m actually a light/medium with this product. But this is some pretty amazing stuff.

  
MAYBELLINE FIT ME CONCEALER ($5 at Walmart)

Another great find from Maybelline, this has often been compared to the Nars Radiant Creamy Concealer (which I haven’t tried because, well, I’m cheap) and it really does have that high end feel to it. It falls somewhere between feeling liquidy and slightly thick, if that makes sense. But it blends out like a DREAM. This is one that I’ll often use on large areas of my face BECAUSE it blends so well and matches the skin FLAWLESSLY. If I’m skipping foundation or BB Cream, I’ll usually slap on a thin layer of this little baby and dash out the door. I keep one in my bag, one in my truck, they’re just everywhere. I’m never without one. And when they’re $5, why wouldn’t you?

  
REVLON PHOTOREADY CONCEALER ($8 at drugstore.com)

This is a great stick concealer that covers flawlessly with little effort. This product is very high coverage, super blendable, and great for on the go touch ups. It has light reflecting pigments that allow for such a flawless finish. If you’re oily I recommend setting with a light dusting of powder, and if you’re dry, always moisturize prior to application. 

There you have it! Hope this was helpful to you all! 

Don’t forget to follow me on Twitter and Instagram @dlynnesposito

Xoxo Donna