

So…are you sick of hearing me talk about contouring and highlighting yet?! No? Good. ‘Cuz we’re not even close to done!
I’ve said it before many times; while the application and the quality of your products is important, probably even more important are your tools. But that doesn’t mean they have to be expensive!!
So today I’ve got a list of brushes for you – if you want to know what they are, just keep reading!
BEST BRUSHES FOR CONTOURING
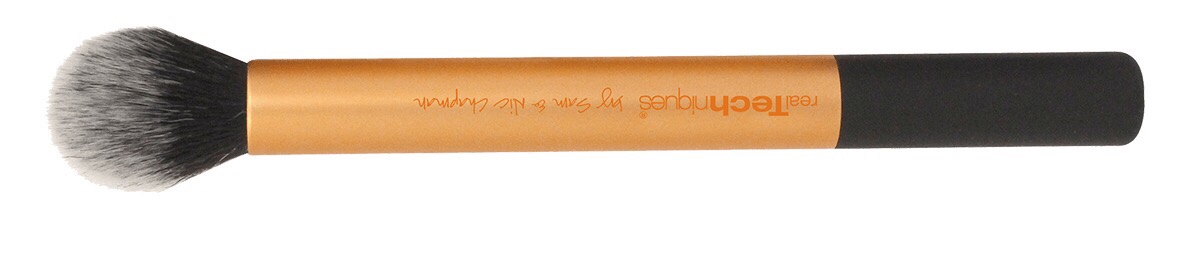
REAL TECHNIQUES CONTOUR BRUSH ($18) – This brush comes in a set with their ‘Core Collection’, and it seems to be the most obvious place (at least in my mind) to start. And I’ll be 100% honest; at first I wasn’t totally sold on this brush. It took some getting used to, but because of it’s smaller size, medium density bristles, and round, tapered shape, it fits nicely right in the hollows of the cheeks. This is a great brush for a sculpted look if you’re a beginner, because it really does almost all of the work for you.
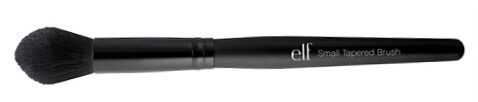
e.l.f. SMALL TAPERED BRUSH ($3) – Initially I love this brush for setting under the eyes with a banana powder, but one day, while playing around, I grabbed it to contour with. This again, is a medium density brush, that picks up just the right amount of pigment to blend out a very natural looking daytime contour. I absolutely love it.
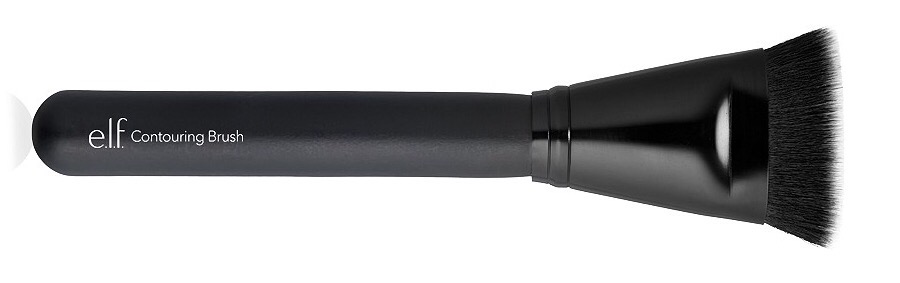
e.l.f. CONTOURING BRUSH ($3) – This is a standard, very densely packed, flat contour brush, perfect for creating a nice, sharp contour under the cheek bone. This is something that I would recommend for someone with a rather high skill level, or at least someone who has patience for blending. This brush picks up and lays down quite a bit of pigment, so if you try it or another one like it, you may want a different, fluffier brush on hand to aid in blending.
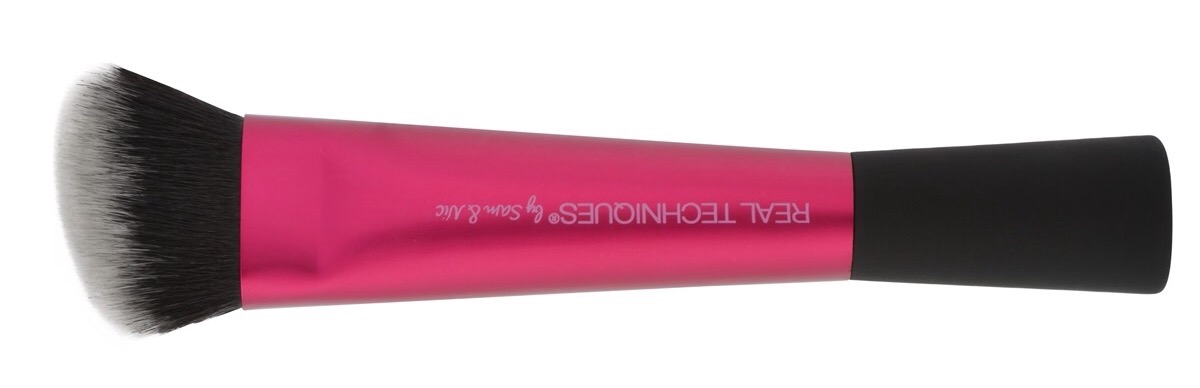
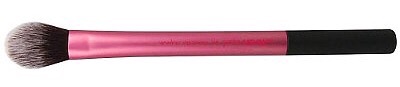
REAL TECHNIQUES SCULPTING BRUSH ($10) – This is another very densely packed brush – however it’s much wider, and because of it’s size, shape, and synthetic bristles, I absolutely love it for blending out a cream contour. The best part about Real Techniques brushes, aside from their amazing quality, is that ULTA often has them on sale on a ‘buy one get one 50% off’ promotion, so you can stock up without a huge hit to your bank account!
BEST BRUSHES FOR HIGHLIGHTING
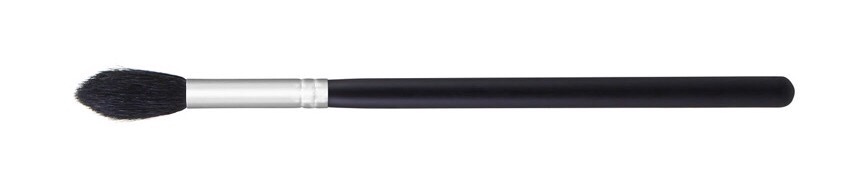
REAL TECHNIQUES SETTING BRUSH ($8) – When it comes to highlighting, usually the fluffier the brush, the better, more natural application you get. However there are some highlighters in my collection that aren’t ridiculously shimmery, and I find that instead of layering product with a fluffy brush, this brush works perfectly. Some of the highlights it works in perfect harmony with are the Wet N Wild Color Icon Bronzer in Reserve Your Cabana ($4) (a very natural looking highlight) and the Physicians Formula Mineral Glow Pearls Powder ($13), which tends to be a little tough to pick up on a softer brush.
MORPHE M501 PRO POINTED BLENDER ($8) – While not technically a highlight brush, this is probably my most reached for. It’s light and fluffy, and picks up the perfect amount of product, and blends it out like an absolute dream. I seriously can’t recommend this brush enough – go get it!
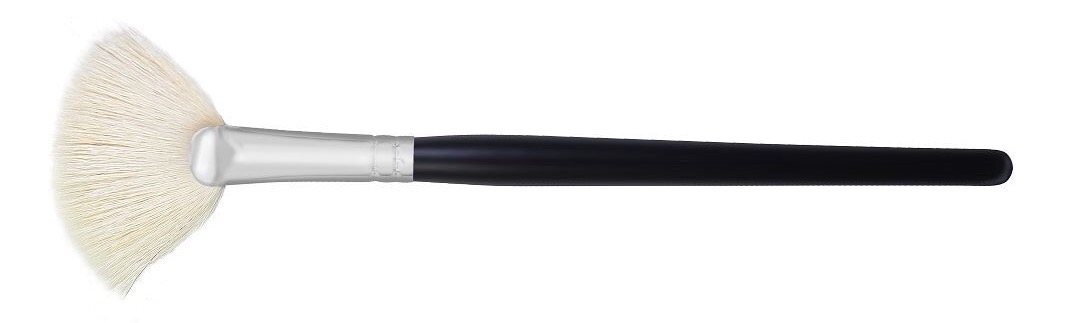
MORPHE M310 LARGE SOFT FAN ($5) – Some people prefer a fan brush to apply their highlight, because it covers more ground and tends to give a lighter, more natural appearance. While I’m not one of those people (I want you to see my highlight from space!) this is a great brush. Super soft, goat hair gives you great control over the amount of product you’re laying down – but because it’s goat hair, take great care in washing it – use a gentle cleanser, something alcohol free, and add in a drop of olive oil when you wash it. It will definitely help keep it super soft.
 REAL TECHNIQUES MIRACLE COMPLEXION SPONGE ($7) – Ok, so this one isn’t a brush. But it’s awesome if you’re someone who uses cream highlighting formulas. Cream highlights, I find, give the most natural glow on the skin. Dewey, fresh, girly, gorgeous; one of my faves is the Revlon PhotoReady Skinlights in Bare Light or Pink Light. The way they melt into your skin is just……just trust me, try it!
There you go! Obviously there are tons and tons of options out there, and these are just my favorites – if you’ve been using something that works well for you, stick with it! But if you’re someone who’s been struggling to find the right tools, or just looking to expand your collection, these brushes are a great place to start!
Have you tried them? What are some of your faves? Leave me a comment and let me know! I love to hear from you guys!
Please come follow me around on social media!
Twitter & Instagram : @dlynnesposito
Facebook : Affordable Gorgeous
Snapchat : dlynnesposito
And of course, feel free to reblog or share this post and my social media with your friends! Your support means so much!
LOTS OF LOVE!!


 Just as important as the technique is, so is using the right products and tools. If you can find an ‘HD’ loose powder, go for it! The
 In terms of tools, you can use a damp
