JUNE 2016 FAVORITES


Hey guys! It’s monthly favorites time again!

I’ve pulled a few items that I can’t seem to live without this month, and I thought I’d share them with you!
Let’s get started!


MAC COSMETICS EYESHADOW PRO PALETTE REFILL PAN – NYLON ($6/maccosmetics.com)

I’ve been using this nearly every day (that I apply makeup, anyway) to highlight my brow bone and my inner corners (tear ducts), and I just love it. It’s a very frosty, very pale gold shade that just beams off the skin. I love, love, love this for the spring and summer, when I have more of a tan!

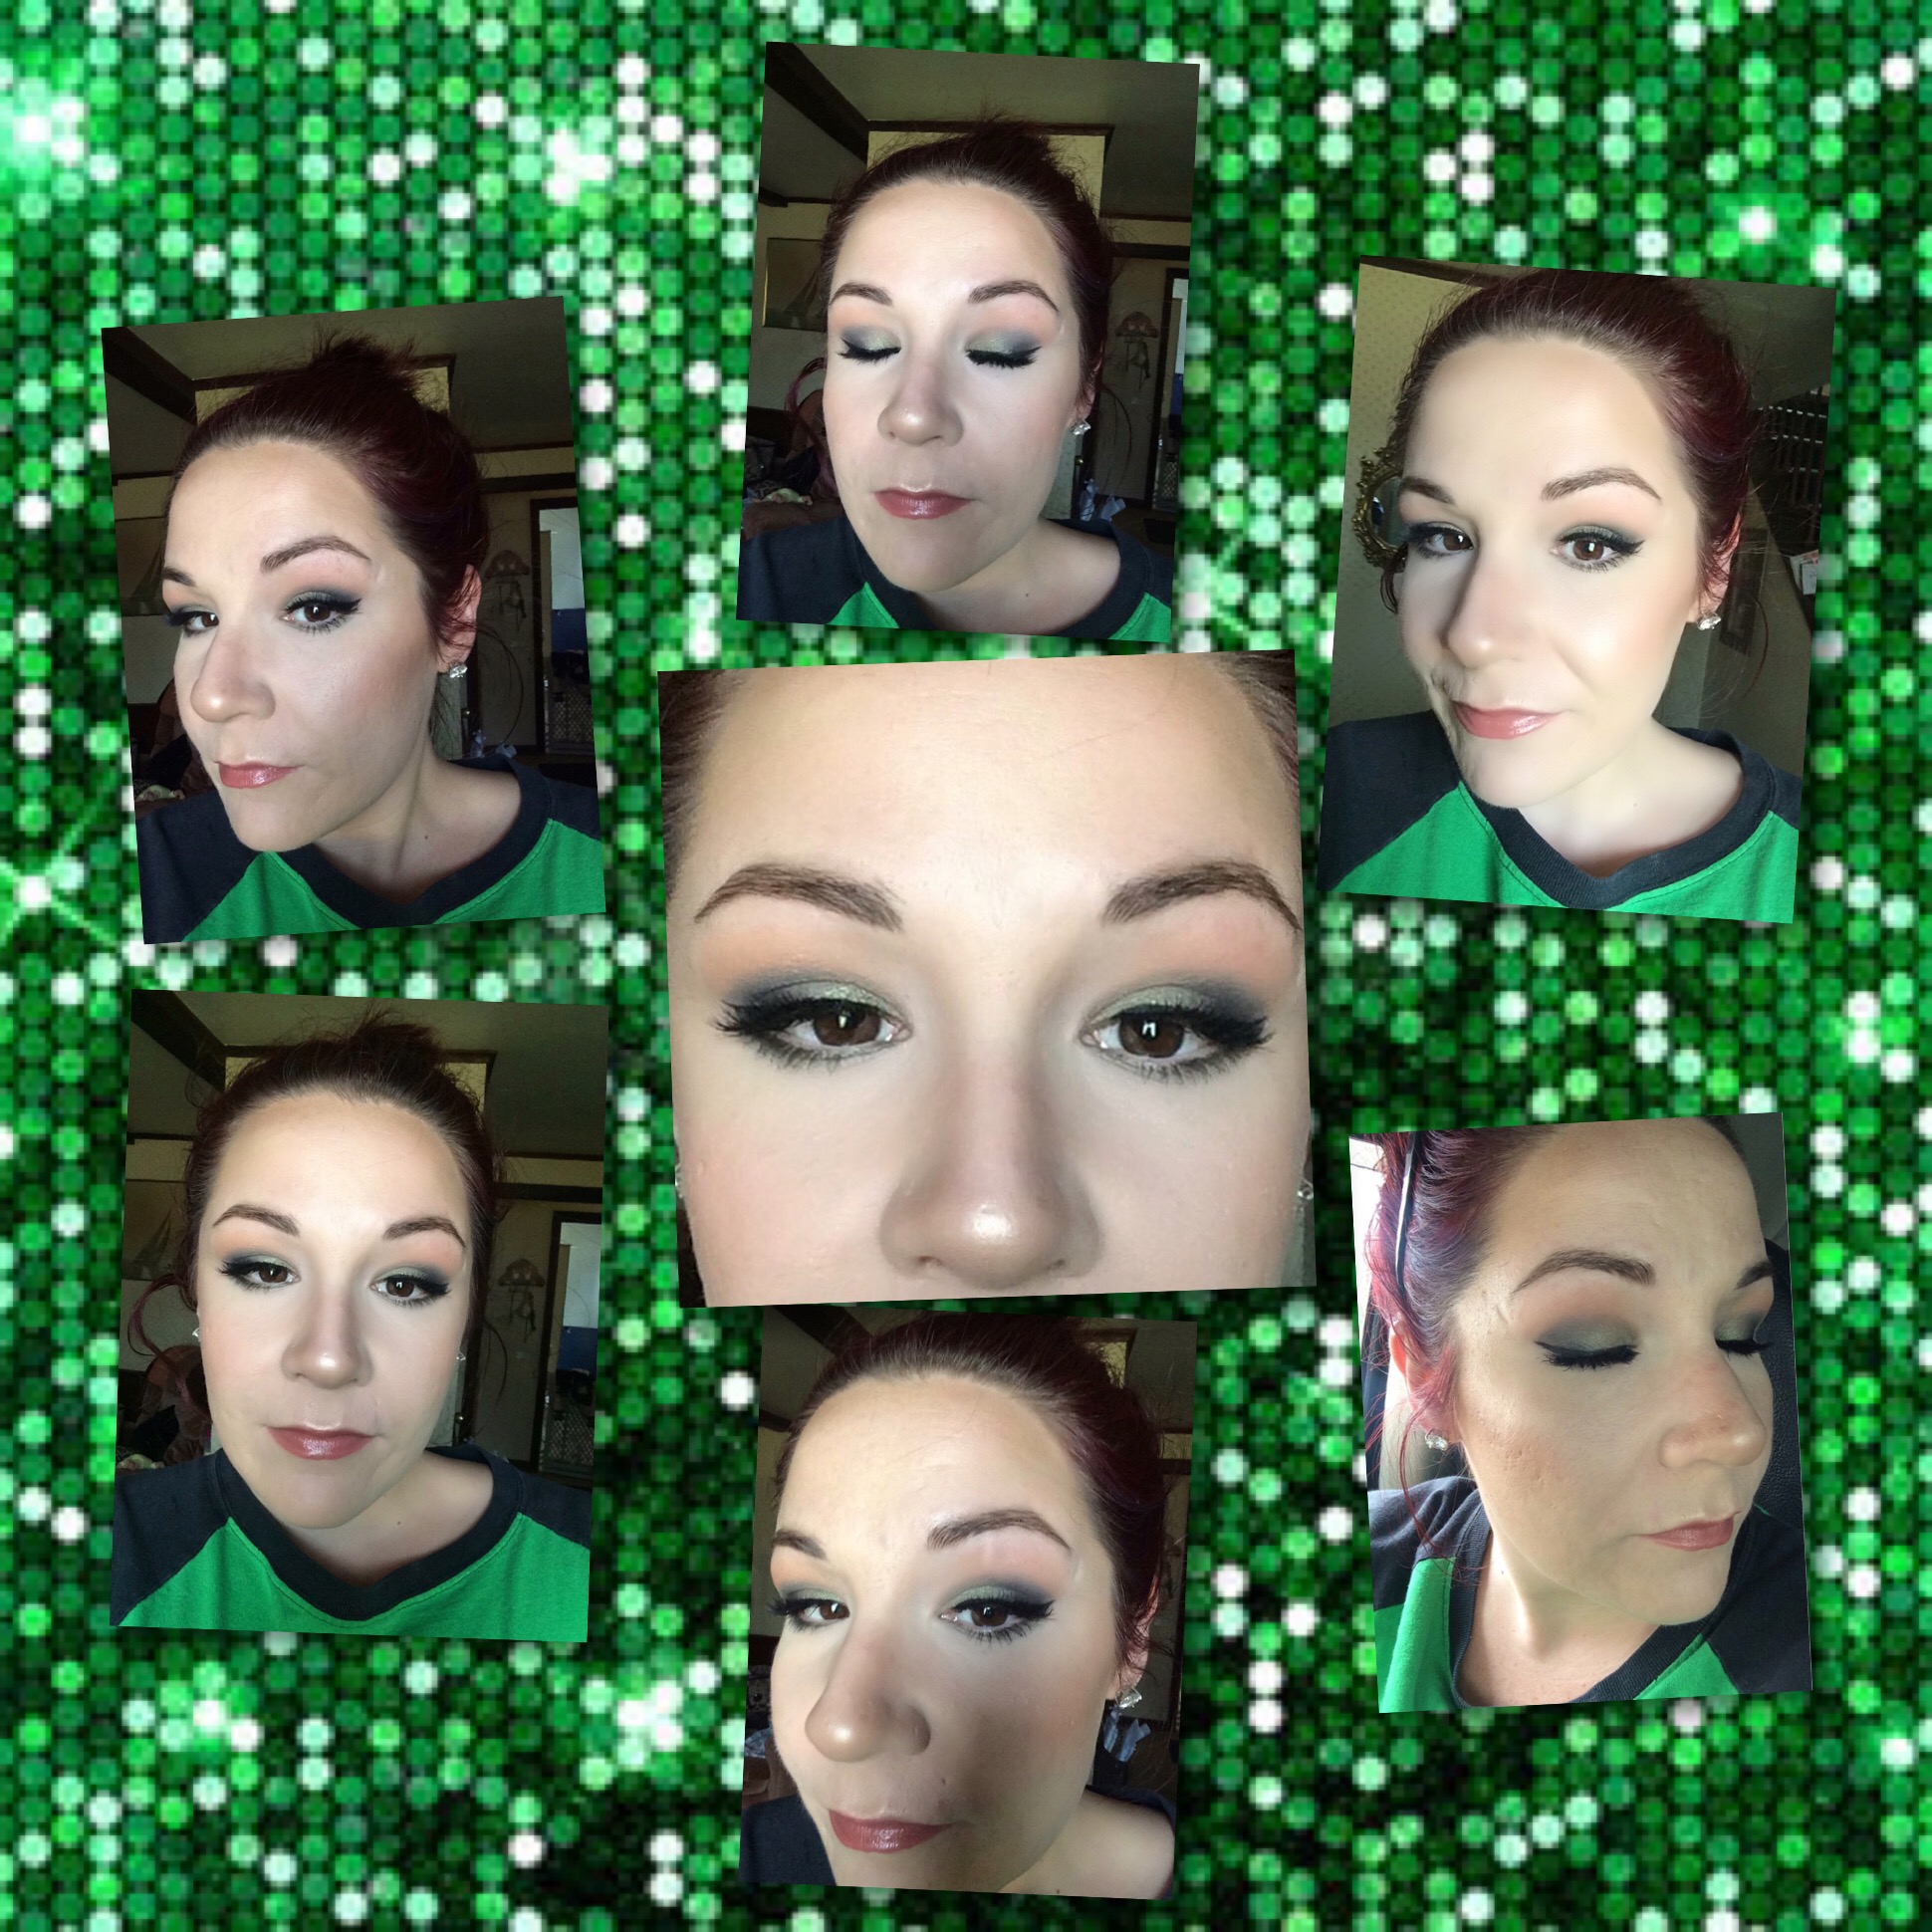
SALON PERFECT PERFECTLY GLAMOROUS FALSE LASHES – #614 ($2.98/Walmart)

These are hands down some of my favorite lashes of all time! I love how long and wispy they are, adding just the right amount of volume and drama to both everyday looks, as well as something a little more glam. They have a super easy, thin and flexible band, which I prefer over a thick band, because I don’t always like to wear eyeliner – with these, you can get them super close to the lash line and barely notice them. And they’re so lightweight, it literally feels like nothing on your eyes!

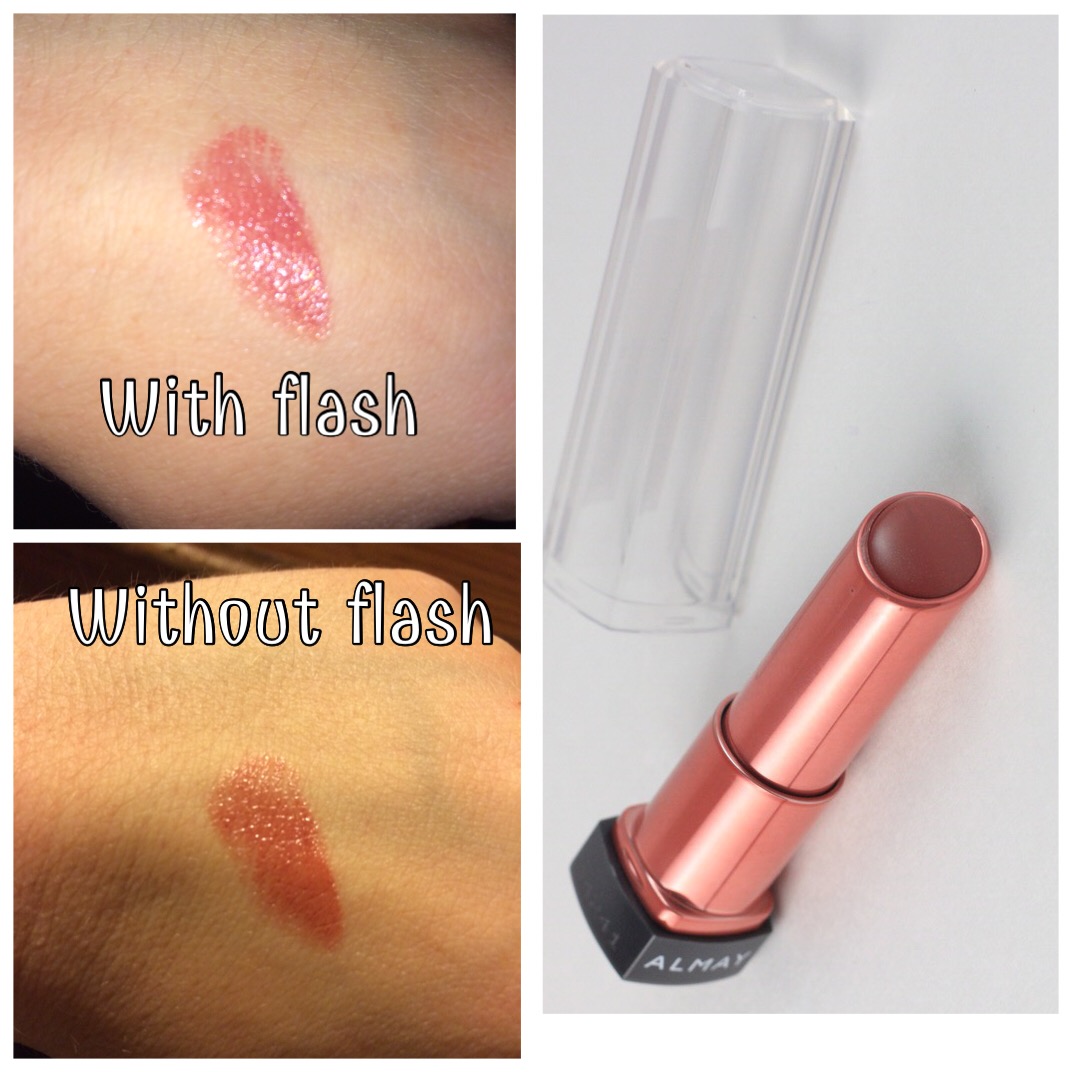
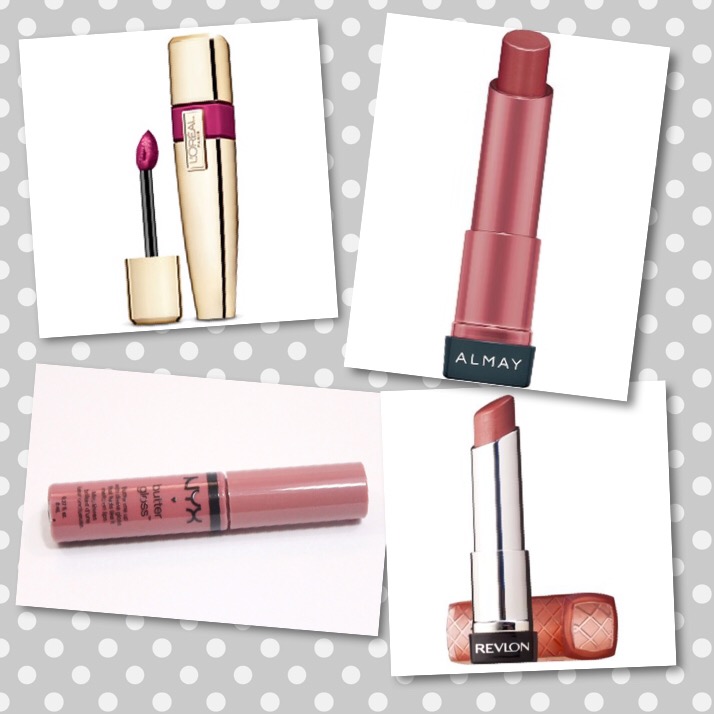
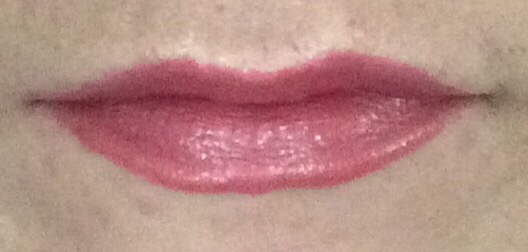
ALMAY COLOR + CARE LIQUID LIP BALM – ROSY LIPPED ($5.99/ULTA)
NYX SLIM LIP PENCIL – PEEK-A-BOO NATURAL ($3.49/ULTA)

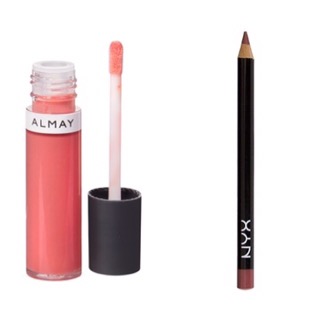
This has been my fave pinky/nude lip combo lately. The liner is basically MLBB (my lips but better), but I like to overdraw them just a bit, and then top it off with this semi-glossy liquid lip balm, which again, is basically my lip color with just a little bit of sheen to it. Super pretty, and super easy! Plus, since lip pencils alone can be a little bit drying, the balm gives enough moisture to make it a comfortable, long lasting combo without breaking down the lip pencil, giving you the dreaded ‘butt-hole lips’.

HOURGLASS VEIL MINERAL PRIMER ($52/Sephora)

I just did a whole review on this primer, so I won’t repeat myself – but seriously, if you’re anywhere from normal to oily-skinned, and want something that keeps your makeup in place, keeps you matte, fills in pores, fine lines, little wrinkles, helps to neutralize redness, and more, go check this stuff out! (Clicking the link will bring you to my review, so click away!)

L’OREAL BROW STYLIST PLUMPER BROW GEL MASCARA – MEDIUM TO DARK ($9.99/ULTA)

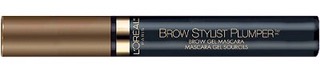
A few weeks ago, I noticed that my cleanser (which contains Benzoyl Peroxide) had begun bleaching my eyebrows; fabulous. So rather than reaching for my usual pencil or powder, I remembered I had this product stashed in my brow drawer. On minimal or no-makeup days, I just swipe it over my brows and go; it’s a very neutral dark shade that contains little fibers that stick to my brow hairs, thickening them, and covering up the weird yellow shade they’ve become. For a more sculpted brow, I’ve been outlining them with pencil, filling in the bare spots, and then applying this over the top. Perfect brows, every time.

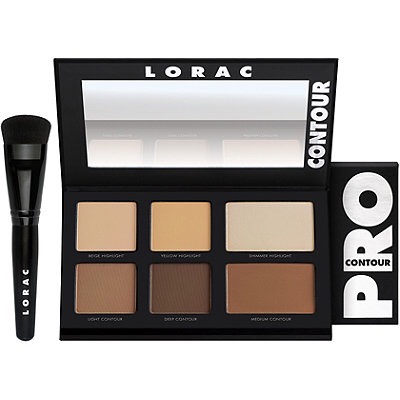
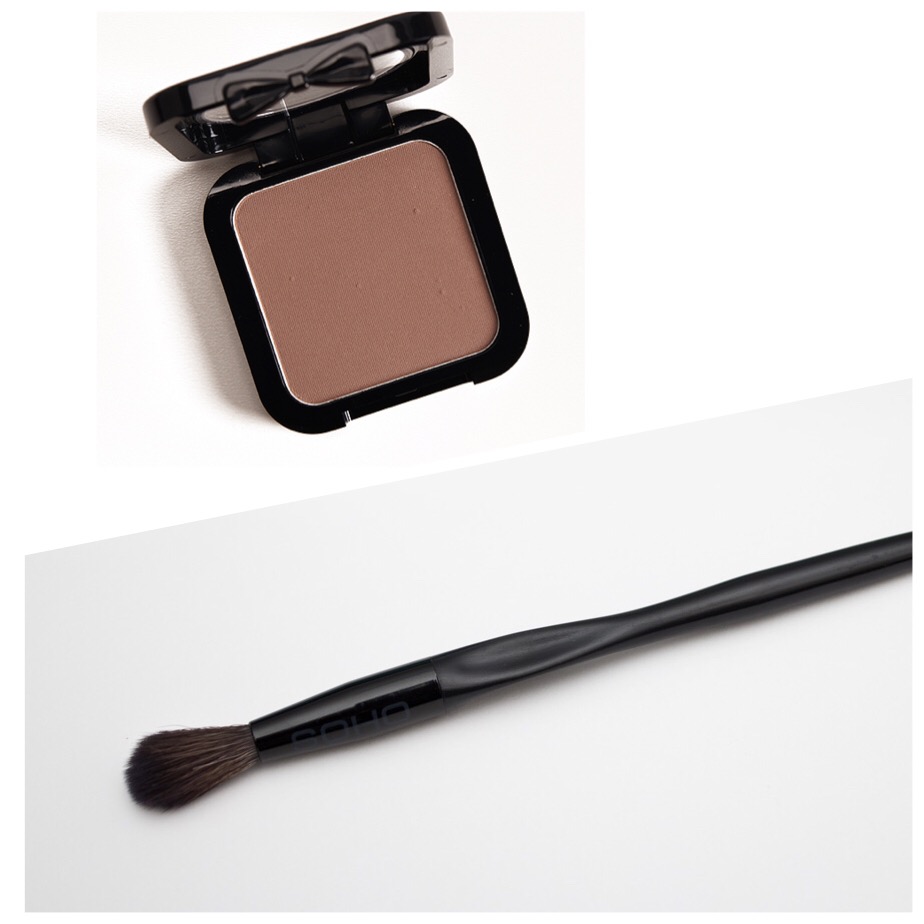
ANASTASIA BEVERLY HILLS CONTOUR REFILL – SAND ($14/anastasiabeverlyhills.com) 

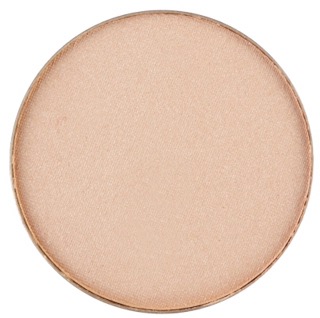
Let’s face it, all the hype surrounding the original contour kit centered around the ‘Banana’ shade – it’s famous, and for good reason. But an often underrated shade in the kit, is that slightly shimmery one at the top right; Sand.
Clearly, it’s not secret that when I highlight, I like to beam rays of shine off satellites, but on days where I just want something a little more subtle (yes, I can do subtle, believe it or not!), I reach for this. It’s got just enough sheen to it to make you look healthy and dewy, without settling into the pores and fine lines on my face. If I really want to amp it up, but still not be ‘over the top’, I mist my face with setting spray, and immediately apply this while my skin is still a little damp. Perfect glow, every time.


What are some of your favorites this month? Leave me a comment and let me know!

Come follow me around social media!
Twitter, Pinterest & Instagram : @dlynnesposito
Facebook : Affordable Gorgeous
Snapchat : dlynnesposito

And feel free to reblog this post and share my social media with your friends! Your support means so much!

LOTS OF LOVE!!
img_9363-2

ST. PATTY’S DAY MAKEUP TUTORIAL #2

Hey guys!

So while, I have another St. Patty’s Day makeup tutorial coming your way, I thought to myself “why not share the slightly different look that I wore to the parade yesterday?!”

Yesterday, my husband, my son, and myself went to the annual St. Patricks Day parade in New Haven (Connecticut) and had a great time! But the couple days leading up to the parade, I knew I wasn’t the type of person to wear the funny hats, and dress in head-to-toe green; but I knew I would try to create a killer green smokey eye!
Hey, some people dress their body, I dress my face – it is what it is!

In any event, I was actually really impressed with how the look turned out (despite being crazy rushed in the morning – I’m a mom before all else, and well, baby needs to be ready first!) and I wanted to share with you how I achieved my parade-ready look!
SIDE NOTE * It was quite warm out for March, with a touch of humidity, and my makeup did…not…budge!*

If you want to see how I created this look, then just keep reading!


 Working with more pigmented, shimmery shadows than usual, I knew I wanted to do my eyes first. So I started by priming my eyes using the Urban Decay Primer Potion (still working off my little Sephora VIB sample), and then went over my lids and slightly into my crease with my NYX Jumbo Eye Pencil in ‘Milk’, and blended that out with my finger.


 First, I wanted a warm transition shade, so I mixed ‘Beaches and Cream‘ and ‘Peach Smoothie‘, both by Makeup Geek, and dusted that back and forth sloppily into my crease using a Morphe M441 brush.


 They shadows I’m using are samples of Urban Decay singles, I believe, that I received with an ULTA order sometime last year, and never really got around to playing with. So, I started with the shade ‘Mildew‘, which is a shimmery, mossy green shade with the slightest gold reflect. I tried using a Morphe M167 dampened with some MUFE Mist & Fix, but because they’re carded samples, I was having trouble picking up enough pigment, so I ended up packing it on with my finger, from the inner corner, to about halfway across my lid.

Next, I used my Morphe M433 brush to pick up some of the shade ‘YDK‘, which is a shimmery, golden/champagne-y/brown shade, and dusted that lightly over my crease where I laid down my transition shade, and running it just over the edge of the green shadow to soften the line. Then, using a Morphe M169 brush, I carefully started working in the shade ‘Blackout‘ into the outer V, and blending it out with a tapered Morphe M330 brush. You can build on that black color as much or as little as you want – I didn’t want it too dark, but I didn’t want it too light, either. Once I had almost no product left on my brush, I started to very, very lightly drag it over the green in the crease, keeping it very low – #hoodedeyeproblems.

img_9421

Maybelline EyeStudio Gel Liner in Blackest Black

Taking a baby wipe (I ran out of makeup remover wipes), I removed any fallout from under my eyes (and fair warning, there’s gonna be A LOT!) and also sharpen up the edges of the shadow, and then apply some winged liner using my Maybelline EyeStudio Gel Liner in ‘Blackest Black’ (yes, I finally replaced it!) and a Morphe M160 1/8 brush. Click here for my winged liner tutorial!


 Next I applied my foundation. I mixed Revlon ColorStay Foundation for Oily/Combo skin in the shade ‘Nude’ with a pump of the L’Oreal Magic Lumi Light Infusing Primer on the back of  my hand, and applied it with a Sigma F80 brush spritzed with MUFE Mist & Fix.


 For concealer, I’ve been trying out a sample of the MAC Pro Longwear Concealer in NW15, which I applied with my ring finger in a V shape, and blended out with a damp Real Techniques Miracle Complexion Sponge. Then, using ‘Lyric’ from the Kat Von D Shade + Light Contour Palette, I set the concealer under my eyes, and in the center of my face (forehead, nose, chin, etc) with a Morphe M438 brush.


 Back to the eyes – taking a Morphe M432 flat definer brush, I picked up a little bit of ‘Blackout’ and worked that really tightly up against my bottom lashes, matching it up to my winged liner and stopping about halfway. Then, using that M169 pencil brush again, I smoked it out using ‘Mildew’, all along the lower lash line. Finally, I just applied some Rimmel Lash Accelerator Mascara in ‘Black’ to my top and bottom lashes, and popped on some Kiss Blooming Lashes in the style ‘Tulip’.

img_9564I filled in my brows using the NYX Micro Brow Pencil in ‘Ash Brown’, and set them in place with my Anastasia of Beverly Hills Clear Brow Gel.


 I used Physician’s Formula Argan Wear Bronzer and a Morphe M527 brush to warm up the skin, and then applied a light contour to my cheekbones, forehead, nose, and jawline using Makeup Geek Contour Powder in ‘Breakup’ and a NARS ITA brush. For blush, I wanted to keep it kind of low key, so as not to compete with the eyes and make myself look too overdone, so I chose Milani Baked Blush in ‘Luminoso’ on an angled blush brush (mine is from Walgreens) and used my Morphe M501 to apply BECCA Shimmering Skin Perfector in ‘Opal’ to my cheekbones, cupids bow, and the tip of my nose.


 Finally, for the lips, I chose Almay Smart Shade Butter Kiss Lipstick in ‘Nude Light/Medium’, and gave myself a bath in MUFE Mist & Fix. And voila! All done!


 And there you have it! My completed St. Patty’s Day parade look!
Sure, I could have just slapped on some green eyeshadow and walked out the door, but what kind of fun would that have been?! This look would be great if you’re headed out with your friends to a local pub (if you’re old enough!) or if you just feel like being a little extra festive that day!

Most importantly, have fun with it – make it your own! Makeup is supposed to be fun!! And if you recreate this look, tag me on Instagram (@dlynnesposito) so I can see it, too!

Come follow me around social media!
Twitter, Pinterest & Instagram : @dlynnesposito
Facebook : Affordable Gorgeous
Snapchat : dlynnesposito

And feel free to reblog this post and share my social media with your friends! Your support means so much!

LOTS OF LOVE!!
img_9363-3

DRUGSTORE MAKEUP KIT FOR BEGINNERS

 Hey guys! Every so often I go through my collection and sort of ‘declutter’. Basically I get rid of things that I’m not using or don’t like or what have you. If I find unused or just barely swatched items that are age-appropriate, I usually pass them on to my step-daughter, who at almost 14, is taking quite an interest in all things beauty.

And the same is true for many girls her age. However, thanks to YouTube, these 13 and 14 year old girls want the expensive stuff – MAC, Urban Decay, Marc Jacobs – and not only is that stuff not always in the budget, but for girls who are just learning, and will likely be wiping off too-heavy foundation or concealer while they perfect their technique, practicing with a $60 foundation or $30 concealer just isn’t, well…practical.

So if you want to see my recommendations for a beginner’s makeup kit, just keep reading!


BB CREAM & FOUNDATION 


 Nine times out of 10, if you’re a young girl, you have pretty great skin. Until you hit those pesky teenage years. Even then, you might be blessed enough to be the girl that has a flawless complexion (I was not). If so, then a BB cream will suit your needs just fine. One of my favorites is the Maybelline Dream Pure BB Cream ($9) (and I’m pushing 30!) which is oil free and contains Salicylic Acid to help treat and prevent breakouts. It offers decent coverage (think sheer but buildable to a light/medium) and is great for evening out your skin tone and covering a bit of redness.
However, if you’re someone who is more comfortable with a fuller coverage, I recommend the Revlon ColorStay Whipped Cream Makeup ($15), which is a medium coverage foundation, perfect for all skin types, and it covers imperfections very well, without ever feeling or looking heavy.

CONCEALER 


 Chances are you don’t have many dark circles to cover, but if you do, color correcting before concealing is super important. NYX Dark Circle Concealer ($6) is great for that, because it corrects and conceals all at once.
If you’re looking for a do-it-all concealer, especially for blemishes or acne scarring, Maybelline Fit Me Concealer ($7) and Maybelline FaceStudio Master Conceal ($9) are both fantastic options. Maybelline Fit Me has a very light, gel consistency, but offers a solid medium coverage, and the Maybelline FaceStudio Master Conceal is a creamier formula, which will make any blemish disappear. Be sure to set these with a powder though, as they can be prone to creasing.

POWDER


 Every girl needs a good translucent powder in her arsenal. It can set your foundation and concealer, make you look airbrushed, and help ease the blending process for any blush or bronzer you plan to use. One of my faves is the e.l.f. High Definition Translucent Loose Powder ($6). It’s inexpensive, and it’s been compared to super fancy, high end brands!

BLUSH & BRONZER


 Blush and bronzer are definitely very important. They bring warmth and dimension back to your face. I’m not talking contouring – that’s way too dramatic for school-aged girls. But a nice light wash of bronzer like Rimmel Natural Bronzer ($5) is great for bringing the life back your skin. It’s matte, waterproof, looks very natural, and it’s not too orangey or warm.
As for blush, one of my absolute favorites that works on nearly every skin tone is the Milani Baked Blush in ‘Luminoso’ ($8). It’s a universally flattering peachy-pink shade that contains a very subtle amount of super fine shimmer. It’s barely detectable, but it just leaves you looking glowy and healthy.

BROWS


 This is all based on personal preference. However for beginners, I would definitely steer clear of any pomades – they’ll look too harsh and overly sculpted, plus they can be tricky to use. I always like to recommend brow powders (or even eyeshadows!) for beginners, as they’re the easiest to work with and the most natural looking. I’ve recently gone back to filling mine in with powder again, using the Salon Perfect Brow Defining Kit ($9), which comes with three brow shades, a highlight shade, a dual ended brush/spoolie, and a waxy crayon to help keep everything in place.

EYE MAKEUP


 Makeup is all about experimentation – and what better way to express yourself than eyeshadow? The one brand I will recommend ten times over is Morphe. Their palettes contain 35 colors each, though there are a few smaller, 12 pan palettes, and they’re around $20! You won’t EVER find a deal like that at your local drugstore! They range from dark smokey colors to neutrals to vibrant hues! And they’re amazing quality – if you’ve been around here with me for awhile you know that I have a special place in my heart for all things Morphe.

Mascara, on the other hand, will be all about individual needs and desired effect. I will say though, that Covergirl’s Lash Blast line is incredible, and Maybelline has some great ones too – my fave from Maybelline is their Volum’ Express Pumped Up! Colossal Volume Mascara ($8), which gives lift, volume, length, and it doesn’t move, all day long. Plus it’s hot pink chubby tube will never, ever get lost in your makeup bag!

LIPS


 Ohhh this is a fun one for me. You know how much I love my lippies. I definitely advise against fully opaque, traditional lipsticks – let your natural beauty shine! I love, love the NYX Butter Gloss ($5) line, especially in the shade ‘Angel Food Cake’ which is flattering on everyone – and they smell like cupcakes!
If you prefer a lipstick, I highly recommend the Revlon Colorburst Lip Butters ($9), or the Almay Smart Shade Butter Kiss Lipstick ($7) (both made by the same company) which is kind enough to break it down by skin tone, helping you find your perfect shade. I’m partial to the shade ‘Nude Light/Medium’ myself – it’s the perfect MLBB (my lips but better) shade! They have nudes, pinks, berry shades, and reds for every skin tone!
If you’re a stain kinda girl (I love them, you don’t have to reapply them after lunch!) then I recommend the L’Oreal Colour Riche Caresse Wet Shine Stain ($8), which goes on like a gloss, and fades to a pretty stain – I believe they might be being discontinued though, so look on Amazon or eBay, or keep an eye out in your local discount/dollar store!


 Ok, so I know it’s a long list – and by no means do I want you to feel like you have to purchase every single product listed – this is merely a guide to get you started! Feel free to tailor it to your needs, wants, and budget!
Have you guys tried any of these products? What are some of your favorite beginner items? Leave me a comment and let me know!

Come follow me around on social media!
Twitter & Instagram : @dlynnesposito
Facebook : Affordable Gorgeous
Snapchat : dlynnesposito

And feel free to reblog this post and share my social media with your friends! Your support means so much!

LOTS OF LOVE!!
img_9363-3

SOFT & SULTRY VALENTINE’S DAY MAKEUP

 Valentine’s Day is coming, peeps. Some look forward to it, some dread it. But it’s coming.

So I thought today, that I would sit down and create a Valentine’s Day inspired makeup look that you can wear whether you’re going to dinner with your honey, staying home on the couch, or heading out with the girls!
Me? I’ll probably be home on the couch with my husband and my son. Which quite honestly, sounds pretty perfect to me.

If you want to see how I created this look, keep reading!


You can start with either the eyes or the skin, the choice is yours; today I started with my skin. After cleansing and moisturizing, I applied my Revlon PhotoReady Perfecting Primer ($11), and then went in with Maybelline Fit Me Foundation ($8) in the shade 110, on a Morphe M439 ($14) brush. Then I concealed the under eye area and a few small blemishes with the Maybelline Fit Me Concealer ($5) in the shade Fair, blending that out with a Morphe M173 ($5) brush.

Next I set the under eye area using the ‘Banana’ shade from the Anastasia Beverly Hills Contour Kit in Light/Medium ($40), and a Morphe M438 ($10) brush. I then set the rest of my face with Rimmel Stay Matte ($4) powder in Translucent, and a Real Techniques Powder Brush ($10).

 Next I moved on to the eyes; starting with some ‘Nectar’ from the LORAC Pro 2 Palette ($44) and a Morphe M433 ($6) blending brush, I buffed that lightly into the crease, focusing most of the color on the outer corner first, then blending it all the way through to the inner corner. Then using the same brush, I picked up a mix of ‘Mauve’ and ‘Taupe’ from the LORAC Pro Palette ($44) (the first one) and buffed that into the crease as well, keeping it very, very low. Next, I applied the same combination of shadows to the lower lash line using a Morphe M169 (out of stock) brush, and just smoked it out. Finally, going back to the LORAC Pro 2 Palette ($44), I picked up a mix of ‘Rose’ and ‘Beige’, both gorgeous shimmery shadows, and packed them onto the lid using a Morphe M224 (out of stock), and then blending with the M433 using no additional product – this step was simply to blend the harsh line of where the shimmer met the matte shadow.


 For contour, I used ‘Sombre’ from the Kat Von D Shade+Light ($46) Contour palette, on a Real Techniques Contour Brush ($18 /Core Collection) for a very soft appearance. For blush, I chose the far right shade of the middle row from my Morphe 9B ($20) blush palette, and to highlight, I used Becca Shimmering Skin Perfector Pressed in Moonstone ($38).


 Finally, for the lips; first I applied a NARS Satin Lip Pencil ($26) in the shade Rikugien, which I got as a deluxe sample from a recent Sephora order, and it’s an absolutely gorgeous natural pink shade. I wish the formula was more long wearing, because I would totally buy this as a full size – it’s my ideal MLBB! On top of that, I added some Almay Butter Kiss Lipstick in Pink Light ($8), and finally sealed it all in with a generous coat of Urban Decay Chill Makeup Setting Spray ($30). And we’re done!


Ok, so I realized after I was about halfway through this, that I didn’t do my brows. I was rushing. I think we can let it slide this one time, no? Just fill in your brows as you normally would.
But aside from that, I hope you enjoyed this Valentine’s Day makeup look! Let me know your plans for Valentine’s Day, leave me a comment below!!

Come follow me around on social media!
Twitter & Instagram : @dlynnesposito
Facebook : Affordable Gorgeous
Snapchat : dlynnesposito

And feel free to reblog this post and share my social media with your friends!

HAPPY VALENTINE’S DAY!!
img_9363-2


JANUARY 2016 FAVORITES

Is it me, or does it seem like this month went by way too fast?!

In any event, it’s time for my January Favorites! Below, I’ve compiled a list of the things I’ve been loving this month (like every month) and I want to share them with you! Who knows, maybe you’ll discover some new faves of your own!

Let’s get started!


MORPHE M173 MINI BUFFER ($4.99)

img_9627
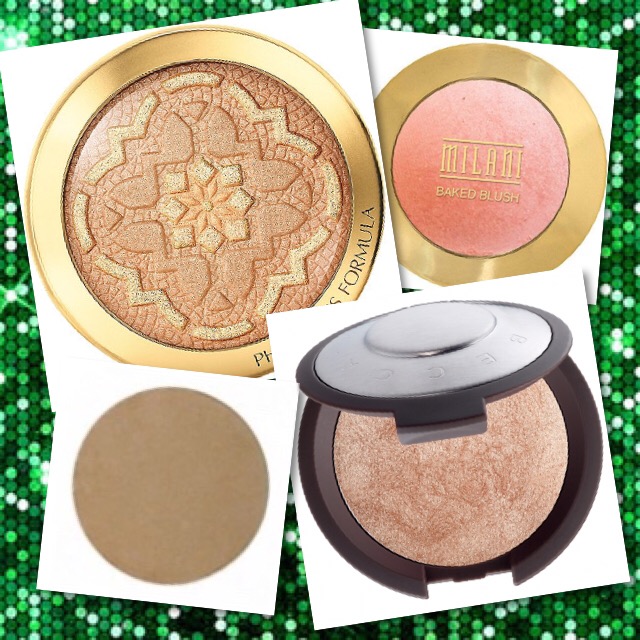
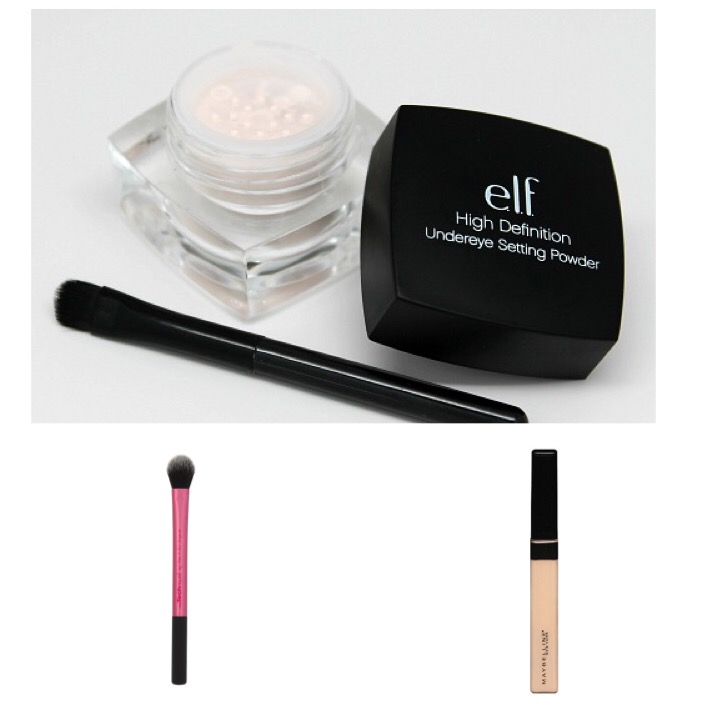
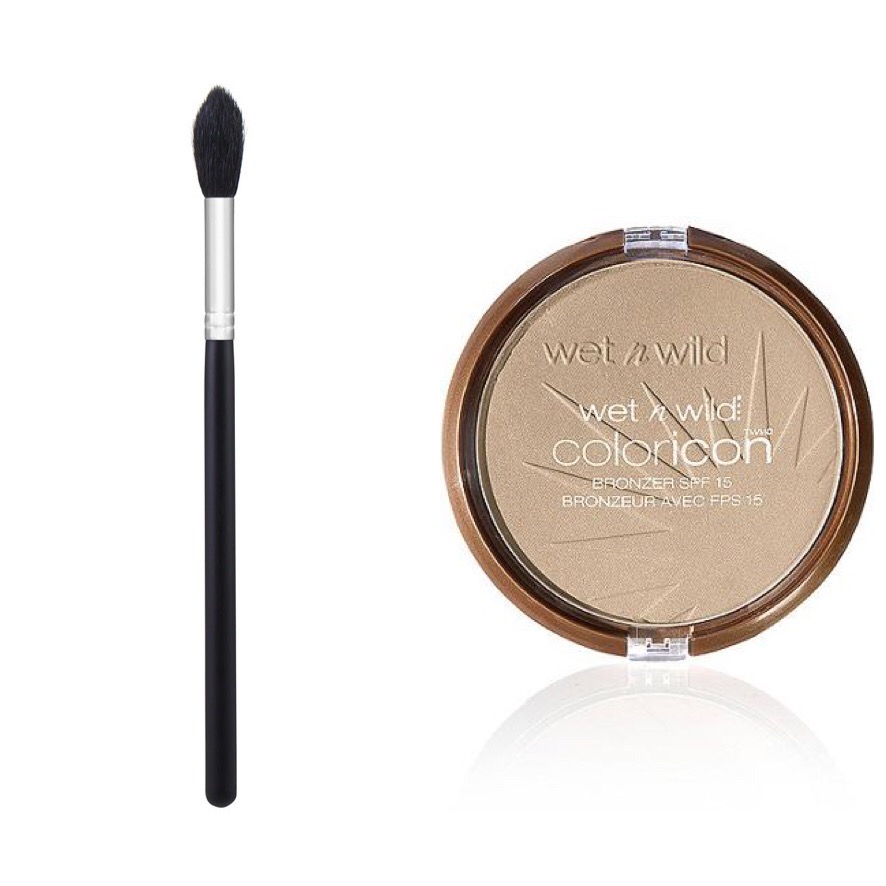
I received this brush in my January Morphe Monthly Brush Club package, and I haven’t been able to stop using it! It’s intended to be an eyeshadow brush, but you guys….it is the most unbelievably flawless concealer brush!! It’s like a baby M439!! All of your imperfections blend away like magic with this brush! I’ll be ordering a few more to have as backup. Like, right now…hold on…..ok, all set!

L’OREAL COLOUR CARESSE WET SHINE STAIN ($9.79)

img_9862
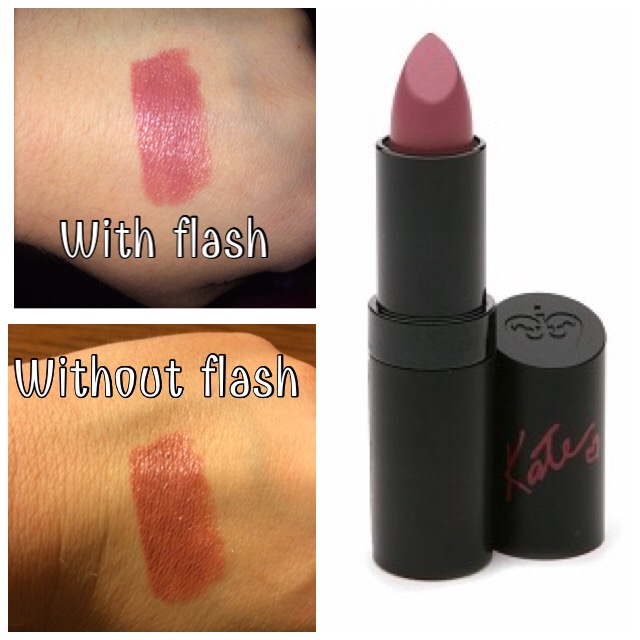
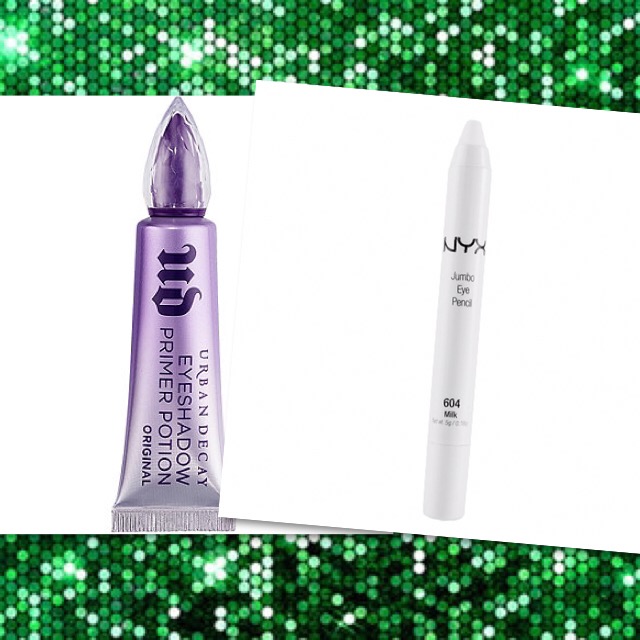
These are hardly new. But if you’d like to read the review on them, click here. I used them religiously when I first bought them, but eventually they disappeared somewhere in the land-of-the-lost-lippes. I managed to rescue them right around the first week of the month though, and since then I have been wearing the shade ‘Lilac Ever After’ on an almost daily basis! It’s the most beautiful mauvey, every day shade, and it stays put! And recently they were marked down 50% in my local CVS, so check yours if you wanna try them – at that discount, they’re less than $5!
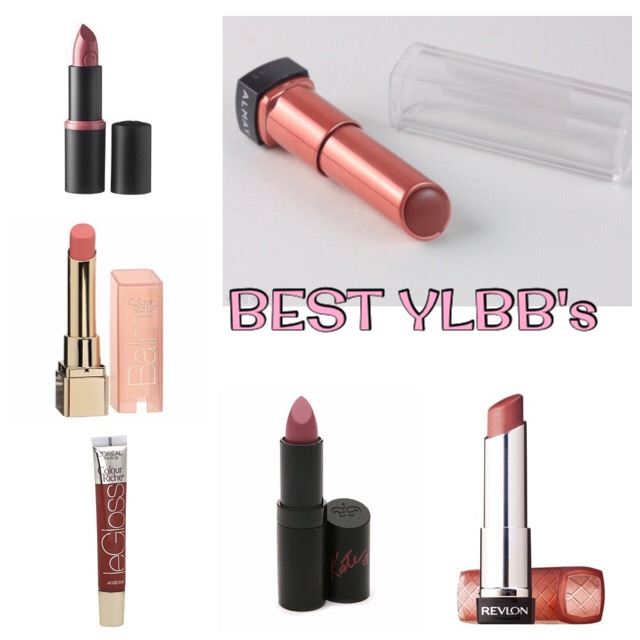
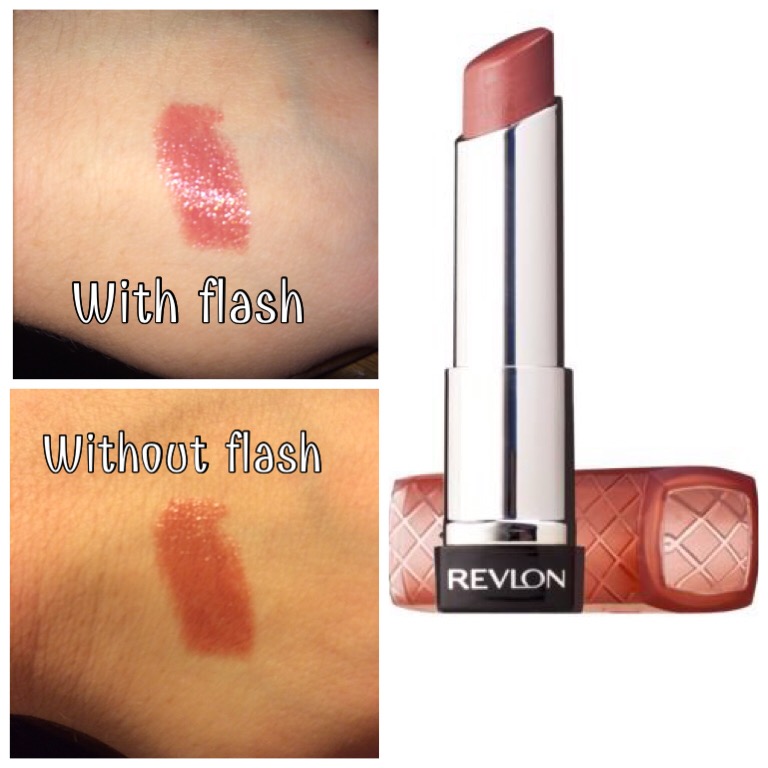
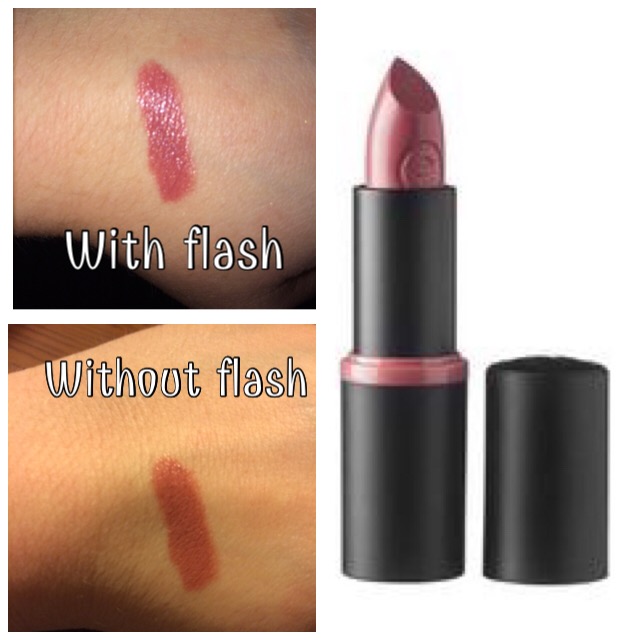
ALMAY CLEAR COMPLEXION OIL FREE CONCEALER ($8.49)


 You guys know my love of concealer. This one treats breakouts (it contains Salicylic Acid), has coverage that rivals my holy grail, high end concealer (dupe post coming? maybe!) and doesn’t accentuate my dry patches! The only downside is that it only comes in three shades; light, light medium, and medium. Light works perfectly for my fair skin tone, however this probably isn’t the product for someone with deep skin. I’m sorry!!

LORAC PRO CONTOUR PALETTE ($45)


 I know, it’s not the most affordable thing in the world. I don’t necessarily love this for the contour shades (they’re a little warm for my fair skin) as much as I do for the highlight shades. The beige and banana powders are great for the under eye area, and the shimmer highlight in the palette is the most natural looking, glowy, dewy finish I’ve ever seen. The palette itself has a variety of tones which I can use when freelancing, and as a bonus it came with a brush, which is a little too dense to use with such a pigmented palette, but I love it with other contour products I have!

L’OREAL VISIBLE LIFT BLUR BLUSH ($12.99)


 Since winter is in full swing here in New England, I’ve been trying to scale back on the powder products for the sake of my lizard-like dry skin. This somehow got lost in my collection, so when I found it, it was like using it for the first time all over again! It’s a super natural looking peachy pink cream blush (I have it in the shade Soft Peach) that comes in a nice, sanitary squeeze tube, and the formula contains ‘Blur Technology’ to help you look young and fresh! For the most natural look, try applying your cream blush BEFORE your foundation – a neat little trick I picked up awhile back!

MARY KAY TRANSLUCENT LOOSE POWDER ($16)


 I’ve been using this lately to set my makeup, and even to bake with. And I can’t stop! This powder….is probably the only powder that doesn’t accentuate my flaky, dry skin. And it contains the itty-bittiest light reflecting particles that make you look like you’re walking around with photo-shopped skin all day long! It blurs aways imperfections and fine lines, it keeps my concealer from creasing, it’s brightening – it’s absolutely amazing!


What are some of your favorites from this past month, or in general? Have you tried any of these products?? Leave me a comment and let me know!

And please take a moment to go follow me on Twitter and Instagram @dlynnesposito, and give a like to the Affordable Gorgeous page on Facebook – your support means so much to me!

LOTS OF LOVE!
img_9363-3

EVERYDAY ‘MOM’ MAKEUP ROUTINE

Since I’m a SAHM (stay-at-home-mom) my beauty routine is pretty minimal – most days I focus on my regular skin care and not much else. My son could care less what I look like, and my husband is the “you’re beautiful without makeup” guy – bless his heart, he’s a keeper!

But let’s face it, there’s something about putting on makeup that just makes you feel good. For me, it’s about that little bit of “me time” where I get to play around with color combos and finishes and textures and create new looks, which in turn, I get to share with you guys!

When I find that I just need that little pick-me-up, or I have to run out for some errands and I know I’ll be gone for awhile or may run into people I know, it makes me feel good to know that I’ve put that little extra effort in. And that’s what this look is about. It’s very minimal, just a few products, but it really does make all the difference!

So let’s get started!


 So like I said, I always make sure my skin is in prime condition before letting a drop of makeup touch my face! I always cleanse, tone, and moisturize, and then apply a primer. For days where I’m doing absolute minimal makeup, I tend to reach for the L’Oreal Magic Lumi Light Infusing Primer ($13). “But wait, aren’t you oily?” Well, yeah, but hold that thought!


 Recently I’ve been reaching for my Maybelline Dream Pure BB Cream ($6.29), which is oil-free (hence the illuminating primer) and contains salicylic acid, which is great for treating any existing breakouts, as well as preventing future ones. I find that I get a solid light to medium coverage with this, and most days I’m perfectly comfortable just wearing this. But…..


 Since I’m not going for a flawless face (it’s mostly to conceal minor redness) I’m not going to ‘power-conceal’ like I might if I were headed somewhere like out to dinner or a family gathering – I’ll spot conceal where I absolutely need it with my Maybelline Fit Me Concealer ($6.49) in the shade Fair, and touch a little into the inner corner of my eyes to conceal some darkness and brighten up that area. Then I always set the under eye area because I will crease, it’s almost guaranteed. I like the e.l.f. High Definition Under Eye Setting Powder ($3) for this, and just a Real Techniques Setting Brush ($8).


 I’m someone that always, always has to fill in my brows – one is thicker than the other, one is shorter than the other, they’re a hot mess. You can check out my brow routine here. If I don’t have time for a full brow routine, I’ve been reaching for my ULTA Brow Tint ($10) in the shade Light, which makes them look fuller and keeps them under control.


 I don’t go all shadow crazy on days like this, but I will throw on some mascara – I really like the Maybelline Pumped Up! Colossal Volume Mascara ($4.20) lately – and mines almost out so I’m trying to get every last drop out of the tube before I go buy a new one – I don’t know why, it’s so inexpensive I really should just toss it and keep it movin’!


 Since the BB cream isn’t heavy coverage like most foundations, and I’m still able to see my skin through it (freckles and all) I see no pressing need for bronzer and blush and all of that. But I absolutely have to contour my nose (it’s just personal preference and takes me all of a minute) so I use some NYX HD Blush in Taupe ($7) and take it on a super fluffy eyeshadow blending brush like the SOHO Pro Crease Blending Brush ($10.50), and just run it down either side of my nose, across the tip, and blend it up into the inner part of my brows. I also like to blend a little bit lightly into the crease of my eye to contour that too, for a natural look. When you’ve got concealer or foundation or anything on your lids it can make them look too flat and make your eyes look smaller. This techniques just adds a touch of definition.


 Now to get my glow on! Using my Morphe M501 ($8) brush, I pick up a little Wet N Wild Color Icon Bronzer in Reserve Your Cabana ($4) and dust that along the tops of my cheek bones, the side of my eyes, and down the center of my nose. This just makes you look nice and healthy, not overly highlighted.


Photo Credit : Writing Whimsy

 And finally, any neutral color lip gloss, lipstick, anything will do here. I always have the Almay Smart Shade Butter Kiss Lipstick in Nude Light/Medium ($8.01) in my bag – it’s a great ‘my lips but better’ shade and I can literally apply it without a mirror, it’s that easy to use!


That’s it! This is a perfect look for running errands, taking the littles to a play date, even going to lunch with some friends! Or if you’ve got chores to do around the house but you’re feeling a little sassy, this is totally appropriate for that too!

I hope you guys enjoyed this post! Let me know some of your favorite products for busy/minimal makeup days! Leave me comments below!

And please go follow me on Twitter and Instagram @dlynnesposito, and go like the Affordable Gorgeous page on Facebook!

LOTS OF LOVE!

img_9363-3

BEST ‘YOUR LIPS BUT BETTER’ PRODUCTS

  With the never-ending choices of lip colors on the market, from nudes to reds, pinks to plums and so on, it can seem like such a daunting task to just find that perfect shade. You know the one I’m talking about – the one that makes people think “what is that lip color she’s wearing? IS she wearing a lip color? I WANT LIPS LIKE HERS!”. THAT, my dears, is known as the YLBB or MLBB (your lips but better or my lips but better) and it seems like it’s almost impossible to find. So I’ve compiled a list of shades from across the board that work on practically ANYONE, from the fairest of the fair, to the deepest, richest skin tones! Let’s get started!


REVLON COLORBURST LIP BUTTER in PINK TRUFFLE ($6/WalMart)

  If I were to go in order of favorites, this would totally be my top pick. I have backups upon backups of this shade, for fear that they’ll discontinue it like one of my other faves, Macaroon, and it LOOKS like Fig Jam may be on it’s way out too! *sad face* But this is the perfect rosey-nude that just makes you look like you have gorgeous, perfectly pink, super hydrated and healthy lips. It’s always with me, and it’s one that I don’t even need a mirror to apply or touch up. It’s my ride or die.

ESSENCE LONGLASTING LIPSTICK in BARELY THERE ($3/ULTA)

  I don’t know that I believe the ‘long-lasting’ claim for this PARTICULAR shade, but maybe I just can’t tell because it almost perfectly matches my natural lip color. I DO have other shades, like ‘I Am Yours’ and ‘Natural Beauty‘ that do seem to last quite some time, so I’ll give it the benefit of the doubt. However for being a long wearing lipstick, I have to say that it’s VERY comfortable on the lips. You know how some can make your lips feel tight and dry? Yeah, not these. I wouldn’t go as far as to call them MOISTURIZING, but they definitely feel very nice.

RIMMEL LASTING FINISH by KATE MOSS LIPSTICK 08 ($4/drugstore.com)

  This is a beautiful dusty rose shade, that’s slightly lighter than my natural lip color, but still a great every day hue. I, personally, haven’t found these to be terribly long lasting, and I would highly recommend prepping your lips by exfoliating and maybe using a light balm underneath, especially if you’re dry because it can apply a little on the clingy side, but I still find this to be one I reach for quite often.

L’OREAL PARIS COLOR RICHE LIP BALM in NOURISHING NUDE ($6/WalMart)

  Yet another shade that I have multiple of – this and Tender Mauve – because they’re just THAT amazing. This definitely leans more to the sheer side, because it is, after all, a tinted lip balm. But my oh my is it beautiful. One thing I don’t really love is that the cap seems to be a little on the flimsy side for my liking, and I’ve cracked a few of them along the way. But when I’m having a no makeup day and just need a little hint of tint, these are ALWAYS nearby.

L’OREAL PARIS COLOR RICHE LE GLOSS in REALLY ROSE ($6/WalMart)

  I’m gonna call a dupe alert on this one! While I haven’t tried it myself yet, I’ve seen on Pinterest that this shade is a dupe for NARS Dolce Vita lip gloss. And if I can find a good drugstore dupe, you KNOW I’m all over that! If I had a real gripe about these glosses, it’s that they really have very little staying power. But the shade is just gorgeous, like you bit your lips and put a little gloss on (ya know, the old school way). GAWGEOUS!

ALMAY SMART SHADE BUTTER KISS LIPSTICK in NUDE LIGHT/MEDIUM ($6/Target)

  These are incredibly similar to the Revlon Colorburst Lip Butters, probably because they’re made by the same company! Right down to the packaging, they’re nearly identical. BUT because Almay took pity on those of us who stand staring at a lipstick display like a deer in headlights, they broke it down to pinks, nudes, berries, and reds according to your skin tone. So light, light medium, and dark all have their own shades of the aforementioned colors. This doesn’t mean you have to stay within those guidelines of course! I fall into the light category, but prefer the shades in the light/medium. They allow your natural lip color to shine through, as they’re a bit more sheer than their Revlon cousins, and more like a balm than a lipstick. But nonetheless, there’s always this shade in my bag!


I really hope this helps you guys! I know for the longest time I was clueless as to how to find that perfect shade, and then I discovered the term ‘YLBB‘ and took to none other than Pinterest! Do YOU have a favorite YLBB? Leave me a comment below!

And don’t forget to follow me on Twitter and Instagram @dlynnesposito.

LOTS OF LOVE AND LIPPIES!

XOXO – Donna