THE BEST TINTED LIP BALMS

So, after our ‘balmy’ fall and winter (Christmas Day was about 65 – 70 degrees here in Connecticut) it seems winter has arrived. With a vengeance.

With the cold, dry air, along comes dry, chapped, and flaky lips! But I have pretty pale lips by nature, and when they’re super dry, they look even paler (like, I look sick).

So the solution to that, of course, is a tinted lip balm! Something that gives great hydration and a wash of color to make you look and feel your best! I’ve rounded up some of my faves to share with you guys!

Let’s get started!


NIVEA KISS OF CARE & COLOR 

  These tinted lip balms are probably some of my favorites – like of all time! They come in 4 sheer shades (Sheer Crimson, Sheer Berry, Sheer Coral, and Sheer Pink) and they have a moisture rich core wrapped in beautifully flattering color. Every color works on every skin tone. I love the Sheer Crimson, Sheer Coral, and Sheer Berry (I haven’t been able to find the pink so plenty of others must love it too!) and every single shade looks good! I’ve bought multiples of each so they’re always nearby, and they often go on sale at CVS and Walgreens, so you can find them ‘Buy One Get One 50% Off’!!

BURT’S BEES TINTED LIP BALM


Photo Credit : Musings of a Muse

I’ve always had a love affair with Burt’s Bees products – I love that they’re mostly natural, and I love their efforts in sustainability and being ‘green’ overall. They have a huge range of products from skin care to baby care that really live up to their claims, and these lip balms are no different – they come in 8 sheer shades, and are made with botanical waxes and shea butter. I have three of the eight shades, Hibiscus, Rose, and Red Dahlia, and they’re absolutely beautiful. Hibiscus is by far the most pigmented of the three that I own, but they all look natural on the lips, but more importantly they FEEL amazing! Even after they’ve worn off, my lips feel just as moisturized as when I first applied them!

CHAP-ICE ROSE TINTED LIP BALM

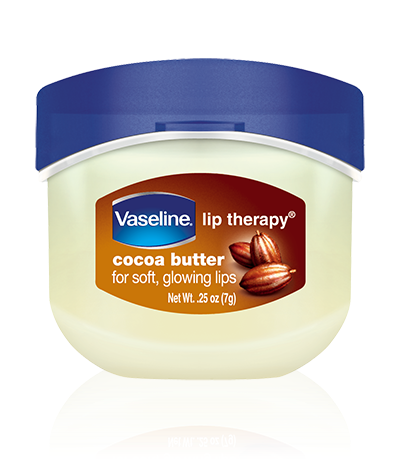
  This is basically the knock-off to the Vaseline Lip Therapy in Rosy Lips, which is a rose tinted petroleum jelly lip balm. And it’s fine. It works nicely. But I find the Chap-Ice one to be slightly more pigmented, so I actually notice a difference in color on my lips when I apply it – and I find it to be a little thicker, therefore lasting longer. I actually found this product in Dollar Tree, and went back and bought like 10 more in case they ever stopped carrying it! They’re only $1! Which I believe makes them roughly $2-3 cheaper than the Vaseline one! (I’m sorry, I couldn’t find a link, but most Dollar Tree stores carry them!!)


I have a pretty extensive lip balm collection – from almost every Maybelline Baby Lips ever produced, to all of the EOS spheres, to the Pixi ones – the list could go on forever. For awhile I was even collecting the seasonal, limited edition ChapStick flavors. But as far as hydration and tint go, these ones are my absolute faves!

Have you guys tried any of these? What are some of your favorites? Leave me a comment and let me know!

And please take a moment to go follow me on Twitter and Instagram @dlynnesposito, and go like the Affordable Gorgeous page on Facebook. Your support means so much to me!

LOTS OF LOVE!

img_9363-3

HOW TO GET GREAT LASHES!

 I used to have gorgeous lashes. Like ‘what mascara are you wearing?’ NONE” lashes. But then something happened.

My son was born in September of 2014, and shortly thereafter, I noticed the normal ‘shedding of the hair’ that everyone experiences. I was prepared for it, but I already had pretty thick hair so it wasn’t THAT bad.

Well what I WAS NOT prepared for, was the shedding and breakage I was experiencing with my EYELASHES!! They were stubby, sparse, snapping off and falling out from curling my lashes or removing my mascara. And it was driving me CRAZY!

*Right about here is where I wish I had a ‘BEFORE’ picture for you guys*

The long and short of it (ha ha ha, get it?) is that there are so many products on the market geared toward making your lashes and brows grow more long and lush. And while they do range in price from drugstore to high end to empty-your-pockets prescription grade, who wants to waste hundreds of dollars or more on something that may or may not work, may irritate your eyes, may change your eye color, etc.

Prescription Latisse $160 / 2 month supply

The way most lash serums work is they contain peptides or exotic plant extracts that realistically do no more than moisturize lashes. The only PROVEN ingredient that causes actual growth is bimatoprost (read more about it here), which was originally used to treat and manage the progression of glaucoma, but is also the active ingredient in Latisse, a prescription lash enhancing serum that breaks the bank at around $160 for a two month supply – WAAAY too rich for MY blood! Along with a host of other risks and side effects, which don’t really seem to outweigh the benefits, I think I’ll pass.

 I’ll admit I have a few of the drugstore ones. More specifically the Rimmel Lash Accelerator Serum ($8), The L’Oreal Lash Boosting Serum ($9), and a Wet n Wild Mega Lash Clinical Serum ($10) that came in a kit with a growth enhancing mascara. The problem is, I cycled through them so frequently that I couldn’t really tell what was working and what wasn’t. Maybe because I have no patience and moved on to the next one. But I can tell you one thing for DAMN sure, they all irritated my eyes. And I have REALLY sensitive eyes. I can’t line my waterline. I can’t use powdery shadows. Crappy, dry, flaky mascara? Fuggetaboutit! (Uh huh)

Vaseline Lip Therapy Cocoa Butter Lip Balm $2

So I’m on Pinterest one night (I know, I know – save your judgement) and saw something like 50 Uses for Vaseline or whatever. One was on your lashes. ‘Well I’m game!’ I thought. So I had a Vaseline Lip Therapy Lip Balm in Cocoa Butter ($2) kicking around, and thought since the principal purpose of THIS ‘treatment’ is to moisturize and protect the lashes, helping to prevent breakage and therefore allowing them to reach full potential, the Cocoa Butter would be an added benefit. I feel like I’ve been testing this out long enough to tell you guys that this routine seems to be working! So below, I’ll go into more detail on exactly what I do:


 NIGHTTIME ROUTINE

  • Instead of using a traditional makeup remover to take off my mascara, I’ve been using coconut oil. Any will do, as long as it’s the extra virgin cold pressed organic stuff. Because the eye area is so delicate it’s SUPER important to be especially cautious of what you’re putting there. Get a small amount, warm in your palm, and rub gently over the eye area until all mascara and liner has broken down, and gently wipe it away.
  • THIS IS OPTIONAL – if you prefer, you CAN use a lash serum along the upper lash line, just take care not to get it IN your eye (they can be runny so it happens, and it will burn!) and allow it a few minutes to dry.
  • Take a small amount of Vaseline (like the amount you would apply to your lips) and warm it up on the back of your hand. Then gently apply to your lashes in a downward motion first, then if you’d like, you can carefully apply to the underside of your lashes.

MORNING ROUTINE

  • When cleansing your skin in the morning, make sure all of the vaseline is gone from the previous night. You don’t have to scrub, just go over once or twice with a gentle cleanser to remove any leftover residue.
  • On no makeup days, I’ll apply more Vaseline for daytime, but on days that require me to pull myself together, I’ve been using the Rimmel Lash Accelerator Mascara ($10) which gives me a nice natural look, or for something a little more dramatic, can be built up nicely with a few good coats.

My lashes after 3-4 weeks with 2 coats of the Rimmel Lash Accelerator Mascara

I’m pretty confident in this routine, and I figure if it works for me, it will work for you guys! My lashes haven’t been this long in quite some time. I want to be clear that this will not likely give you like, the look of falsies, but it will keep your lashes healthy and moisturized, which will help them reach their full growth potential. I would say to give it about 3-4 weeks before you start seeing real results, and it can be frustrating, especially if you’re like me and live for instant gratification! But I promise you, if you stick to it, you’ll be SO glad you did!

Have you guys tried a routine like this? What are some of your favorite lash growth products? Leave me a comment!

And as always, go follow me on Twitter and Instagram @dlynnesposito

LOTS OF LOVE AND LUSH LASHES!

XOXO – DONNA

TOP 5 UNDER-RATED BEAUTY PRODUCTS

 There are a lot of beauty products out there on the market. I mean A LOT. And when you’re standing in front of a seemingly endless array of them in your local drugstore or Walmart or Target or ULTA or Sephora, it can be insanely overwhelming.

My personal little trick is to make a list of what I’m looking for ahead of time, otherwise I’ll either leave with NOTHING but anxiety, or a whole mess of stuff I probably didn’t want or need in the first place.

But there are some products that tend to be overlooked, or highly under-rated. So I’m here today to bring you some of MY favorite under-rated beauty products!  Let’s go!


GARNIER NUTRITIONISTE SKIN RENEW ANTI-DARK CIRCLE EYE ROLLER ($13)

 For my 27th birthday my sister made me a bag of anti-aging products (wise ass). This product was in there, and at first glance I was like ‘I’m only 27, I don’t need this stuff!‘. Well hold on a minute. This isn’t your typically eye roller. It’s tinted, so if you fall into the fair to light category, it’s basically a really nice, sheer concealer that can not only be used on the under eye area, but for that hormonal redness on either side of your nose, or to tone down a blemish that reared its ugly head in the overnight hours. If you’re more light to medium, it’s a great, subtle, every day under eye highlight, because it’s just enough to brighten that area without being all WHOA! It contains lemon essence, caffeine, and mineral pigments, which help to depuff and brighten the under eye area while nicely concealing any darkness.

VASELINE COCOA BUTTER LIP THERAPY ($4)

 You might be thinking ‘this is under-rated? I’ve been using this forever!’, but hear me out. I have a bunch of these – when I saw they were making little ones, I ran out and bought one of each – the original, the cocoa butter, the creme brûlée, and the rose tint one. But lately I’ve been using the cocoa butter one at night ON MY LASHES! Now I’m still testing this one out, but it’s been about 2 and a half weeks, maybe 3 weeks now, and I’ve noticed my lashes are growing longer and thicker, and I’ve had no more lash breakage and shedding like I had been seeing for quite some time. I’ve also been removing my mascara with coconut oil, so I’m sure that helps too. I’m going to give it another couple of weeks and then I will most certainly be updating you on whether or not it’s working for sure! I just take a very small amount (like what you apply to your lips) and warm it up on the back of my hand, and work it into my lashes right before bed. So far, so good!

WET N WILD ICON COLLECTION BRONZER in RESERVE YOUR CABANA ($3)

This is actually NOT a bronzer. It has no bronze pigment whatsoever. But it IS an absolutely beautiful HIGHLIGHTER. I’ve seen it swatched next to theBalm Mary-Lou Manizer Highlighting Powder and to be quite honest I can’t tell the difference. For $3 you get a GENEROUS amount of product. For how little you really need to use, it will take you a very long time to hit pan. I’m a die hard fan of Hard Candy So Baked Bronzer in Tiki ($9) for highlighting, but lately I’ve been reaching for the Wet n Wild more. It’s not too white, not too gold, it’s somewhere in between, and it’s great for every day use.

NYC SMOOTH SKIN LOOSE FACE POWDER in TRANSLUCENT ($3)

 This is for sure used for more than just setting your makeup or keeping shine at bay. By now I’m sure we’ve all heard of the terms ‘baking‘ and ‘cooking‘ when it comes to our makeup. It’s far from a new thing – it’s been around for years in the drag community. But if you’re familiar with highlighting and contouring at all, then let’s just refer to it as highlighting on steroids. Basically what you do is take a translucent loose powder like the NYC brand (you DO NOT need anything super expensive for this) and a damp makeup sponge like the Real Techniques Miracle Complexion Sponge ($6), and apply a thick layer under the eyes, down the center of your nose, or under your contour (along the top of your jawbone), to set, highlight, sharpen, and seriously define those areas to make them POP! Just let it sit for about 5 minutes, and sweep it away carefully with a fluffy brush. Done!

L’OREAL PARIS INFALLIBLE THE SUPER SLIM LIQUID EYELINER ($9)

 I’m not generally one for eyeliner. I may whip it out for special occasions, but that’s pretty much it. Maybe it’s because I’ve always struggled with applying it so I didn’t look ridiculous. And I’ve tried them all – pencil, kohl, liquid, gel, everything. This is pretty much the only one, out of the 40 some odd eyeliners I own that I actually enjoy using. And I NEVER see or hear it talked about on Pinterest, YouTube, other blogs, anywhere. It’s a liquid liner in pen form, with a super slim (duh) fine point applicator. It’s blacker than black, dries matte, stays put, and SOOOO easy to use! Thick lines, thin lines, barely there wing, full blown cat eye, this little liner has you covered! If I can do it, ANYONE can do it!


Have you guys tried any of these? Or do you have some under-rated favorites of your own that you could recommend? Leave me a comment below!

And as always, go follow me on Twitter and Instagram @dlynnesposito. There’s some exciting stuff coming that you won’t want to miss out on!

LOTS OF LOVE!!

XOXO – DONNA